
The rainbow swirl pattern was inspired by these gorgeous cookies.
I love the texture from the little dots.
Enjoy!

The rainbow swirl pattern was inspired by these gorgeous cookies.
I love the texture from the little dots.
Enjoy!
Okay. Maybe I went just a little overboard with this one. But I had to practice my lemon meringue tarts and as long as I was doing one little pie I might as well do two and just add cocoa to half the dough. And the ice cream was made ahead of time, then I just had to try out my new digital thermometer for tempering the chocolate. And don’t they all look so cute on the plate?
I made a little lemon meringue pie. I used my favorite pie crust recipe and replaced some flour with almond meal and ground pecans. I rolled out the crust, cut 3 inch circles, and bakes them in a mini cupcake pan. They were the perfect size.
I made the other little tart using the same pie crust recipe, but this time I replaced some flour with cocoa powder. The filling was a sweet pastry cream with melted chocolate. I covered the filling with a layer of chocolate ganache, then topped the whole thing with some intensely raspberry whipped cream.
One teensy problem: I took these pictures during the afternoon right before the guests arrived and I thought the plate looked quite nice. When it came time to prepare each plate after dinner, however, I had a plating epiphany and started squirting chocolate all over the plate and marbling it fancily. Ergo, these pictures were taken indoors as I was rushing to prevent the ice cream from melting. Although I edited the pictures later to try to adjust the colors, I hope you’ll excuse the photos and enjoy the technique.
And no, I’m not ashamed to say despite a day of sampling in the kitchen, my dessert plate was also completely clean.
The Ark of the Covenant cake! With red velvet insides and creamy vanilla frosting, this cake was very, very rich. I decorated it with chocolate jewels covered in luster dust and edible glitter.
The panels on the side are hand piped and made of white chocolate covered in luster dust. The little pears are edible white sugar pearls that I rolled in gold luster dust. While finishing this cake while I was sick at 1 am, I dropped the entire 8 ounce bottle of pearls on the floor. A month later, I’m still finding them EVERYWHERE!
My frind made the beautiful topper using foam board, spray paint, and a sharpie.
Ohh, shiny…
Cutting the cake.

I love how these cookies worked so well together as a set. Seeing them all together on the plate just made me so happy!
How could I resist making goofy faces on all the jack-o-lanterns?
Boo!
The spiderwebs were made by piping the spider blobs on top of (mostly) dry marbled royal icing.
I had so much fun with the evil bat faces.
I never thought a spider would look so cute!
Why not have both?
I had so much fun making these cupcakes! I made a batch for a family even and then I made some more for a wedding shower the following weekend. Plus, I took [most of] these pictures all by myself. Want to see how they were made?
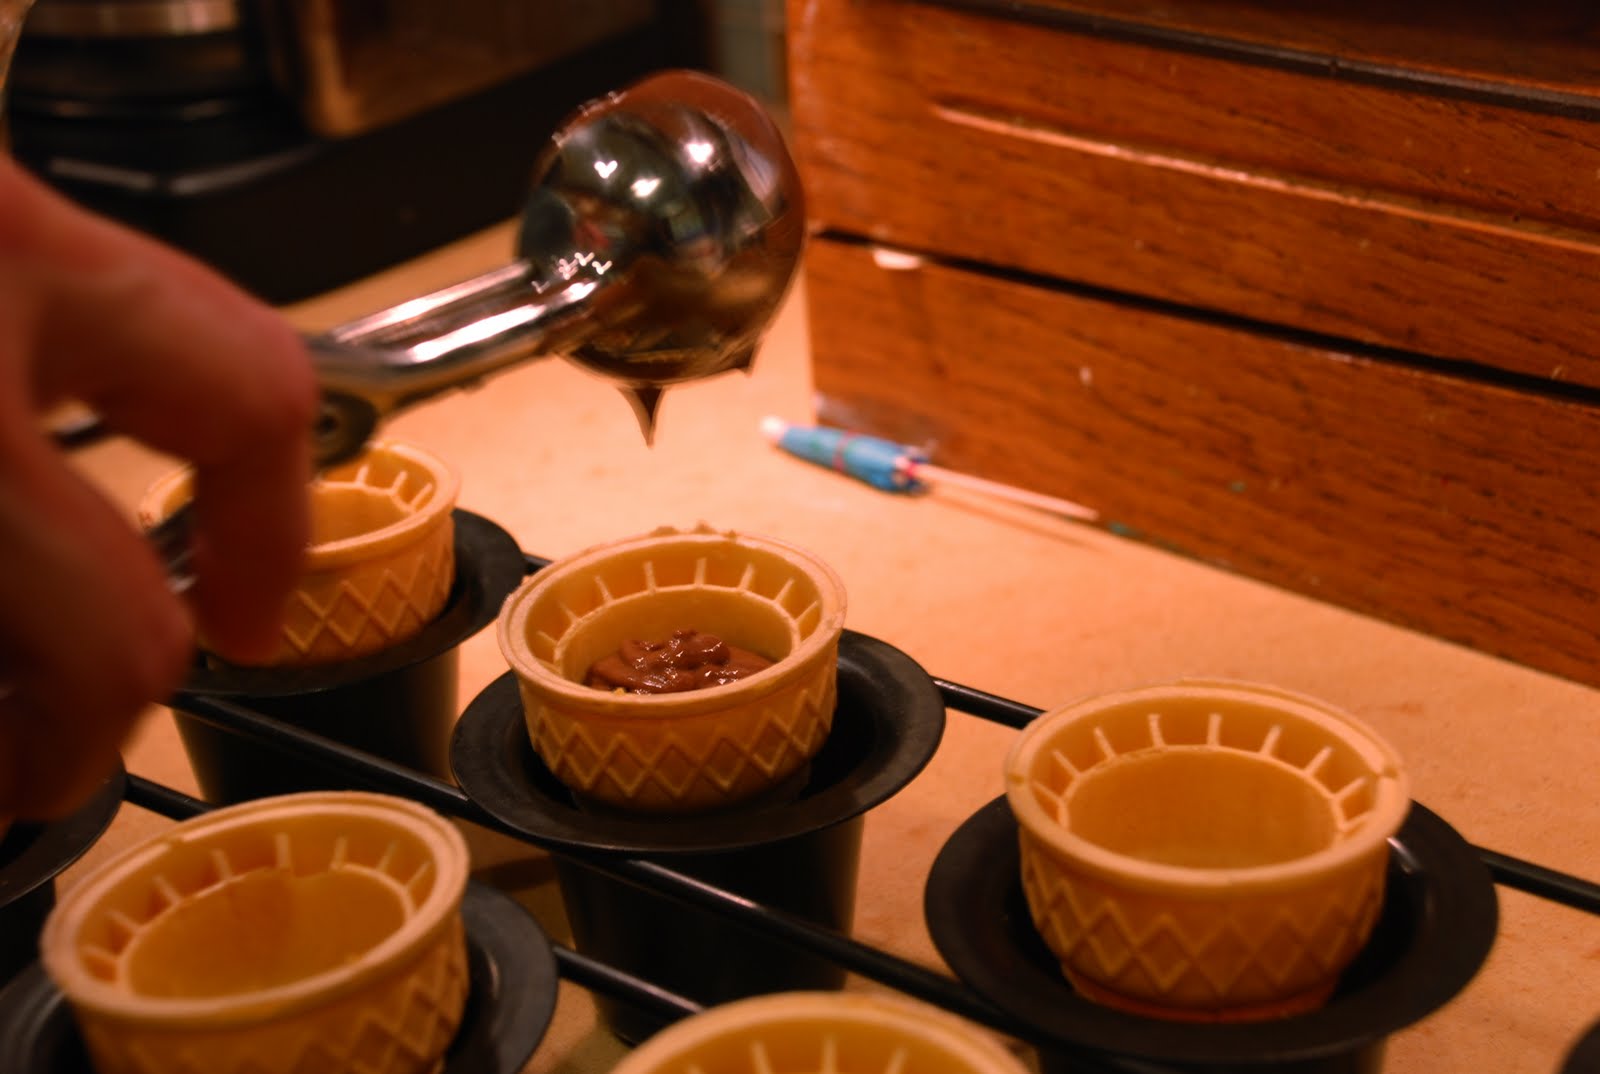
Ice cream cone cupcakes are one of the few baked goods that I think are actually harder than they look. Why? Quite simply, ice cream cones are not made to stand upright on their own. This makes for big problems in balancing them to bake, frost, store, and transport. The first time I made them last year was a total disaster. But now, instead of placing them on a cookie tray or cupcake tray, I put each cone in the cup of a popover pan. This is great because the high sides and narrow bottom resemble the cone shape, keeping them upright and fairly stable. Much less hassle.
So: cones in pan. Batter in cones.
I use an ice cream scoop to keep my batters even, plus it’s much less mess.
Pop them in the oven and get the frosting started while the house starts to smell like chocolate cake.
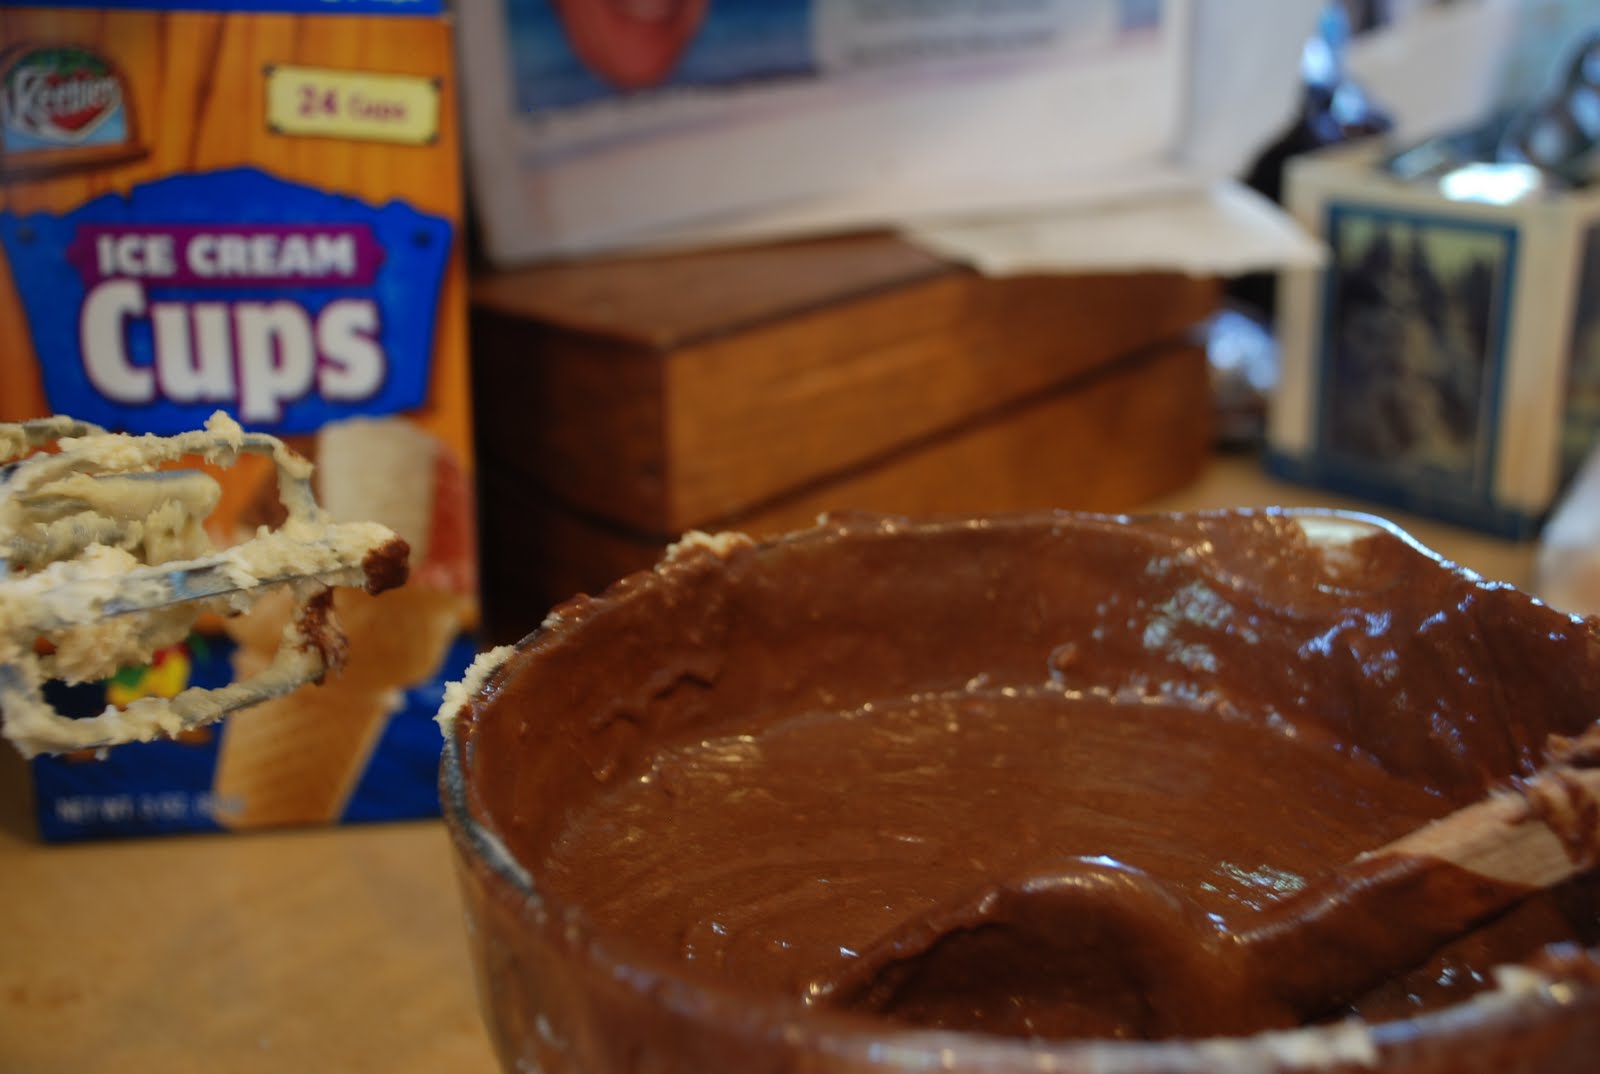
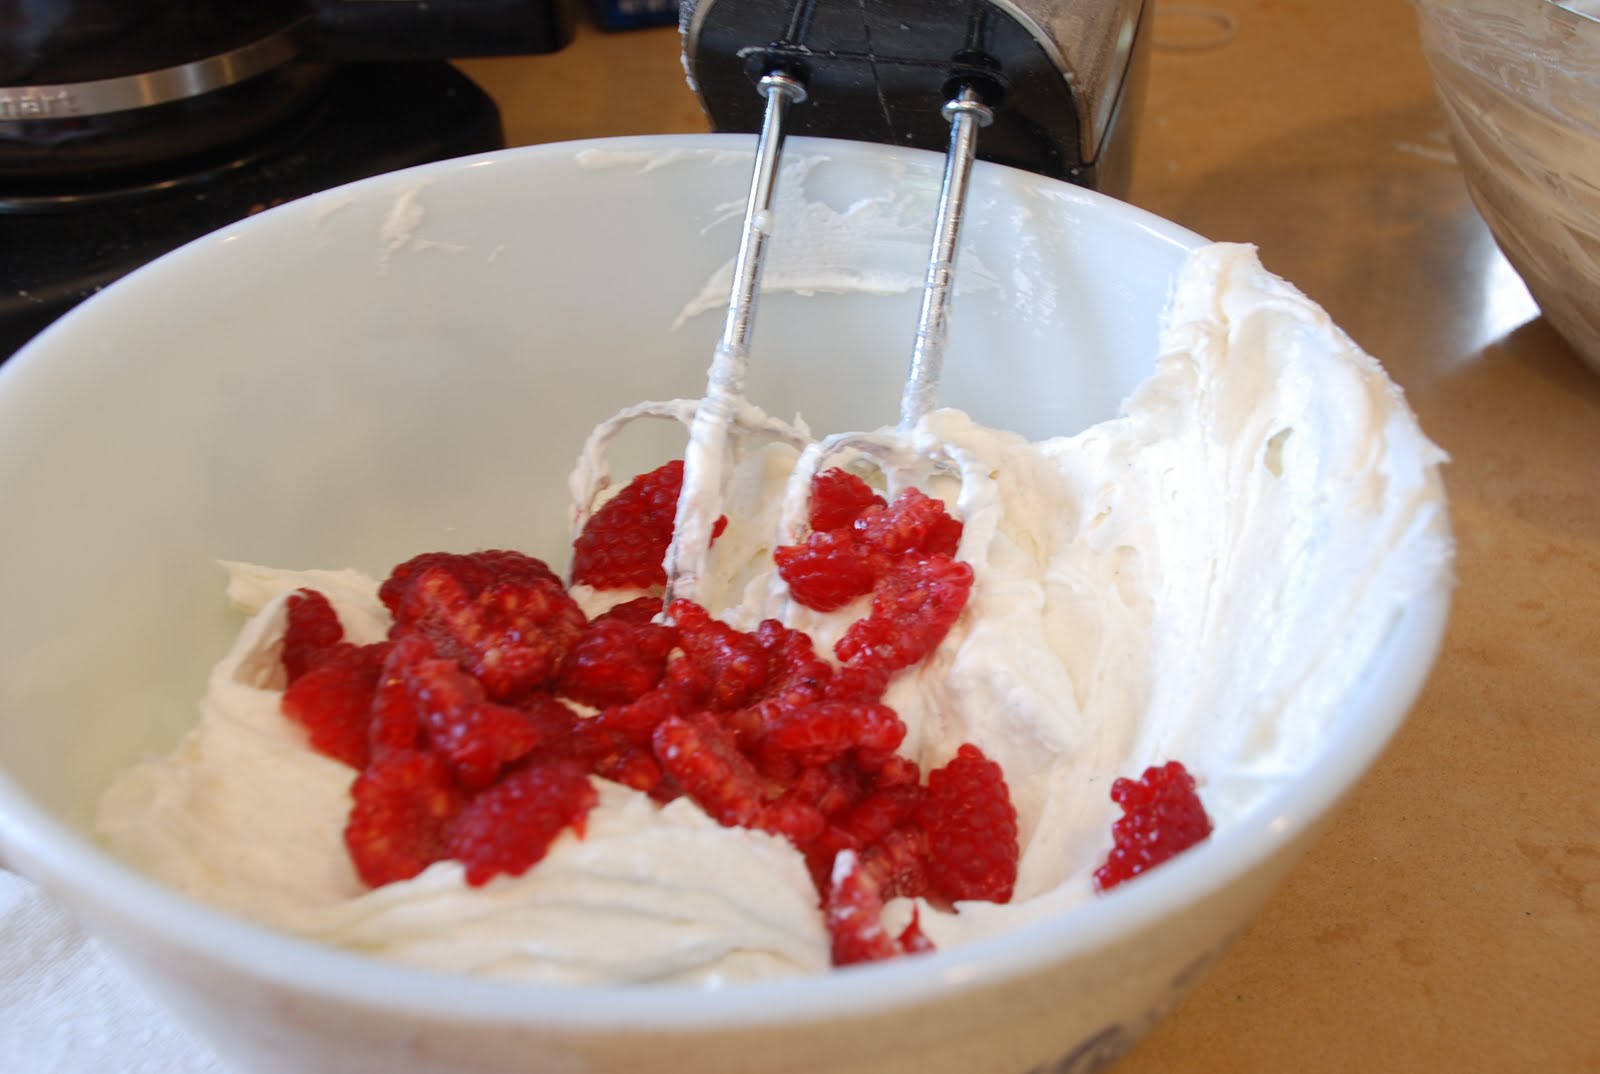
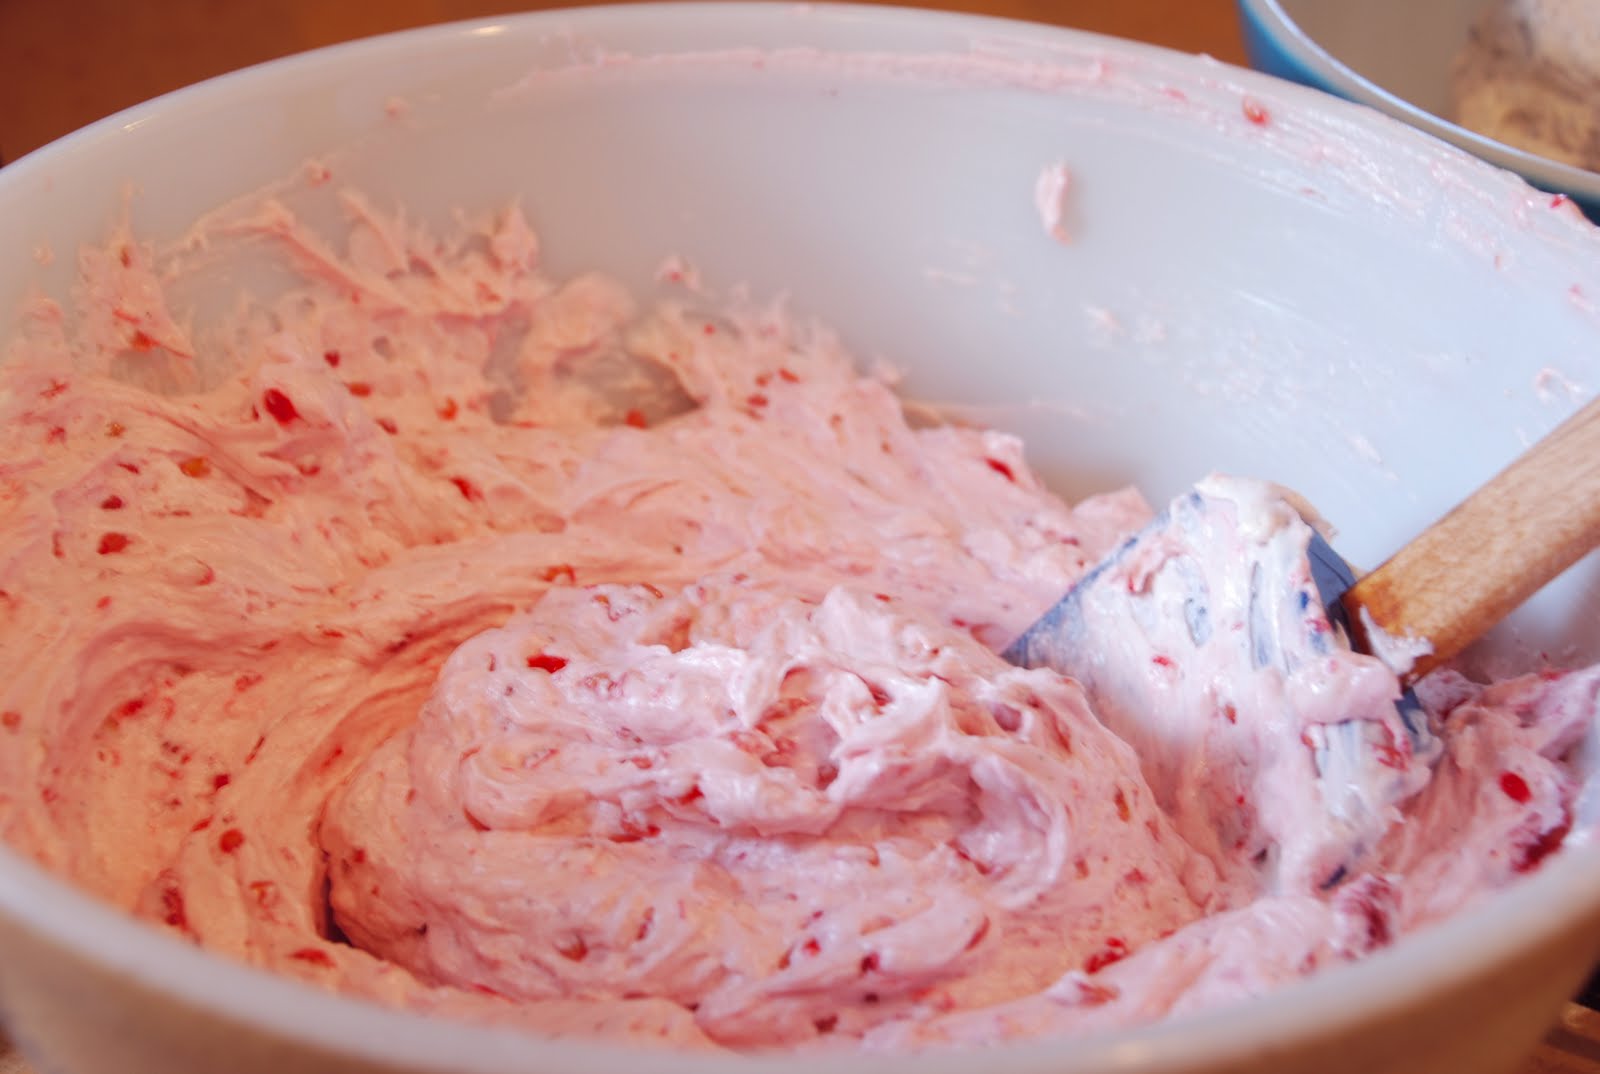
I used my favorite vanilla frosting recipe. It’s a Creamy Vanilla frosting that uses a flour base and lots and lots of butter. It’s very rich, but oh so delicious.
After making it, I divided it into two bowls.
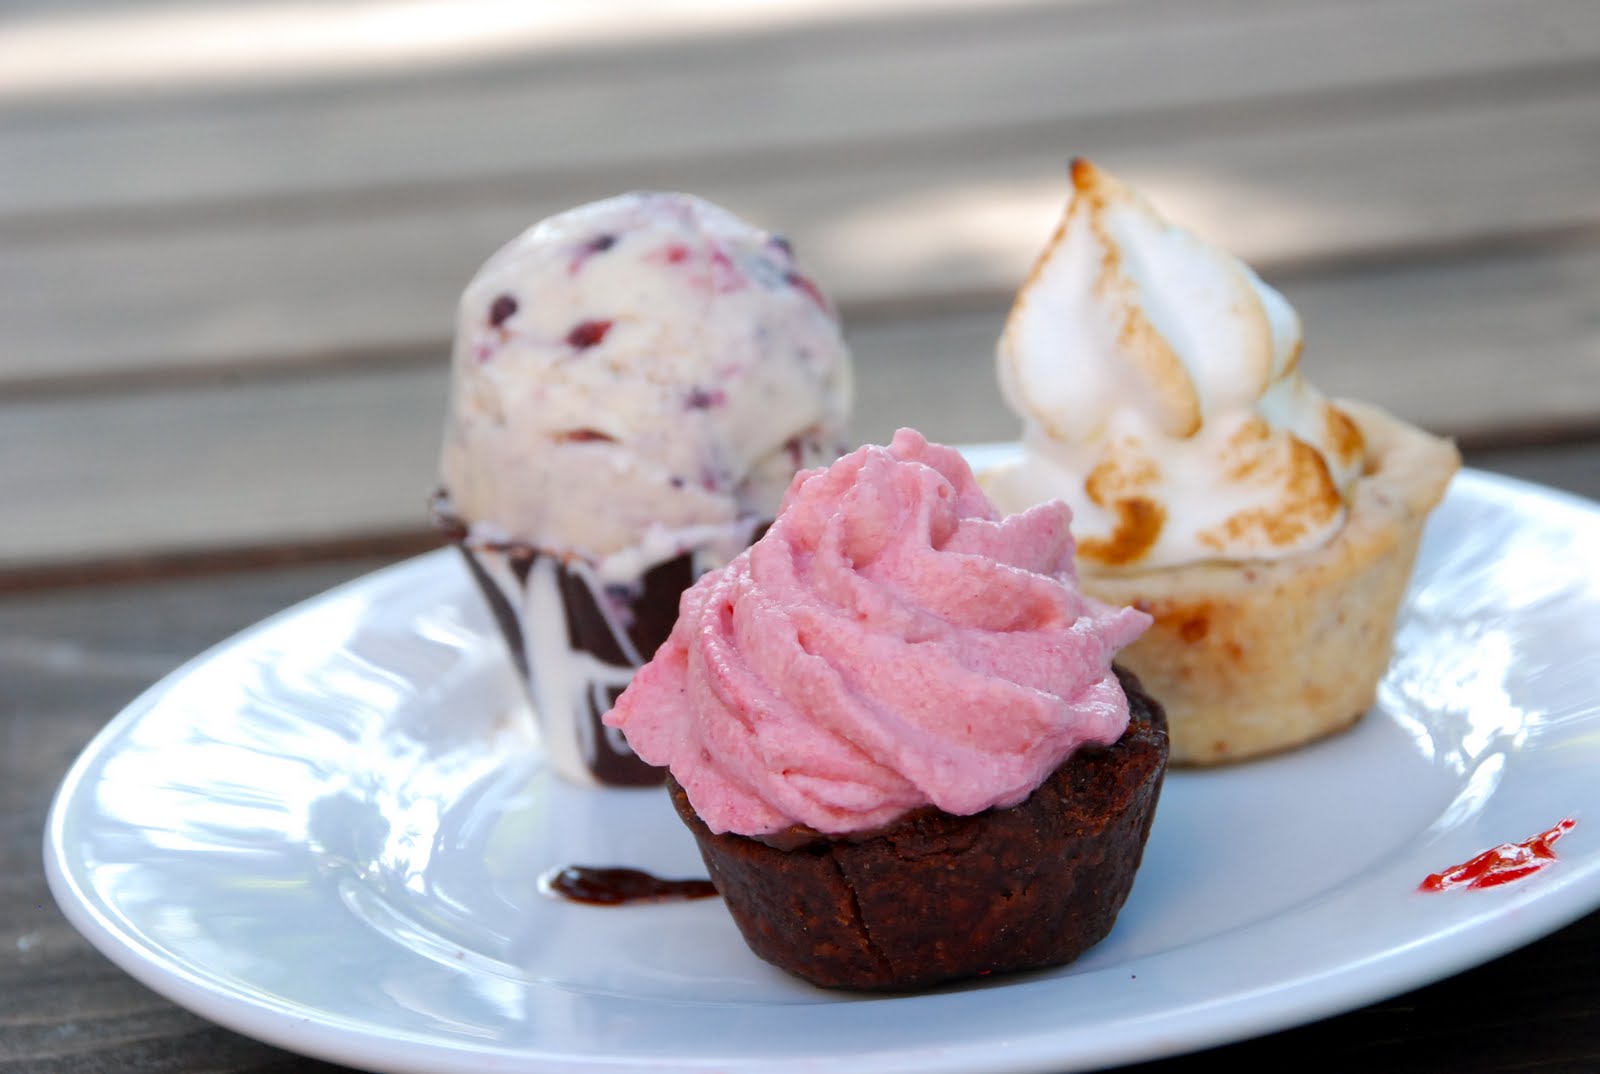
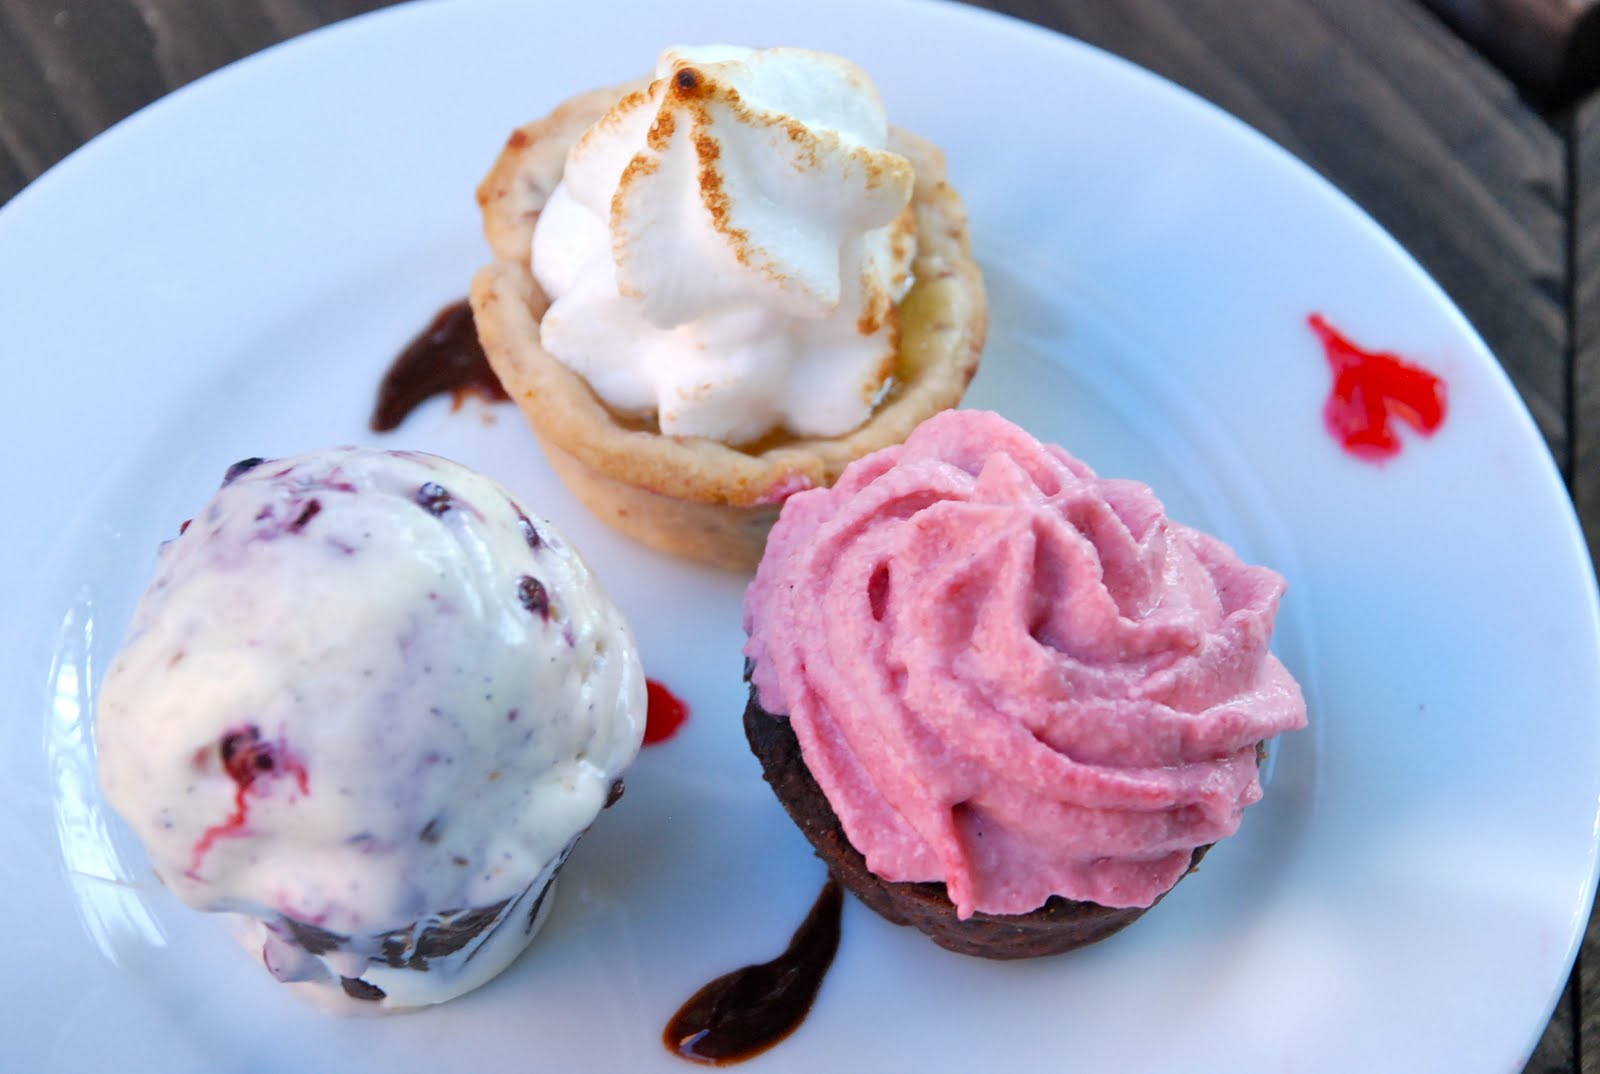
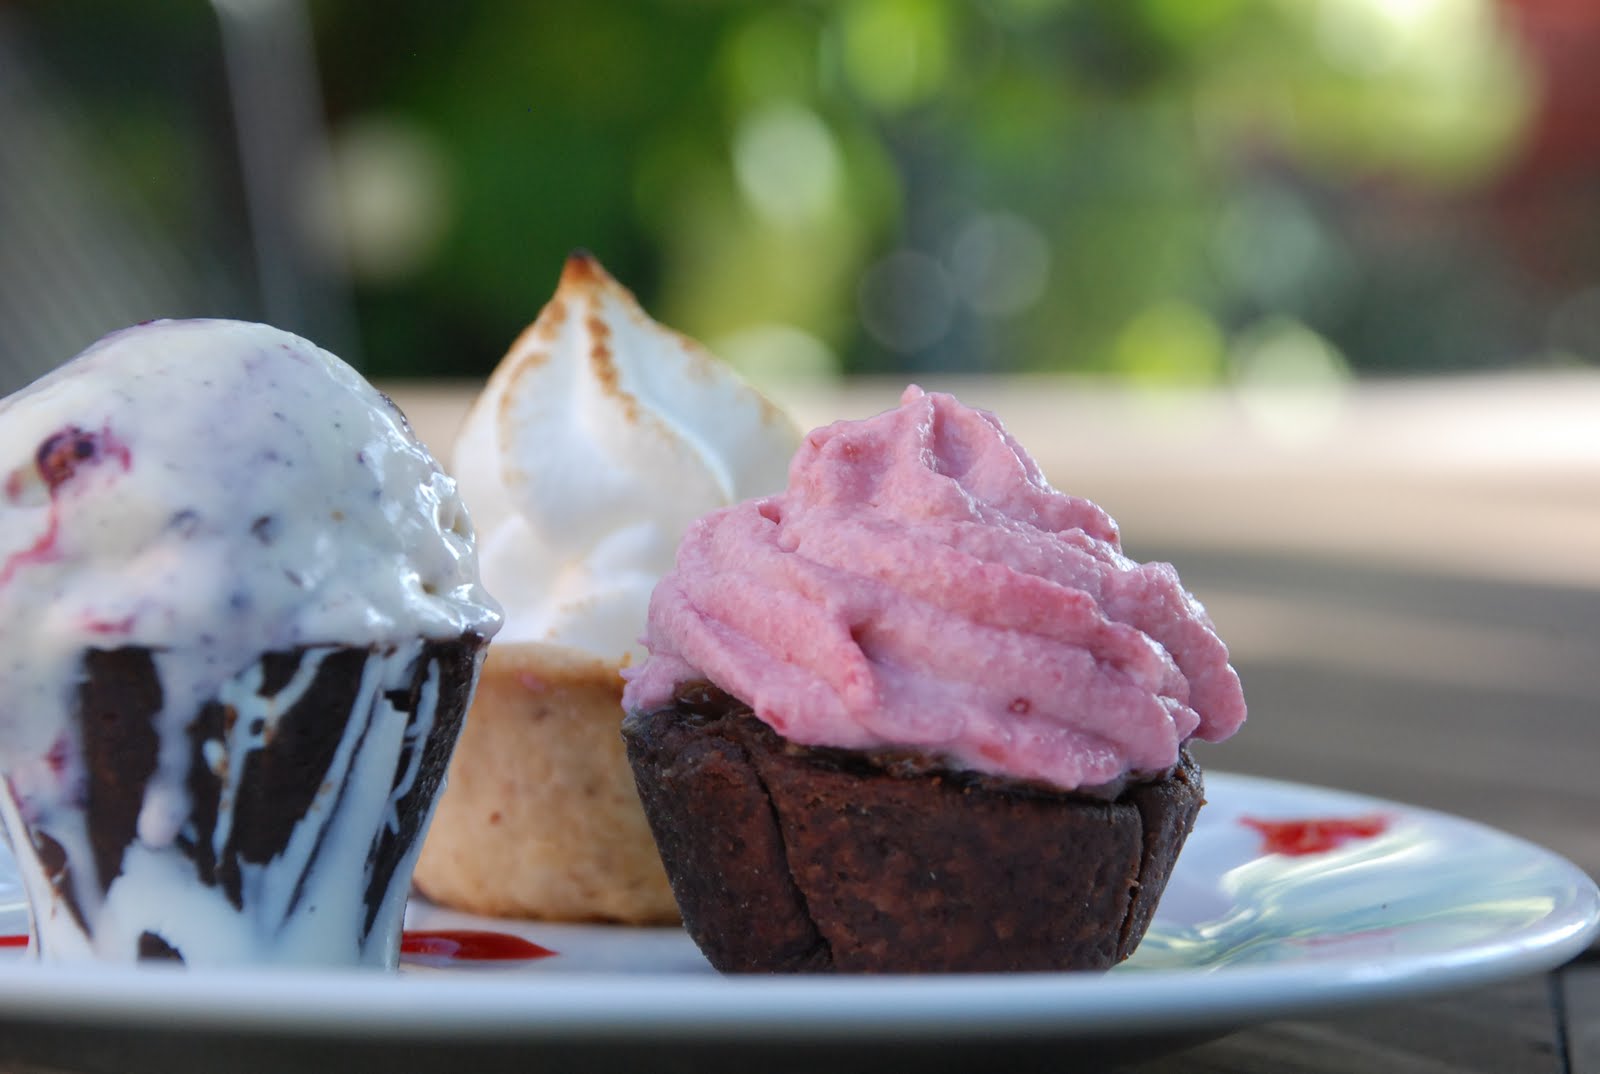
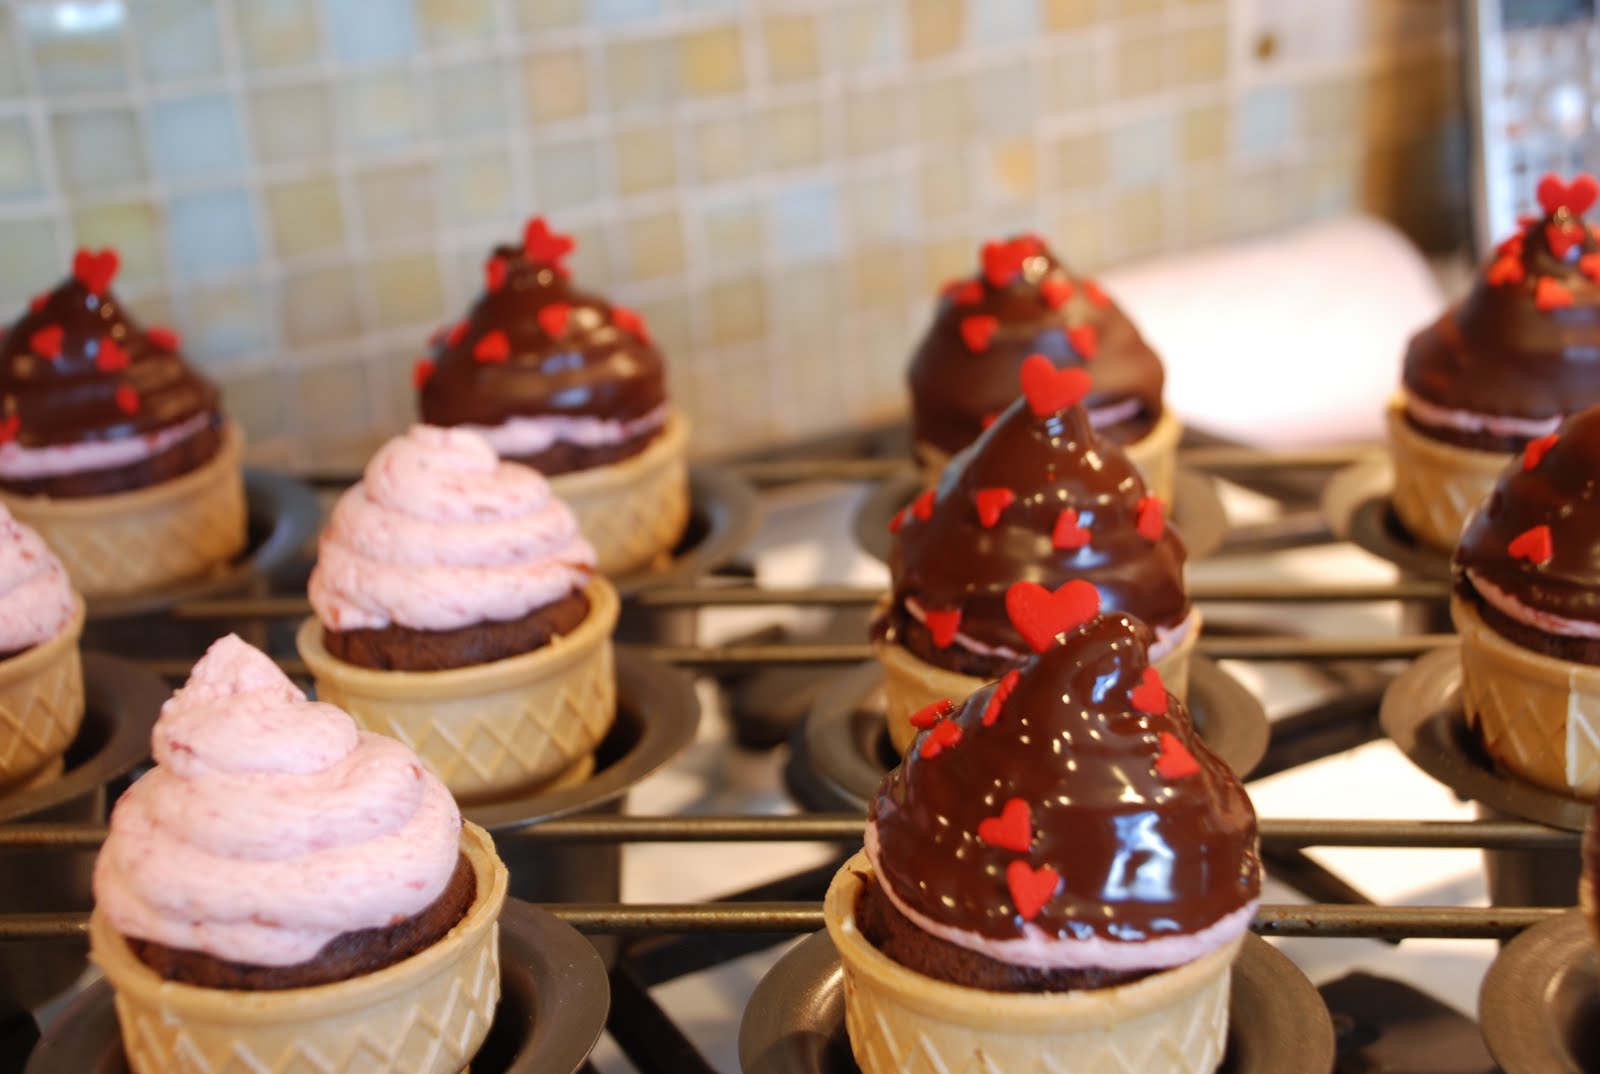
One batch was raspberry…
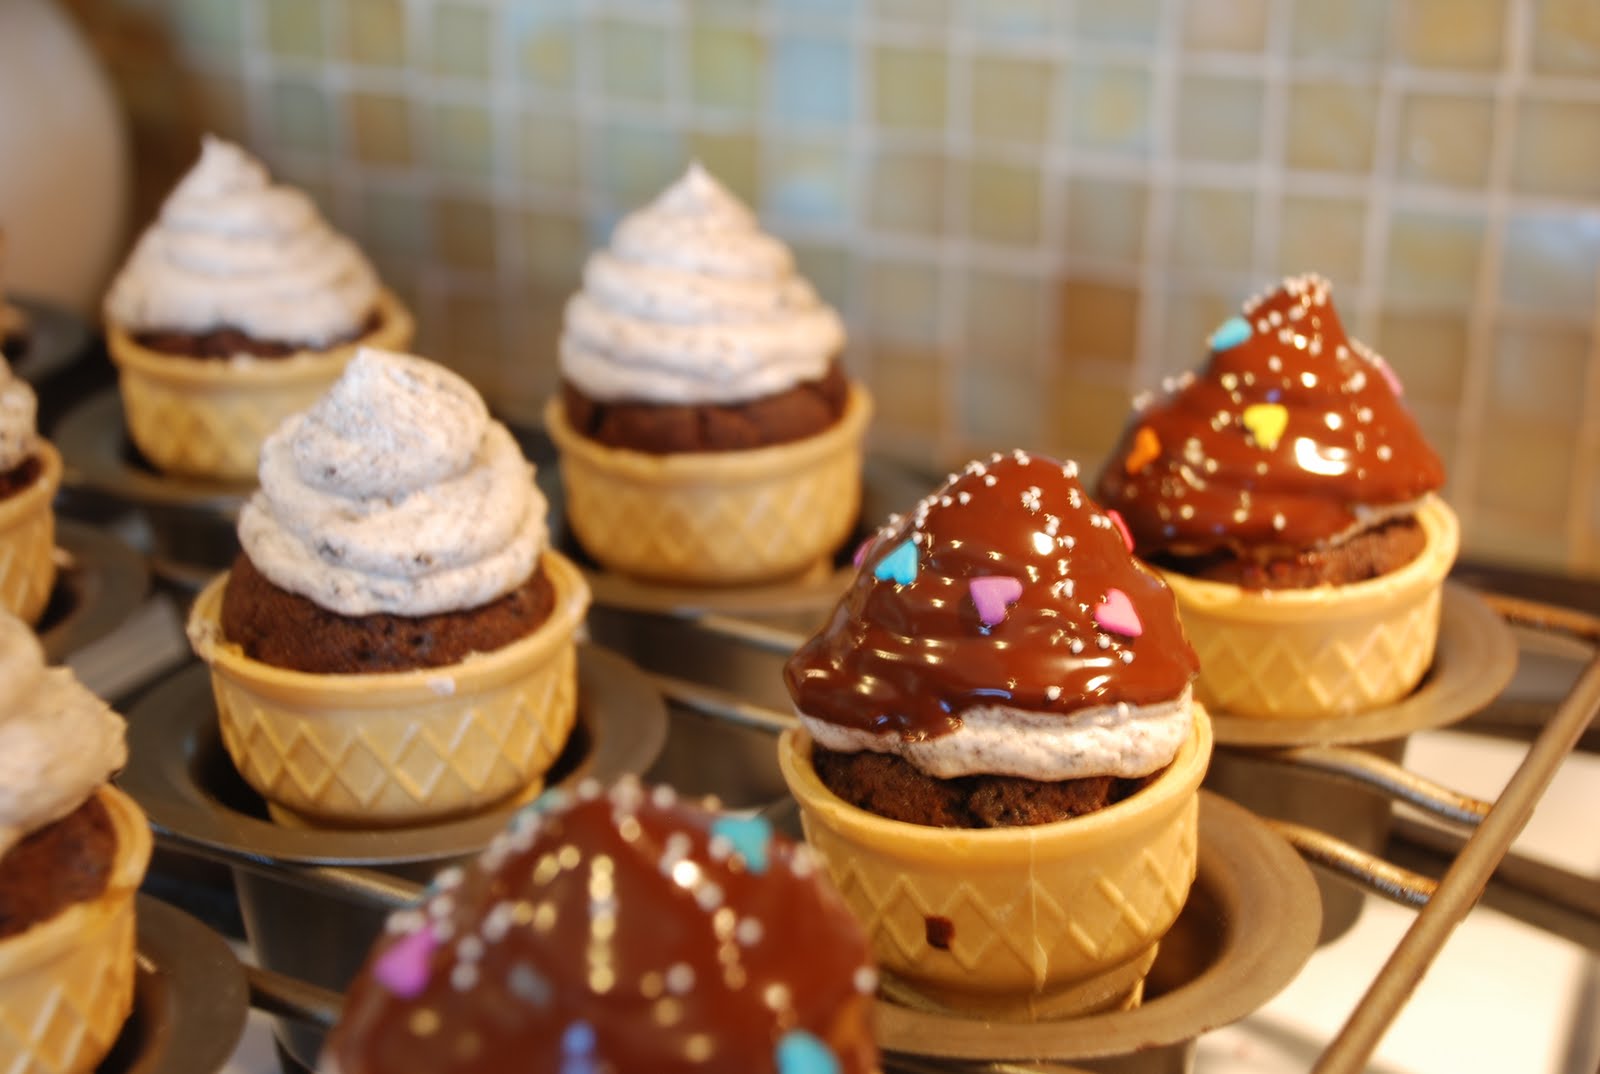
And the other was oreo.
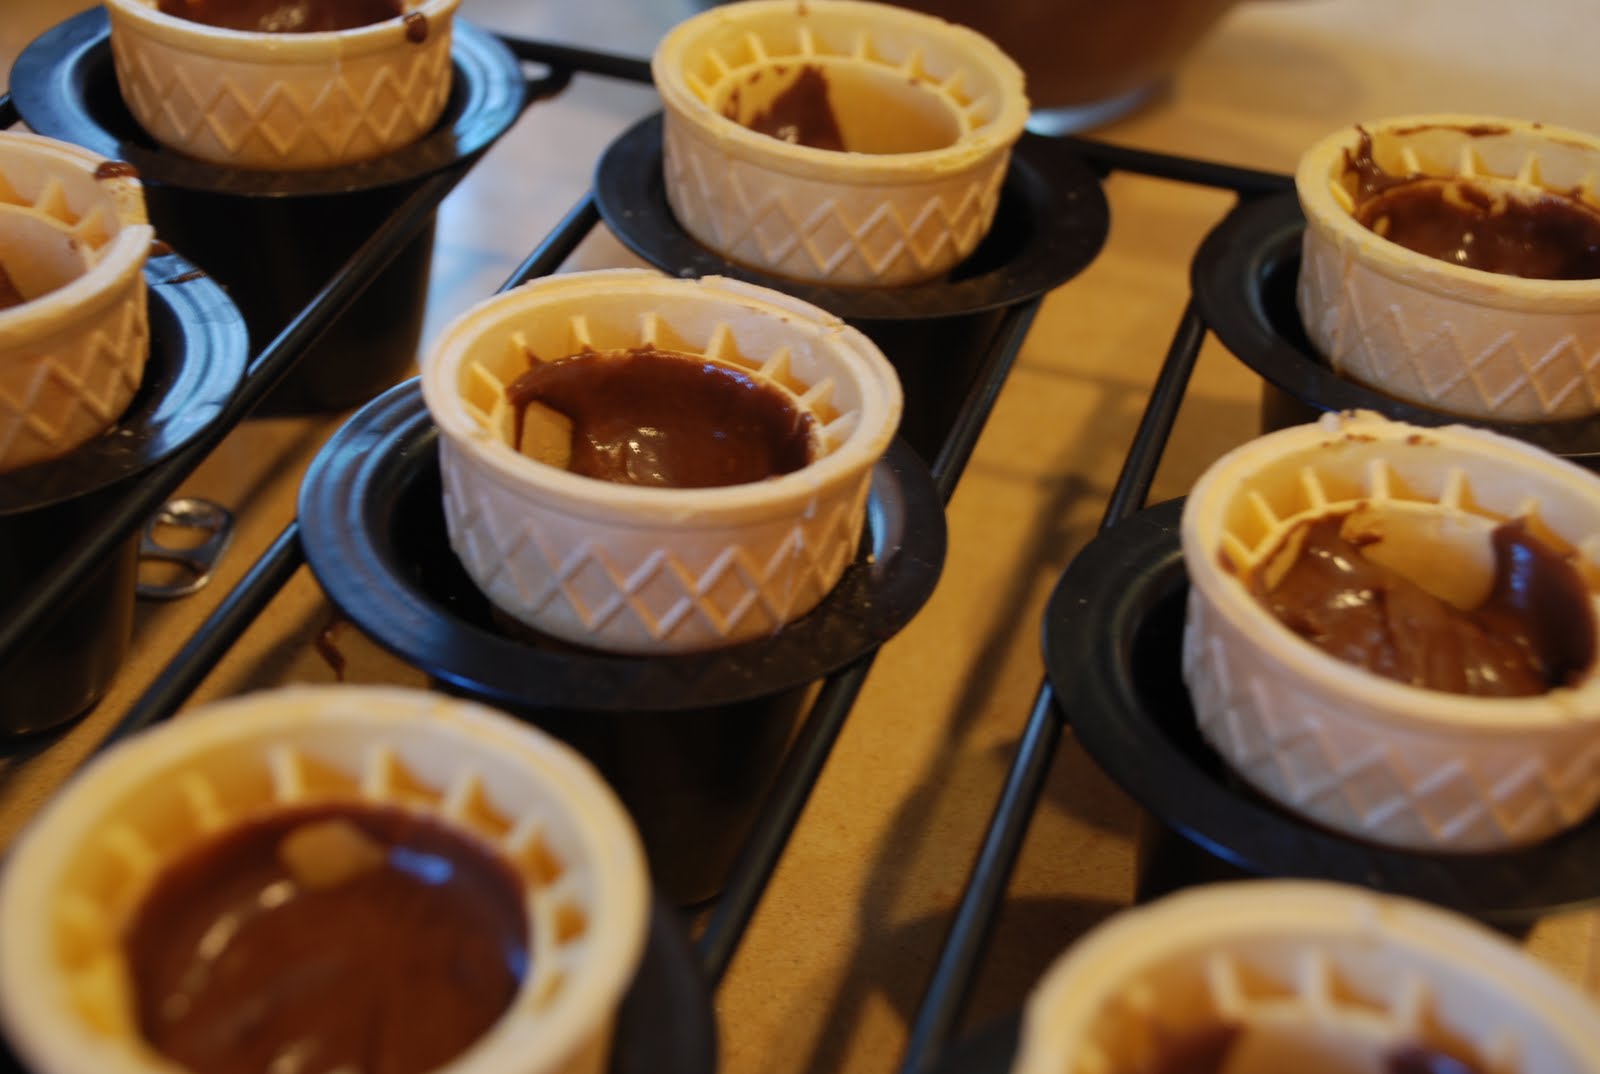
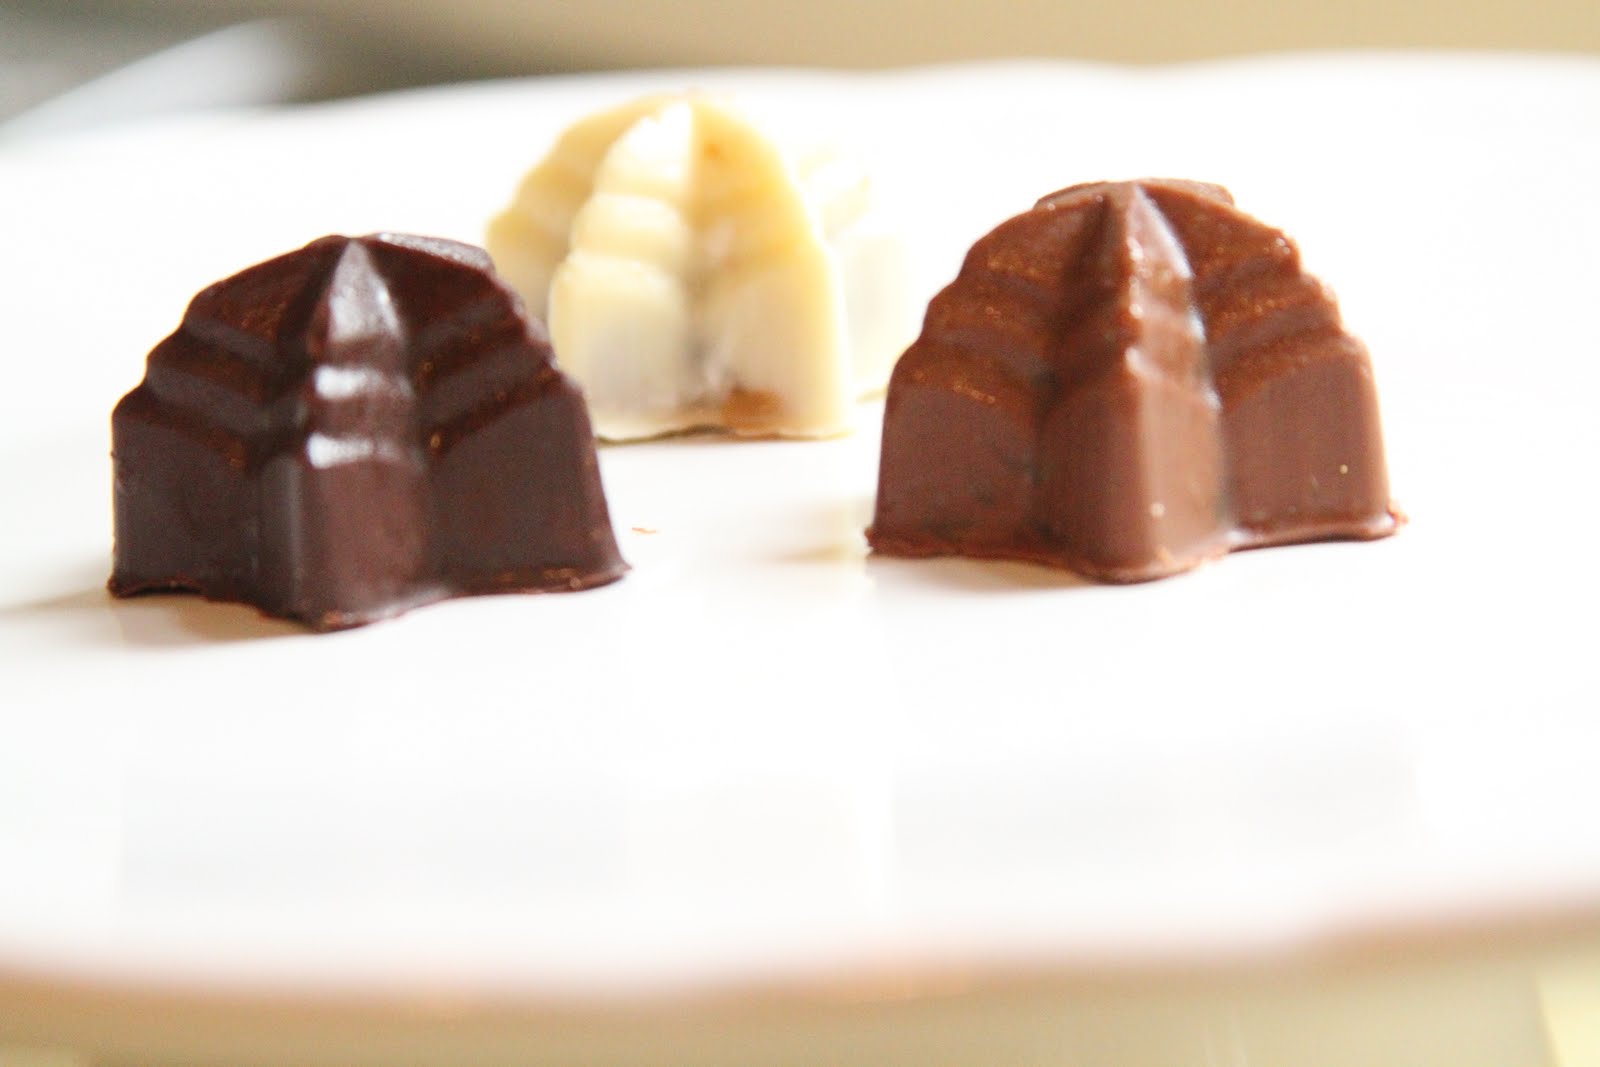
Now might be a good time to tell you that I injected fudge into the bottom of each cone. After the cones have cooled completely, I started frosting using a pastry bag and a very wide circle tip.
I stuck them in the fridge for a few hours to make sure the frosting was very, very firm before I started dipping. I was worried about the frosting sliding off the top and getting ungle smooshes, but with the refrigeration everything was fine.
At this point, a few urgently needed testing, so I happily obliged and sliced them open before they were frosted.

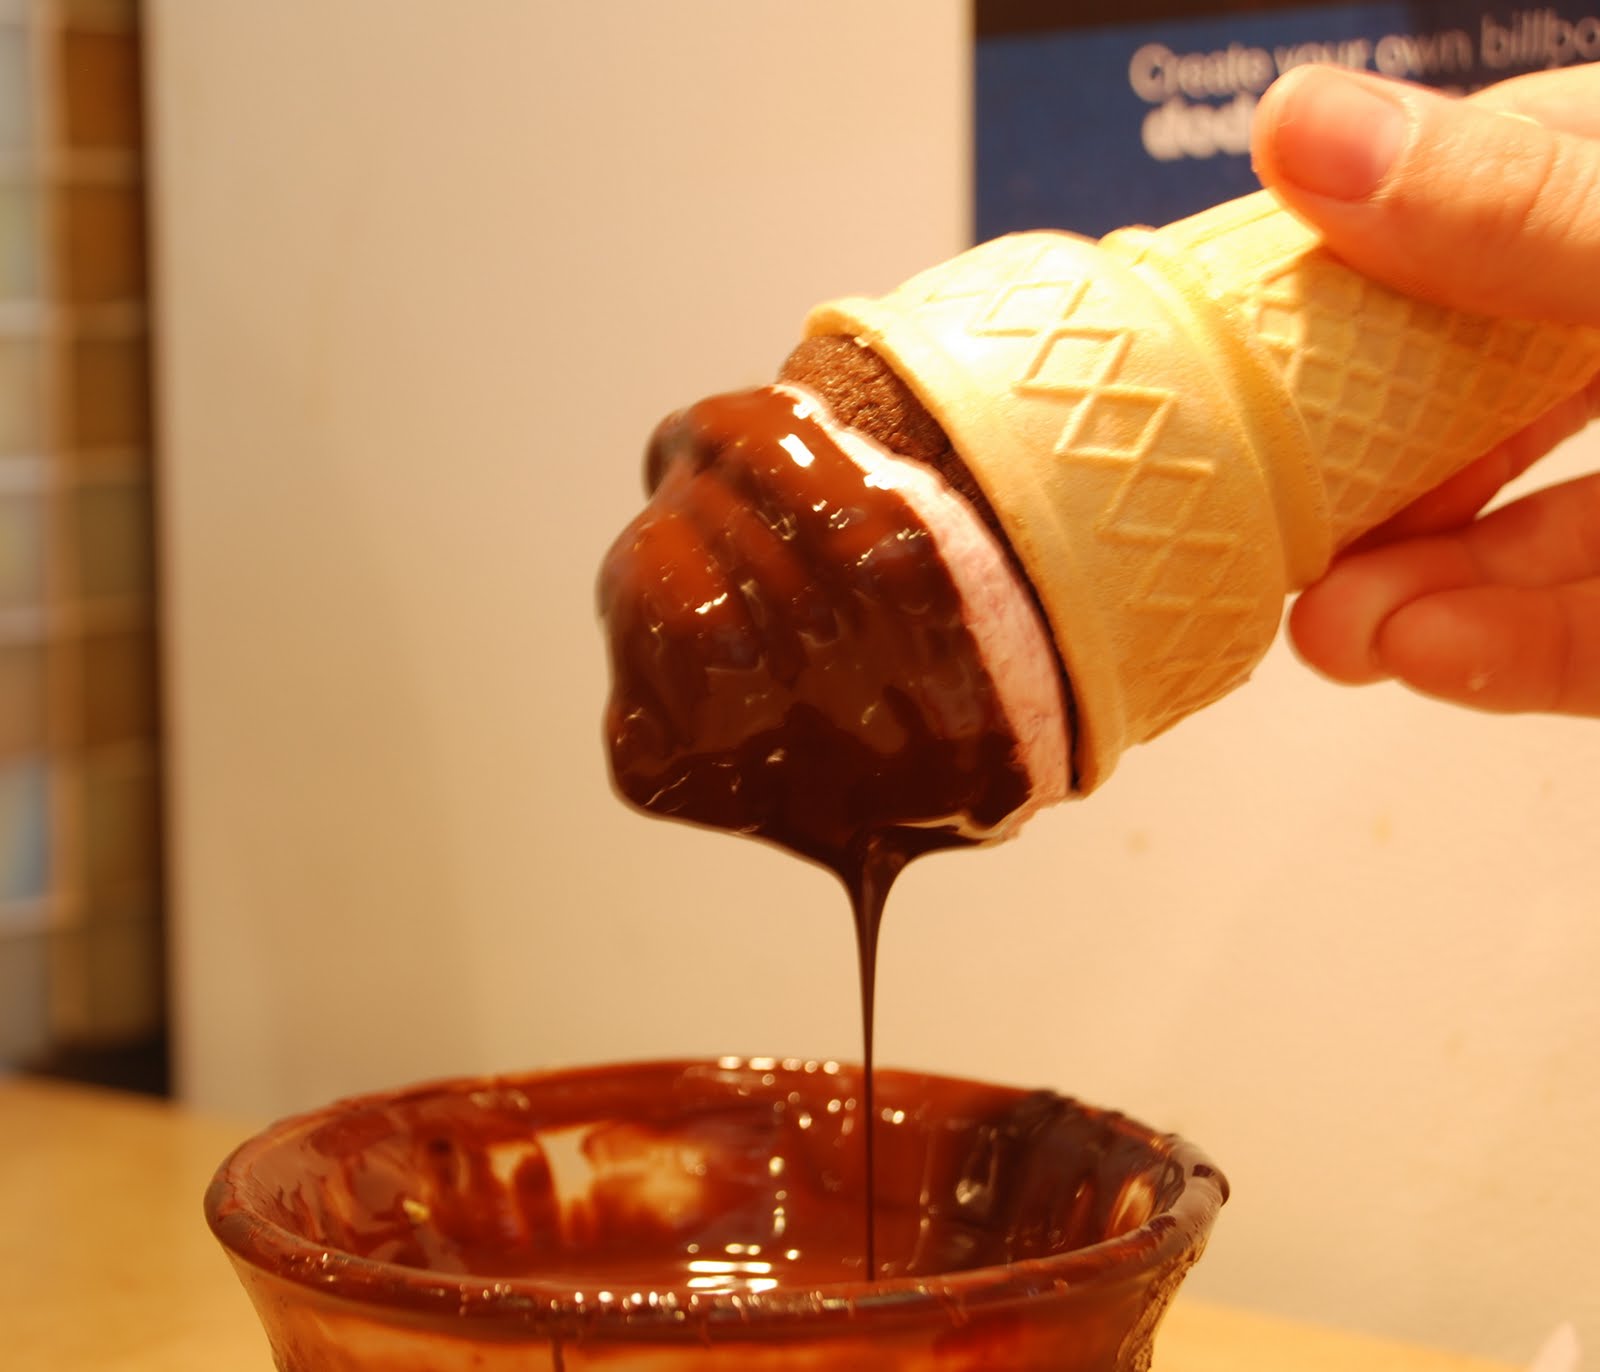
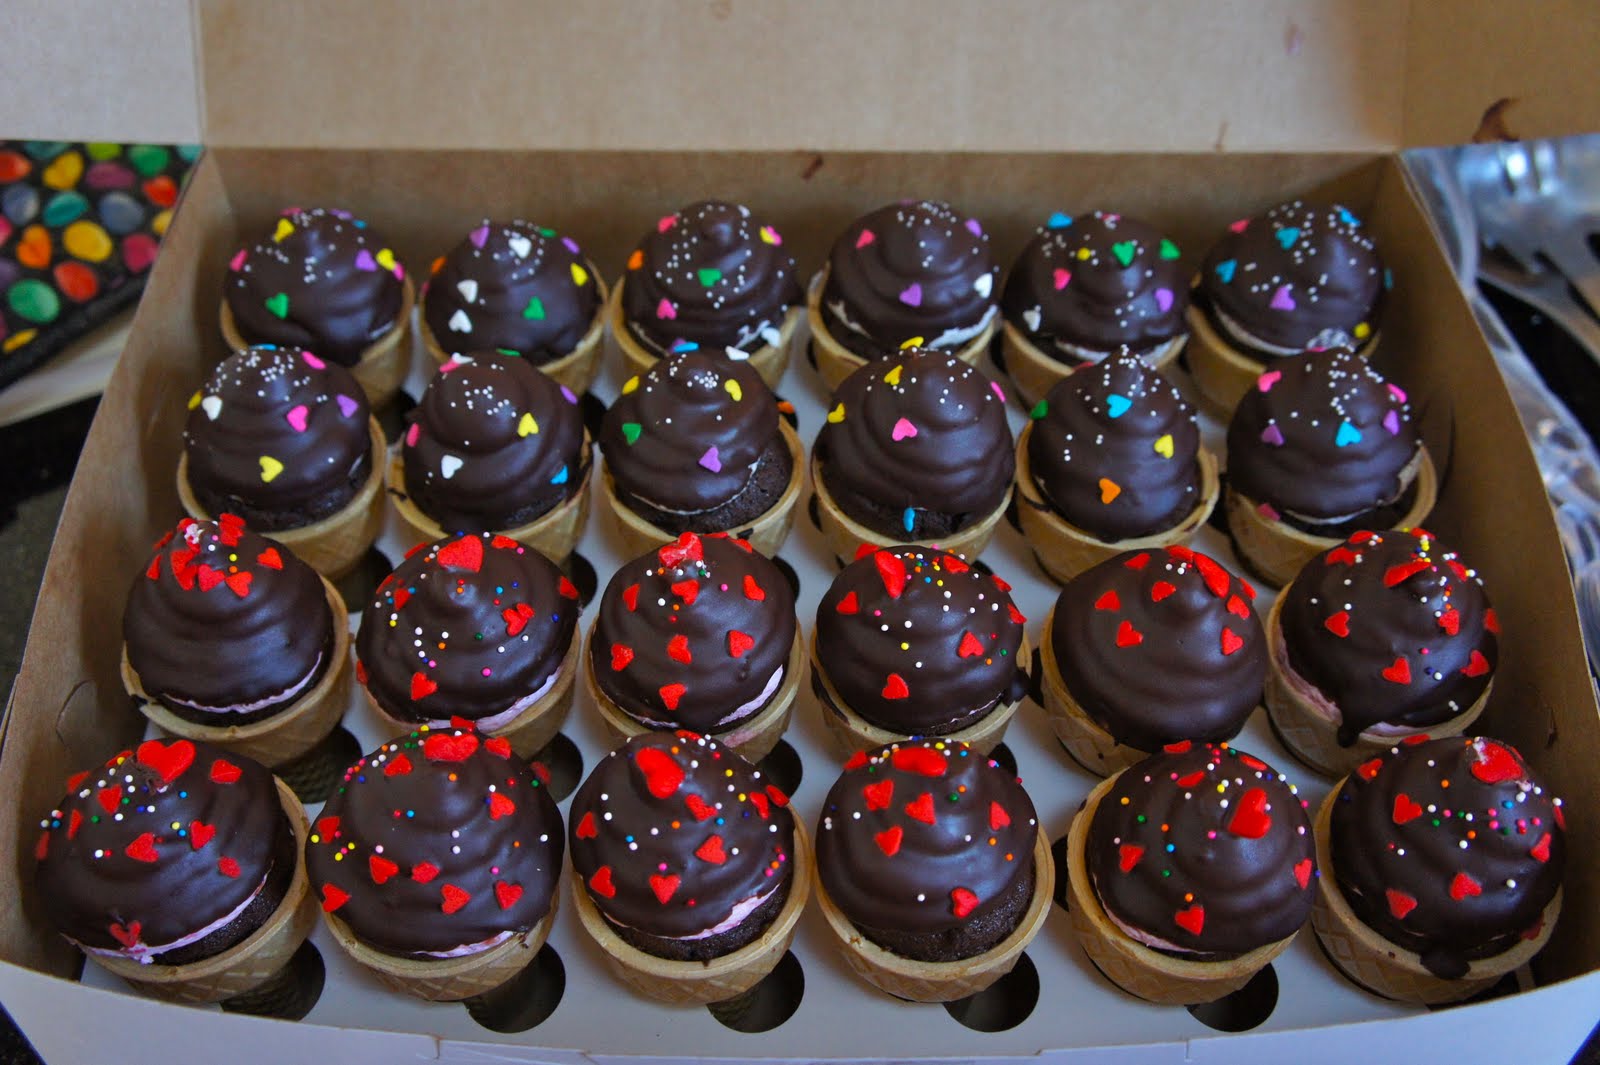
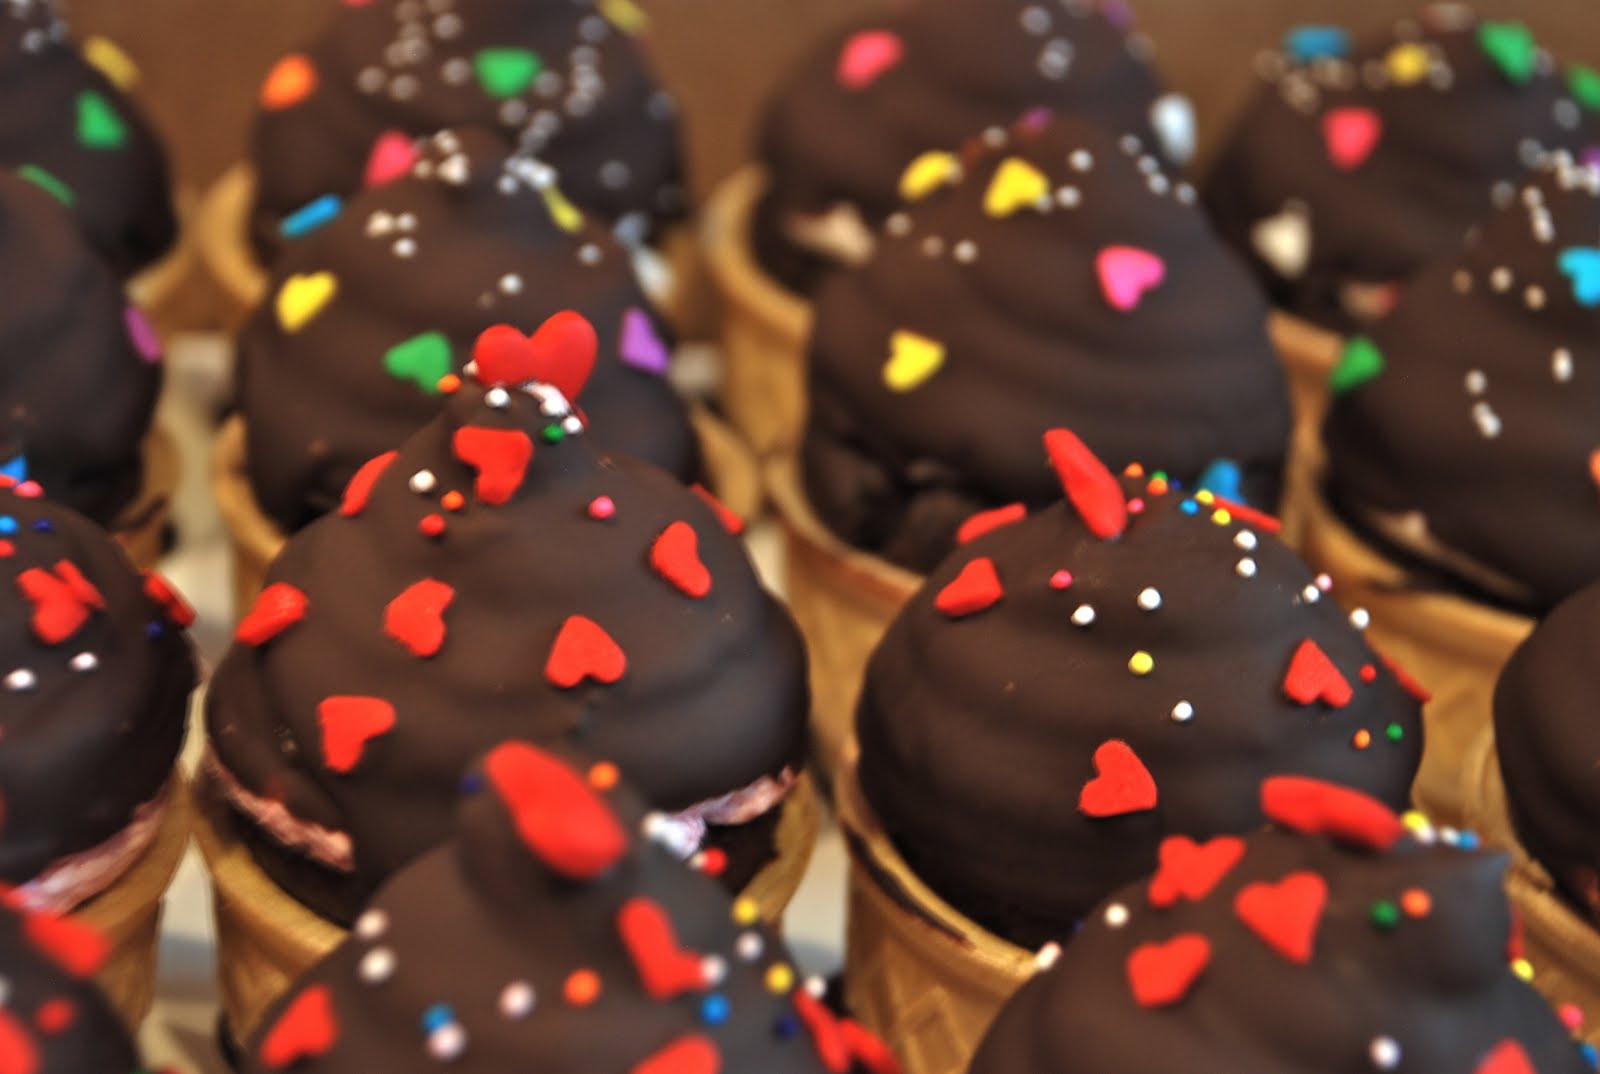
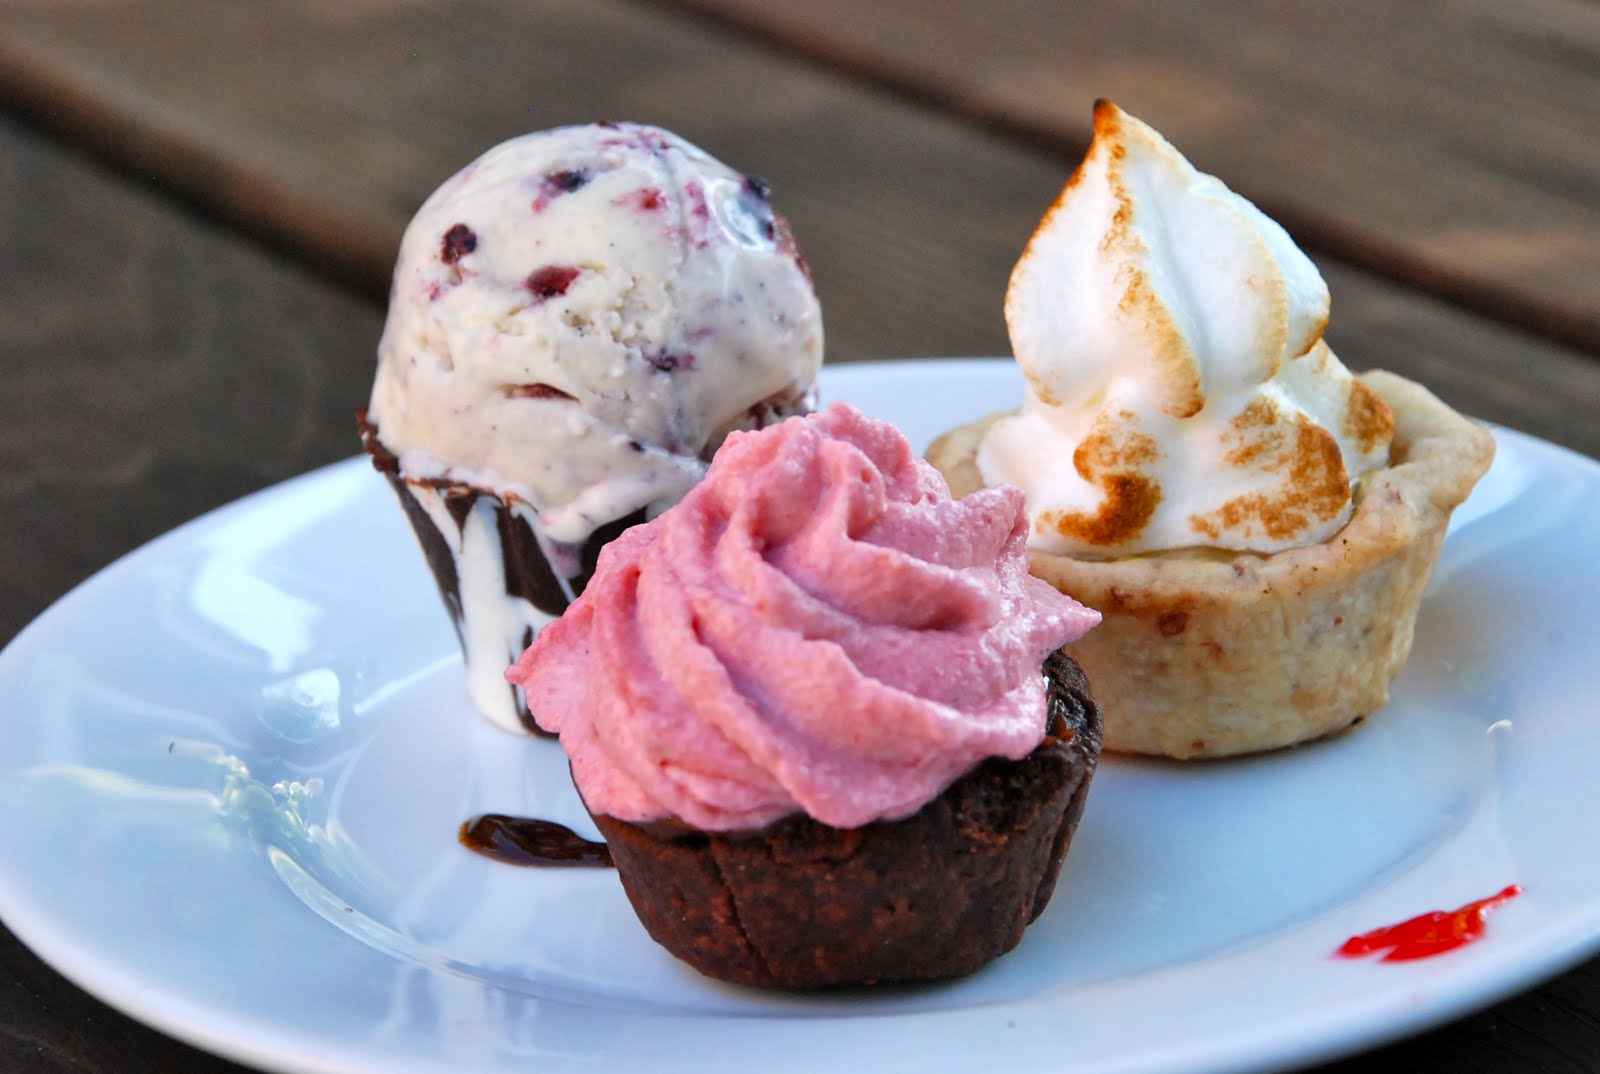
I dipped each cone in melted chocolate mixed with a bit of vegetable oil to make it thinner and easier to work with. Immediately after dipping, each cupcake was attacked with sprinkles: red hearts for the raspberry, and rainbow hearts for the chocolate.
I love how shiny and delicious the chocolate is.
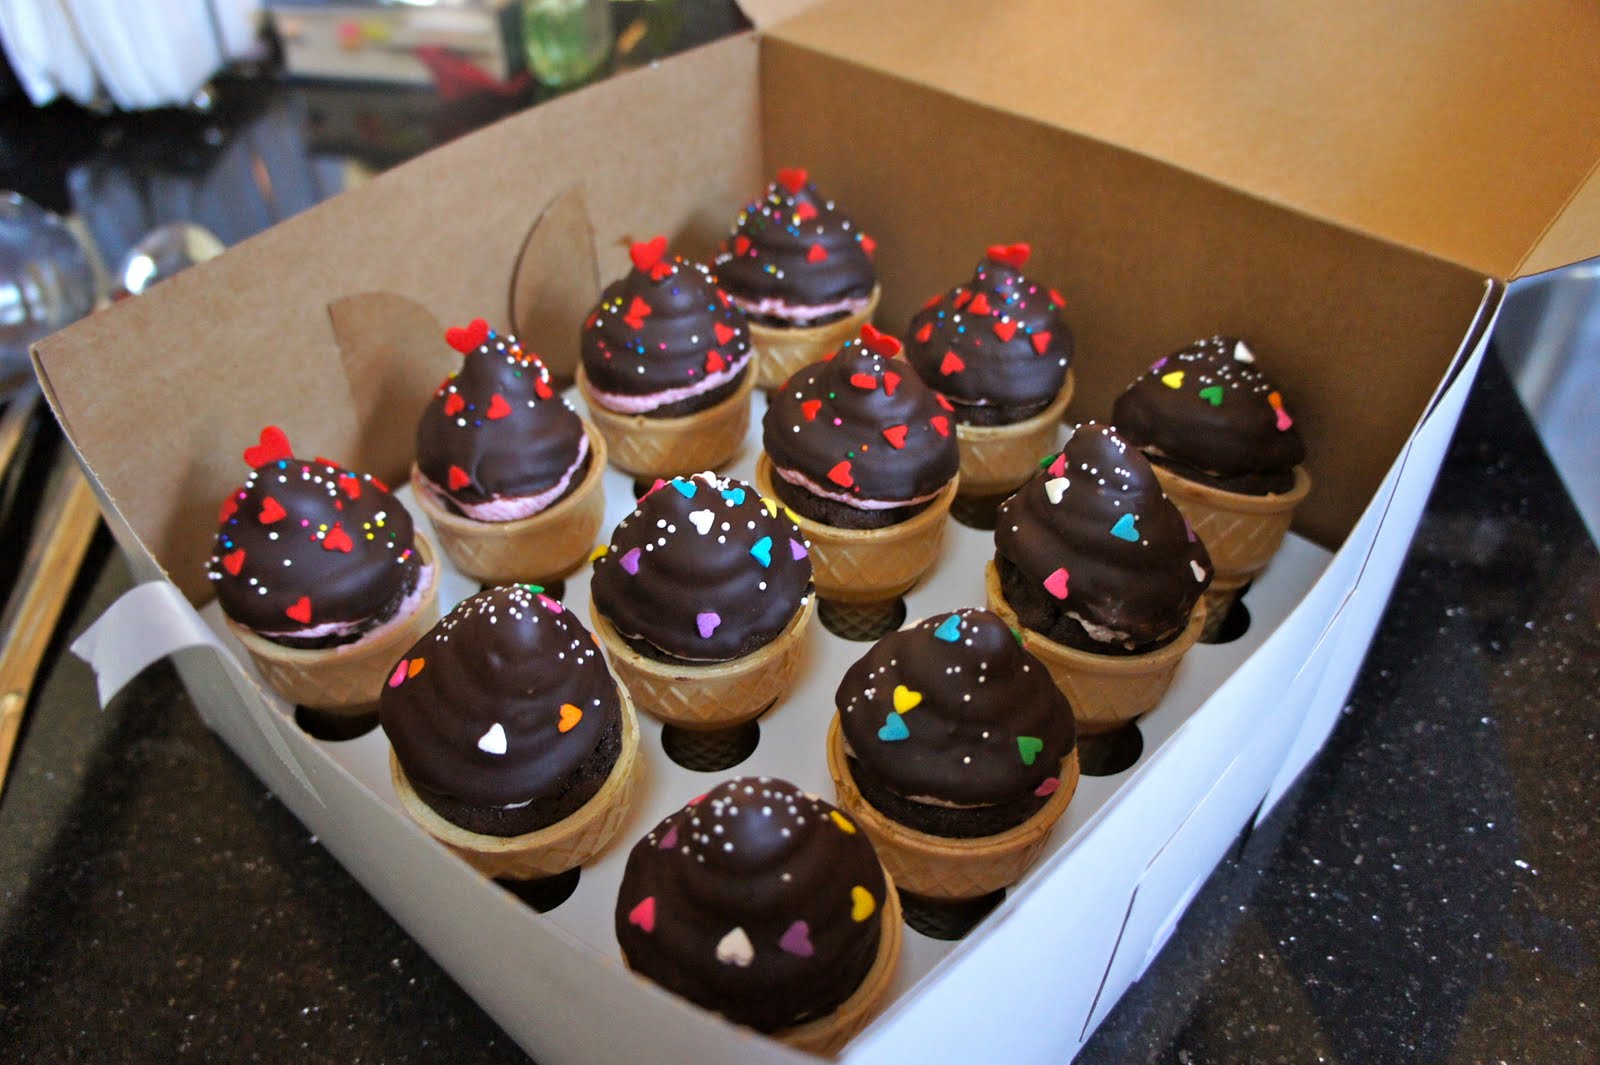
And then they’re ready to box an go! I packed them in a 1/4 sheet cake box with a mini cupcake insert to keep them stable. The size was perfect for the narrow cones and they held up great on the long drive.
All boxed up and ready for the drive!
Alright, I admit. I went a little crazy with these. I got home from work at 4:30, started these right away, and worked through dinner until 10:30 at night. What? You mean that doesn’t happen to everyone? But they were so much fun! Just about ever cookie is unique. I decorated with dragees, piping, and marbling techniques. Take a look at how I did the cookies with the marbling:
Immediately after outlining, then flooding the cookie, I piped circles of color onto the cookie. I tapped it against the table a few times to make it settle, then immediately dragged a toothpick in the direction I wanted. Ta da! This method is very forgiving and quite a bit of fun to do because of the endless possibilities.
Anyways, lots of stars and stripes.
Tons of swirls
And, of course, lots of red white and blue!
Probably tired of coming over in the mornings before work, my photographer friend lent me a fabulous camera! I’ve been experimenting by making and photographing fruit tarts. I’ve been going crazy at the farmers market buying pluots, nectarines, plums, peaches, and strawberries. The crust is crumbly and nutty with walnuts and almonds. The fruit rests on a thick layer of vanilla bean-lemon pastry cream.
I have a fair amount of art background from high school programs and college classes, so I understand color and composition, but I had NO CLUE what a difference the camera makes.
Observe:
I made this fruit tart last week. It was quite tasty, and I photographed it using my little point and shoot digital camera. I make sure to clear the background, go outside, and photograph in the daylight to make the best of what I have. Not bad.
But then I made a second tart the following week, using the same fruits, crust, and filling.
With the good camera, you can see how juicy and delicious the fruit is. The glaze and the detail are clear and you can see the nuts in the crust.
There’s a HUGE difference and I’m so happy with the results.
Celebrate the summer by enjoying some fresh fruit!
First, I should explain that I bake because I get this “I can do that” feeling whenever I eat something sweet. I get so much satisfaction from recreating treats I’ve tasted and that is how I ended up with dozens and dozens of truffles.
Unfortunately I didn’t get any in-progress shots, but I can show you the final product! Most of these pictures were taking by Stephanie, as usual. She rushed over to my house in the morning right before I delivered the treat.
Oh yes, and I made the box out of chocolate, too (a graduation present for a good friend). It was easier than it looks and pretty sturdy, too!
Ready for each type of truffle?
Here’s the raspberry truffle. I made a fresh raspberry filling – tart and just the right amount of sweet.
This one has a coffee buttercream center.
And a vanilla bean filling

Mint chocolate ganache in the center
And creamy ganache dipped in chocolate, then rolled in toasted pecan crumbs.
Well, I guess I could have another…
