Surfing Cookies

It took long enough, but let’s celebrate the sun FINALLY coming out after a long winter.

These were actually Christmas/Holiday cookies for some of my dad’s surfing pals, but I didn’t think my East Coast readers would appreciate the bragging about SoCal weather had I posted them back in December.

Hawaiian shirt cookies and edible surfboards.

The floral print on the Hawaiian shirt cookies was done using a marbling technique. I put icing drops of one color onto the still wet base and used a toothpick to draw each dot in to make a petal. I always want to make a tutorial, but you have to work fast with this technique and I never have enough hands to keep the camera frosting-free!

The little pocket on the breast of the shirt is my favorite.

I had fun with the surfboard designs. I just piped wavy lines and filled them in what whatever color pastry bag I was holding.  I was running out of royal icing at the end so I eeked out whatever was left and I just made it!

Don’t they make you want to head to the beach and lay out in the sunshine?

Here’s to springtime and summer!

Raspberry Brownie Bites

Let’s dress up a classic dessert – brownies – and get them all ready to go to a party, shall we?
 

I baked my favorite brownie recipe, by Smitten Kitchen, of course, into this awesome brownie bite pan.  It’s basically a mini cupcake pan, but with squares. It’s pretty shallow, which makes for perfect, bite-sized desserts.

After baking, I melted some dark chocolate and thinned it a bit with vegetable oil so it’s be nice and runny. I dunked some of the squares into the chocolate, lets the extra drip, and let them set on a piece of wax paper.  Not only does the chocolate coating taste great, but it also helps to seal in the freshness and moisture. You can see the chocolate covered ones below; they look like petit fours.

Some got chocolate ganache heaped on top of the brownie bites instead of a complete coating. 

And the white cloud of deliciousness you see is marshmallow fluff.  I was in a hurry so I didn’t have time to make frosting, plus the brownies were being served at a dairy-free event and I didn’t want to mess with margarine frosting, but I’m really happy with how the fluff looked and tasted.

They were topped off with fresh raspberries. 

The little squares looked like perfectly delicious gems. Next time, I think I’ll try a light glaze on top of the berries to make them really shine. Chocolatey, fruity, sweet and chewy.

And they’re so small that you can try one or two [every time you walk by the fridge].

Jewish recipes, hamentaschen, lemon bar step-by-step

Lemon Bar Hamentaschen: Step-by-step

Purim is coming up! It’s a Jewish holiday filled with celebration, silliness, and, of course, food. In celebration (and because they’re delicious) I made some hamantaschen. They’re basically just a three-cornered cookie with some sort of filling in the middle. These amazing recipes have been making their way around Facebook, and I was inspired by the lemon bar variety.

So let’s get started! We start with a basic sweet dough. This one is butter free, baking this entire recipe dairy free – yay! The dough is tougher and sturdier than your average cookie dough and also less-sweet. I used this dough recipe here. Roll the dough out right away and cut into circles. I didn’t have a circle cookie cutter, so I used a drinking glass. Worked just as well.

Because I was using a liquid filling, I didn’t fold the cookie around the filling. Instead, I folded the cookie first to make a little cup.

Just pinch in each corner.

Make sure to press firmly so they don’t open up in the oven.

Nice little cups ready for filling.

I made a standard lemon bar filling using eggs, flour, sugar, and lemon juice. I cooked it over the stove to thicken it before filling the cookies.

Spooning it in.

Then I gave the corners and extra pinch just to make sure they stayed where they were supposed to.

And here we go! Beautiful right out of the oven. I did a little dance when I saw how well they kept their shape!

These treats are surprisingly easy and super impressive. From idea to oven in only about 45 minutes.

A little sprinkle of powdered sugar on the top and they’re ready to go.

By the way, these little guys travel pretty well, too.
And taste great! Not too sweet, not too soft, not too crunchy, not too messy. Easy to pick up and eat and a good size, too.
Happy Purim!

Roasted Pears with Vanilla Ice Cream (and caramel)

The perfect Valentine’s day dessert! These treats are pretty easy to make as long as you plan ahead and are perfectly portioned.

Roasted vanilla pear, recipe courtesy of the every-wonderful and oh-so-reliable Smitten Kitchen.  I used vanilla bean paste instead of real beans because that’s just what I had on hand.

Cold homemade vanilla bean ice cream on top of a warm pear straight from the oven. 

It stated to melt before I could take good pictures, so I just dug in and enjoyed the beautiful mess. 

And yes, that would be homemade caramel sauce on top. Caramel is my baking nemesis, but Pioneer Woman Ree Drummond’s recipe made it so easy.  The roasted pears also made their own sauce of wonderful pear drippings. I drizzled some of that on too, because I couldn’t find a reason not to.

A candle for ambiance. The guests will just have to wait and drool – I’m busy taking artsy pictures over here!

This last picture was taken before I licked the plate clean. Judge all you’d like – it was absolutely delicious.

Winter Wonderland Gingerbread House

With all the snow from Nemo, I thought it might be a good time to post the snowy gingerbread bread house my mother and I made over the holidays.

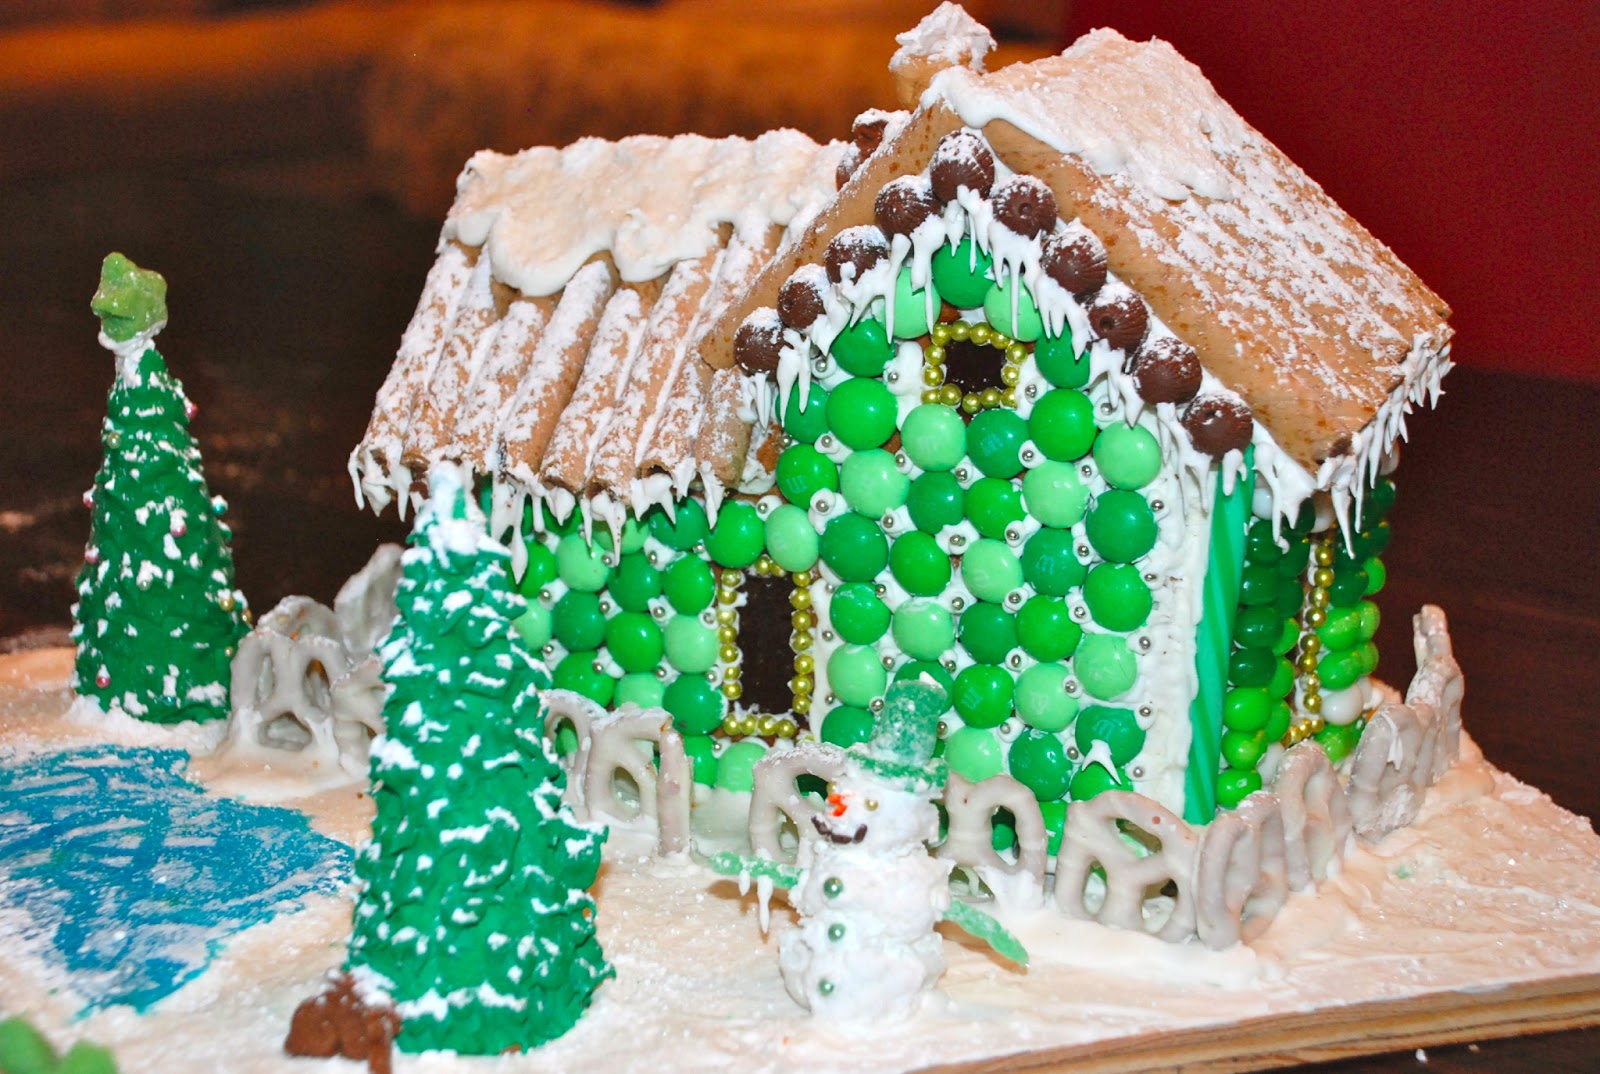
For the first time, we made the gingerbread house from scratch and cut out the pieces! And of coruse, if I’m going to go through the trouble of making the gingerbread and cutting the pieces, it’s going to be more than just a little square house. Below is a front view of our Victorian-style gingerbread cottage.  

We used Sweetopia’s simple, delicious, and sturdy gingerbread recipe and scaled up this amazing pattern by 100%

Here’s a closeup of the front. The Roof is made of those delicious Pirouette Chocolate cookies (so hard to keep from eating them!) And the door is marshmallow. The mailbox is a white chocolate coated wafer cookie on a green candy stick and the little gold balls are edible sugar dragees.

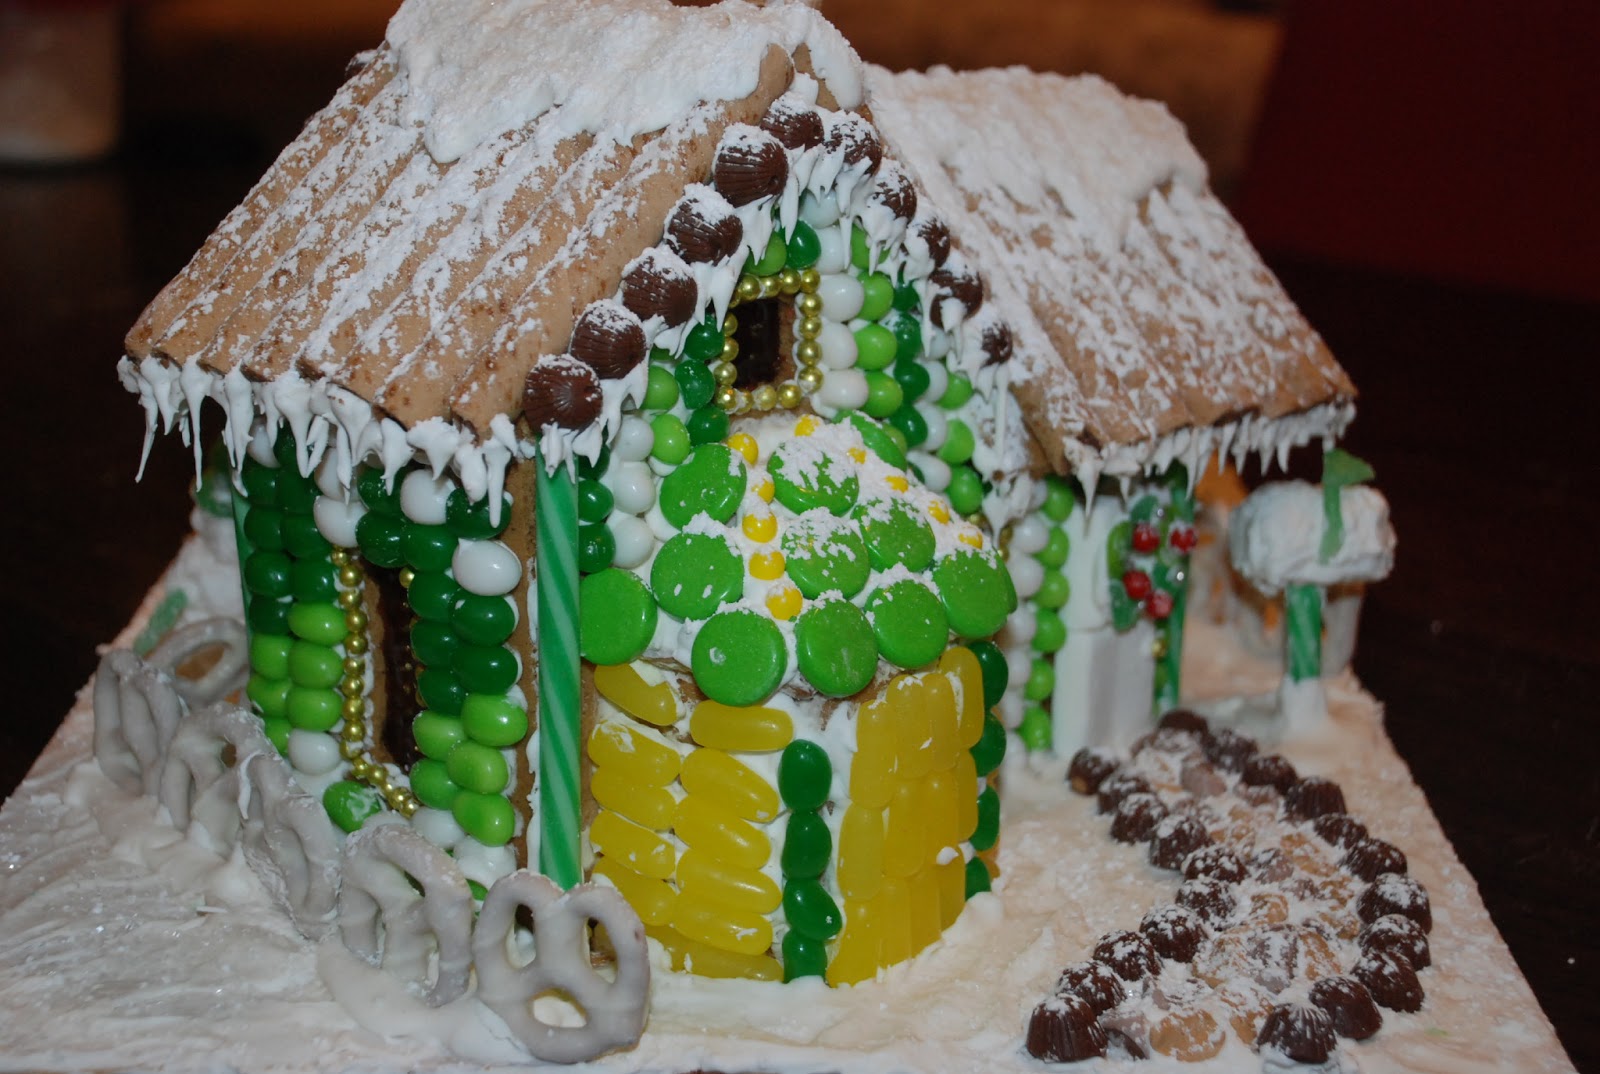
And here’s the back view. Little baby peanut butter cups as decoration along the roof, a marshmallow chimny, and green m&m’s (the mint flavor) along the back. Plus dragees for a little more sparkle  

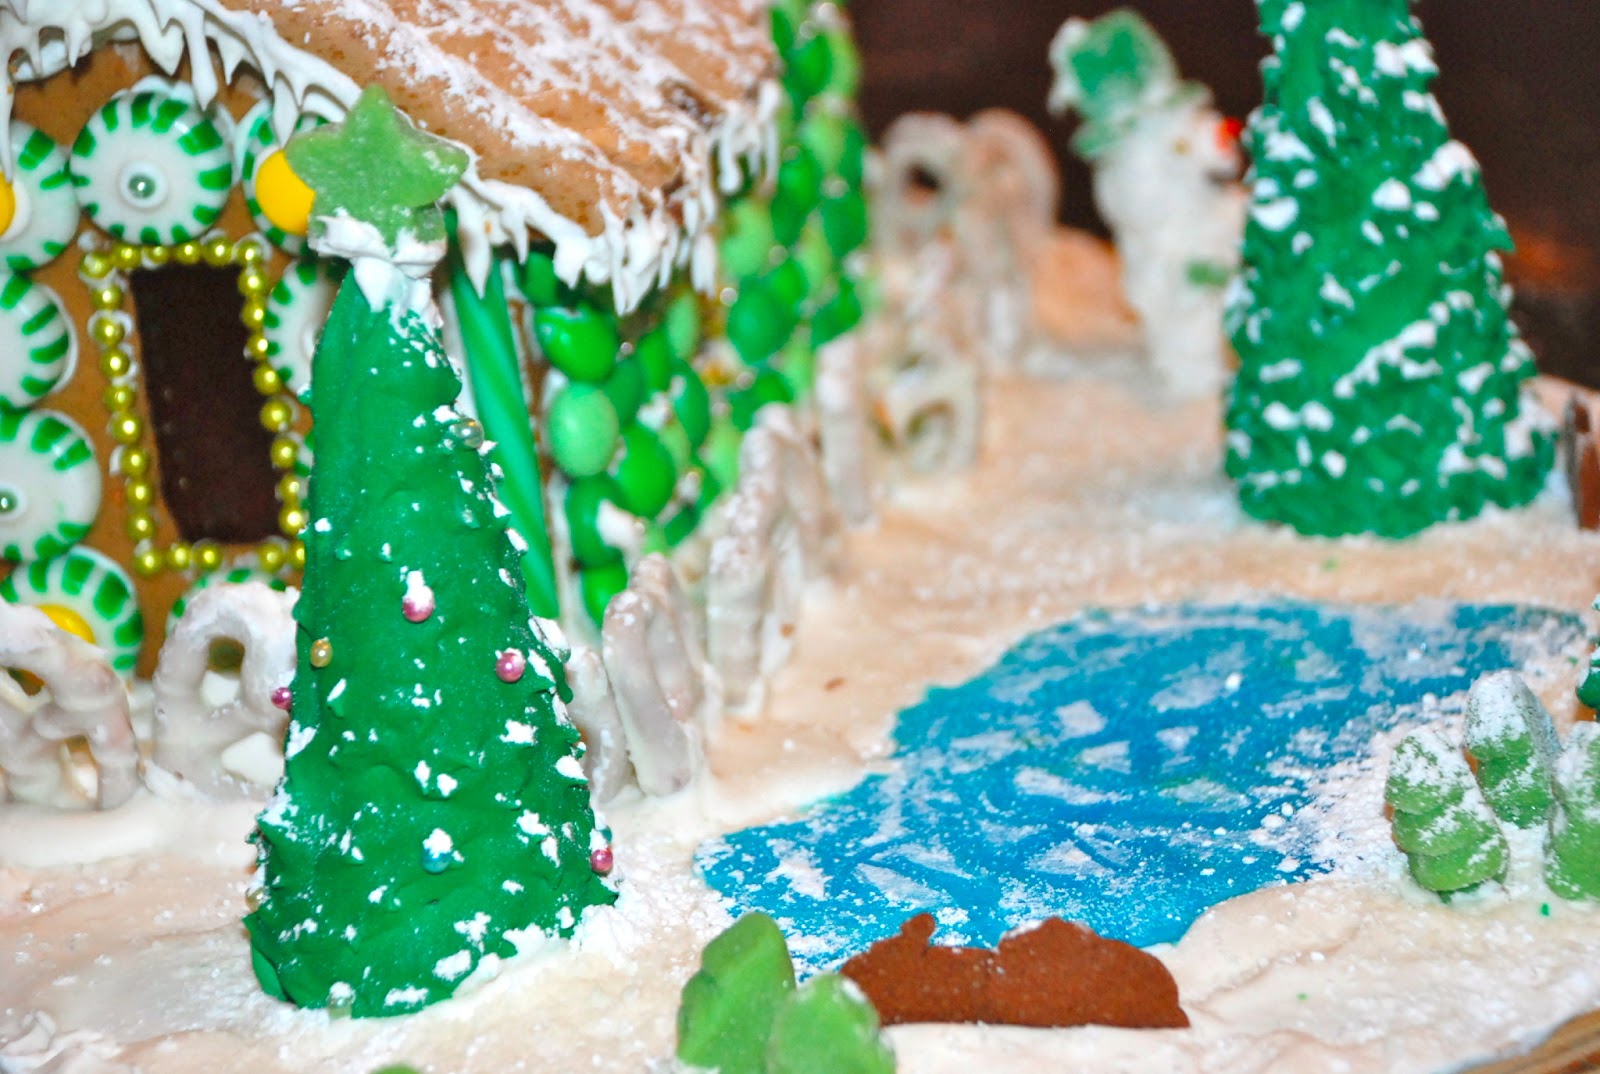
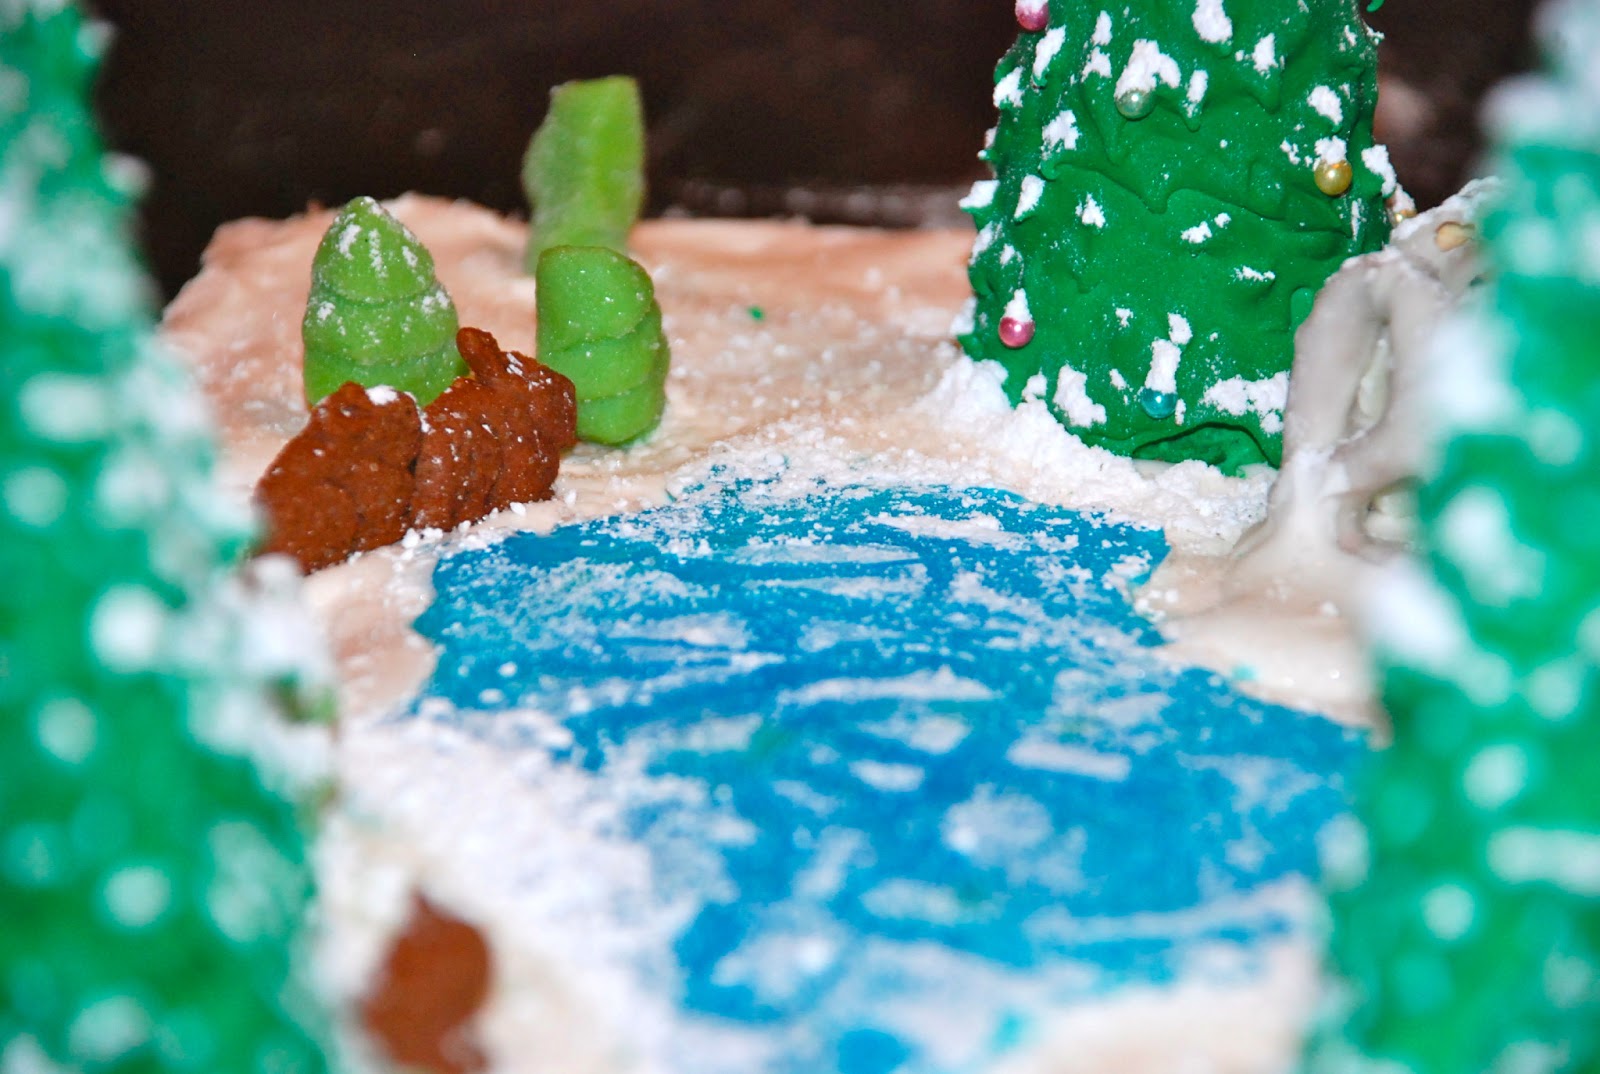
Ice cream cone trees (take a pointy cone, turn it over, and pipe green textured frosting on) and a pond in the back. We found these cute gummy candies as decoration and used Amy’s graham cracker bunnies to give the scene some life.  Can you find the set of bunnies who are well, particularly loving?

The pond is jolly rancher – we crushed them up, put them in a pile/circle on tinfoil, and watched the like a hawk as they were melting in the oven. Once they cooled, it was just a matter of peeling off the pond and plopping it into the board.

The ice-skating marks were made by running a wet paintbrush over the pond after it had been (accidentally over-dusted) in powdered sugar.

No winter gingerbread scene would be complete without a snowman. See the little pretzel fence in the back ground? That fence kept falling over, but we finally got it to almost stay up…

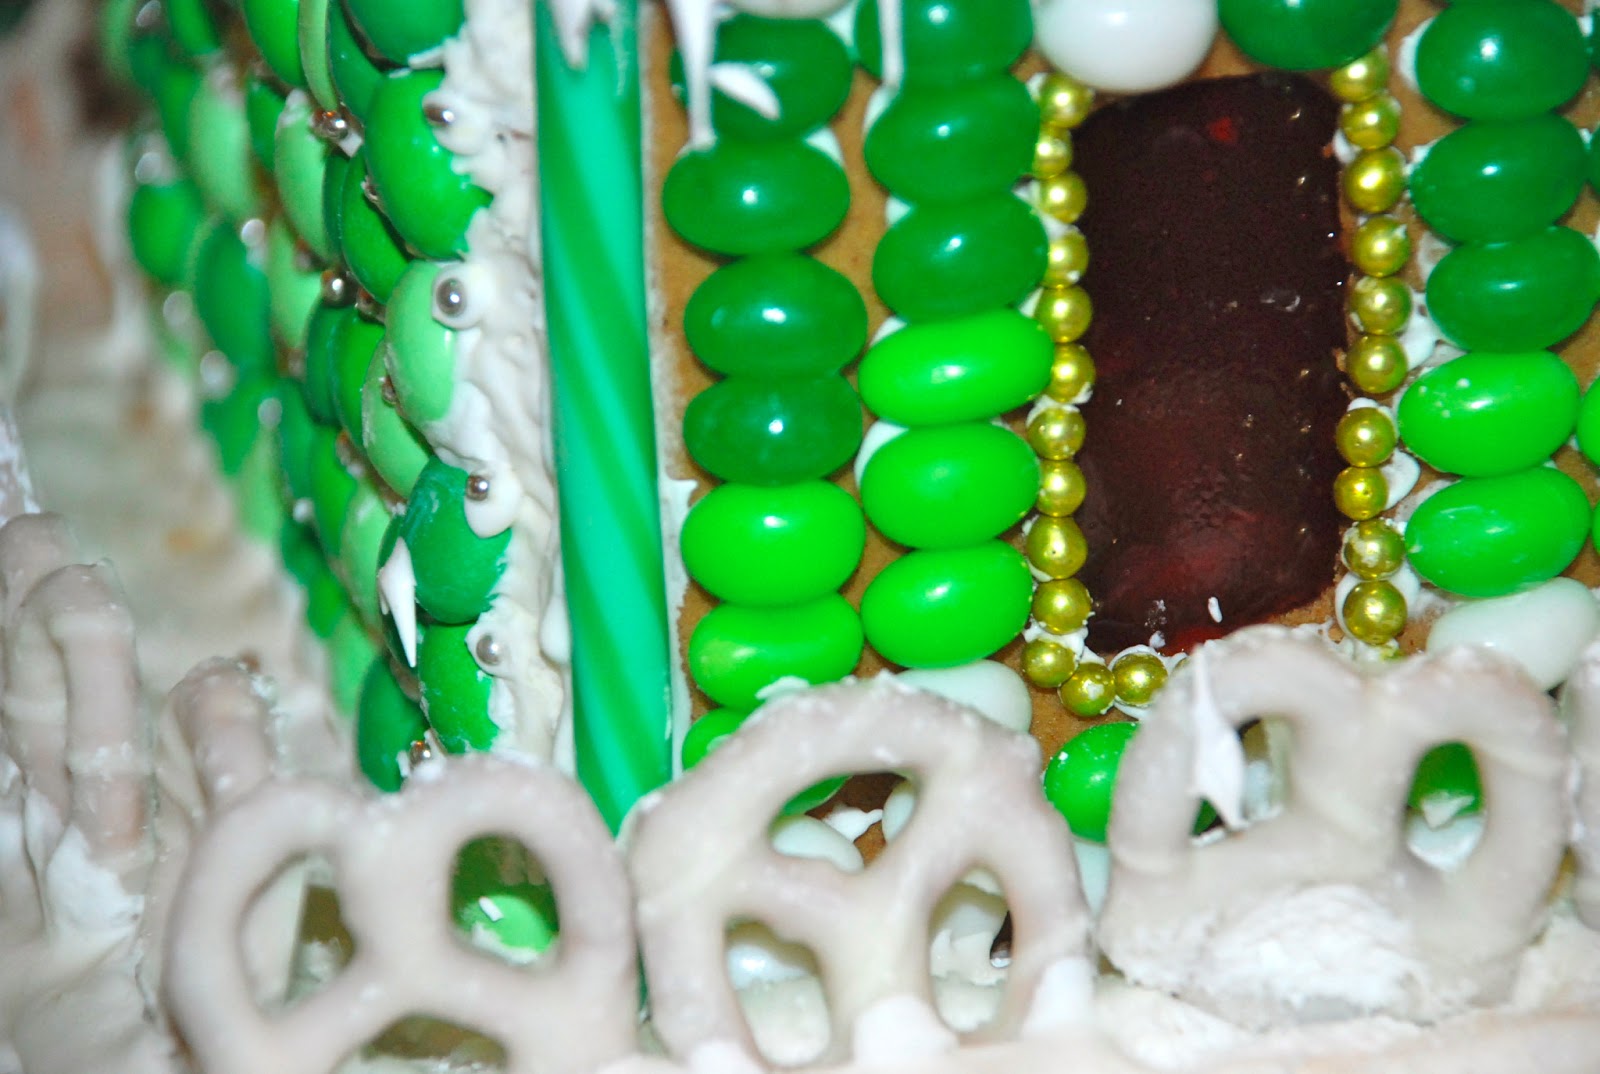
Jelly beans along the side.  We bought the candy a few days after Christmas when it was all on sale!

And the whole back view. The snow on top is powdered sugar and, on top of the roof, roral icing smeared on thick.

The front bay is lined with Mike & Ike’s as well as green chewy disks. Not sure what brand they were, but they were definitely delicious. The walkway is made of mini peanut butter cups and cut-up cinnamon and chocolate marshmallows. I didn’t even know they made marshmallows in those flavors and sold them at the supermarket; must have been a seasonal thing.


The windows, by the way, were made using that same crushed jolly ranchers method. I cut the holes for the windows before baking and cleaned them up more right after the gingerbread came out of the oven. Once the giant cookies has cooled, I sprinkles the jolly rancher pieces in the holes and popped them back in the over for a bit until they had melted. It’s hard to see because there’s no light in the house,but the effect was really cool and looked like beautiful stained glass. 

 
And the front view once more.  With every year comes a new gingerbread house. I’d better start thinking about how to top this one!

Under The Sea Cookies 2.0

More under the sea cookies! The post on the first batch has some step-by-step pictures, but my lighting wasn’t good enough for that this time around.

These were made for a birthday party and send all the way to Louisiana. Purple/team sea horses and starfish!

My favorite part about these cookies was the texture from all the little dots on the starfish – it really makes them pop!

See the light purple on the seahorse belly and the little detail on the back fin? I tried to make these really special!

I tried to get some good detail without making them look to busy – the white to brighten up the eye was exactly what I was going for.

I wasn’t exactly sure what shades the customer needed, so I made sure to include a few and I think they turned out quite well.

Definitely an improvement on the first batch I made because of the increased detail and realism. Plus, I like how the colors fit together.

Gingerbread Friends

Gingerbread friends! Little gingerbread men and women and girls and boys. And some Christmas trees at the end of the post.


This little gingerbread lady is all bundled up for the winter.

By the way, no, those aren’t headphones on the gingerbread man, they’re earmuffs.

See the happy ice skating couple?

And, of course, the classic simple gingerbread people.

Messier piping than I’d like, but they’re still cute and I was so proud of it.  I made them a year ago!

Here you can see the criss-cross piping details on this skirt.

And some Chanukkah friendly gingerbread people. Winter blue and white colors.

And with the scraps I figured I’d have fun making some odds and ends. Christmas trees and stars.

I finally got a chance to use my colorful dragees. Sweet and simple.

Butterfly sugar cookie, summer theme picnic set

Picnic Sugar Cookies

I made these super cute picnic themed cookies for a staff appreciation lunch my mom organized at my sister’s school.

Unfortunately, I wrapped them up before getting good pictures, so you’ll just have to believe me when I tell you that they were super cute.


Happy sun cookies with sunglasses brightened up the basket.

Because I used a marbling technique, every butterfly was different.

I love the watermelon cookies! The seeds just made me “awww!”

The dragonflies were decorated with silver, green, and blue dragees to make them magical.

The ladybugs were stuffed into every corner of the basket and each one had a different number of spots.

I tried to get a closeup of the royal icing marbling technique here. Basically, you pipe out lines of different colored icing next to each other and run a toothpick through them before they set. It’s a very fun and forgiving technique.

I insisted on making the watermelon slices have bites taken out of them, and I’m glad I did!

The baskets were arranged with tissue paper and a few other picnic items (sunglasses and sunscreen) were tossed in.

Here they are on the tables with sunflowers!

They were a big hit and I love how perfectly they fit the theme.

Mini S’mores Cupcakes

Mini s’mores cupcakes. They taste just like the real thing, but with more marshmallow and chocolate.

These baby cupcakes have a sweet graham cracker bottom crust.

The cake is chocolate with graham cracker pieces and more graham cracker crumble on top.

The topping is marshmallow frosting, which I then gleefully attacked with a blowtorch.

So adorable and so easy to eat. Everyone had a few because they’re so hard to resist! My favorite thing about these cupcakes is that they don’t have to be perfect. The marshmallow frosting droops a little and sometimes they’re torched unevenly, but I think that just adds to their charm.

Don’t you agree?

Chocolate Dipped Strawberry Cheesecake Macarons

I made some more french macarons!

These little guys are strawberry flavored. I sliced strawberries thinly, stuck them into the oven on low for a few hours until they were dried out, then ground them up and put them in the batter. Pretty light flavor, but still tasty.

Some have cheesecake filling and some have strawberry-chocolate ganache.

I accidentally over baked most of these, so I brushed them with pink luster dust to disguise the dark color! Oops!

Still quite tasty, though, especially dipped in chocolate.

chocolate+dipped+straewbery+cheesecake