Under The Sea Cookies 2.0

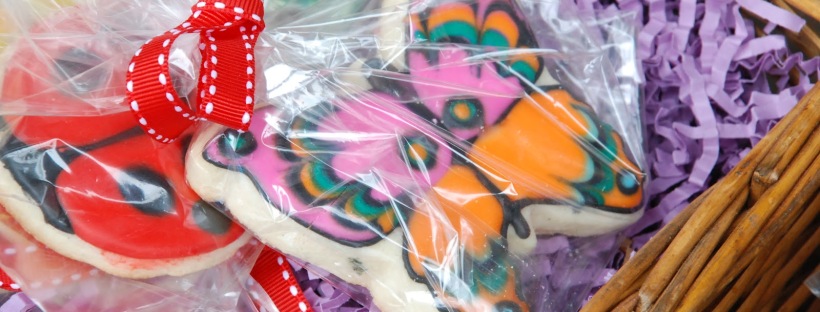
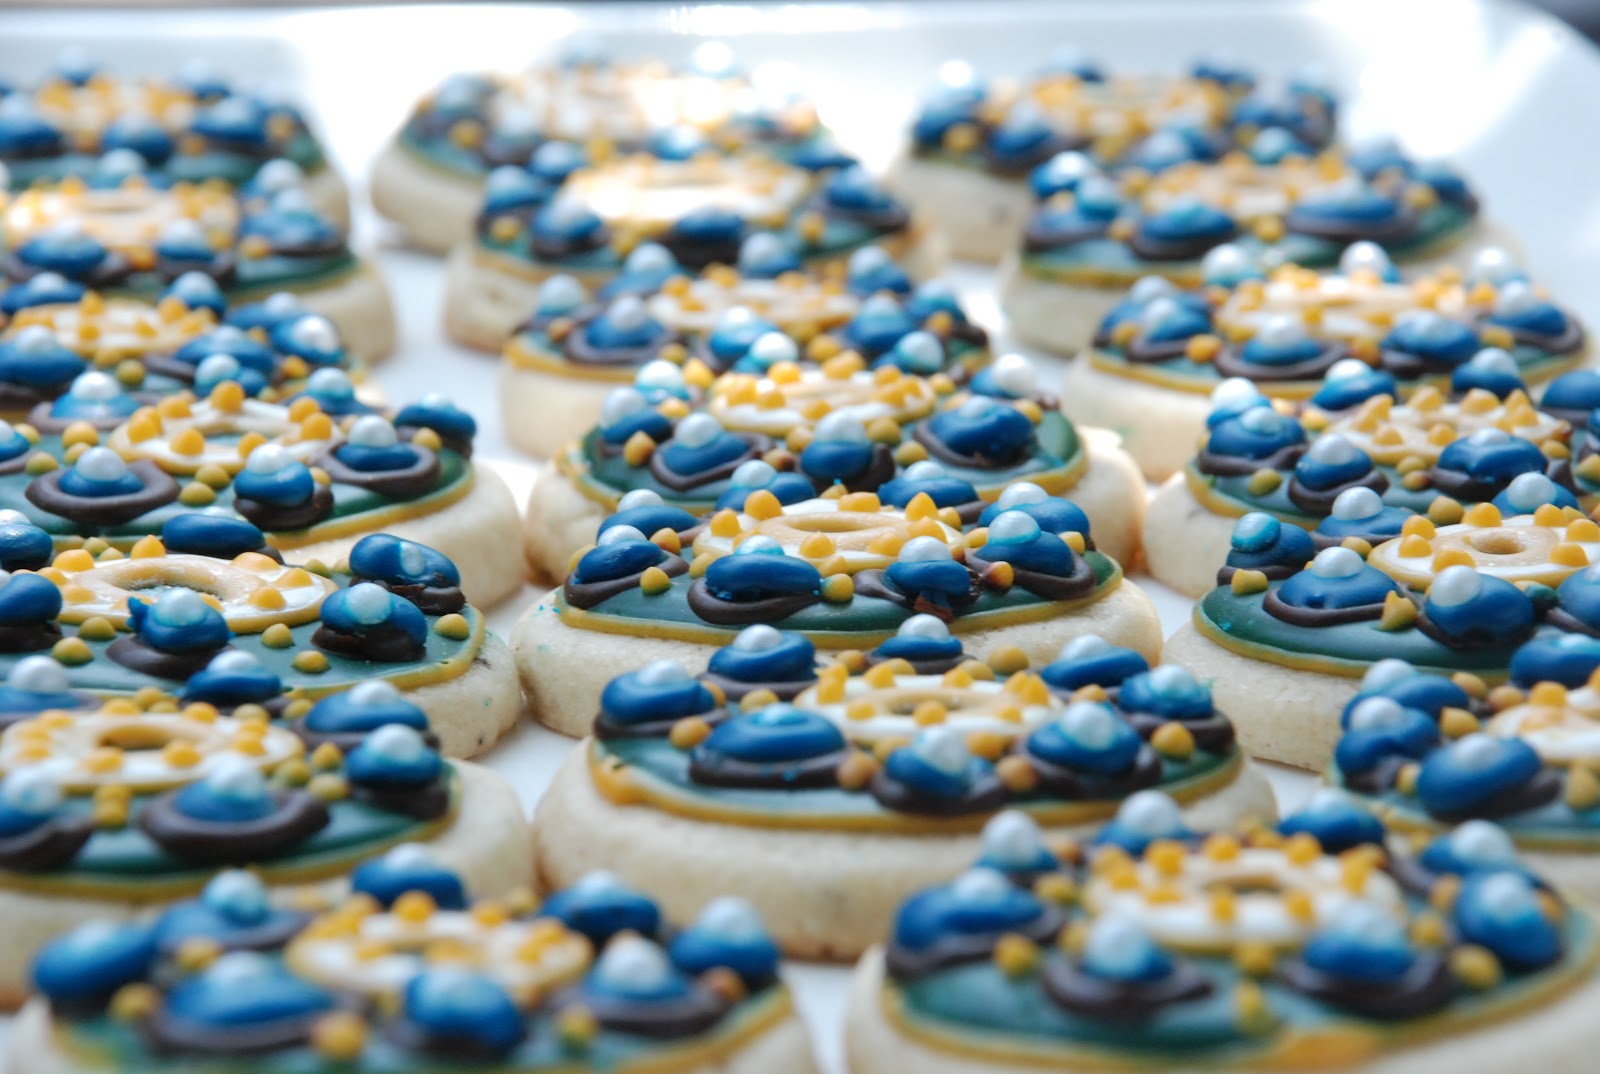
More under the sea cookies! The post on the first batch has some step-by-step pictures, but my lighting wasn’t good enough for that this time around.

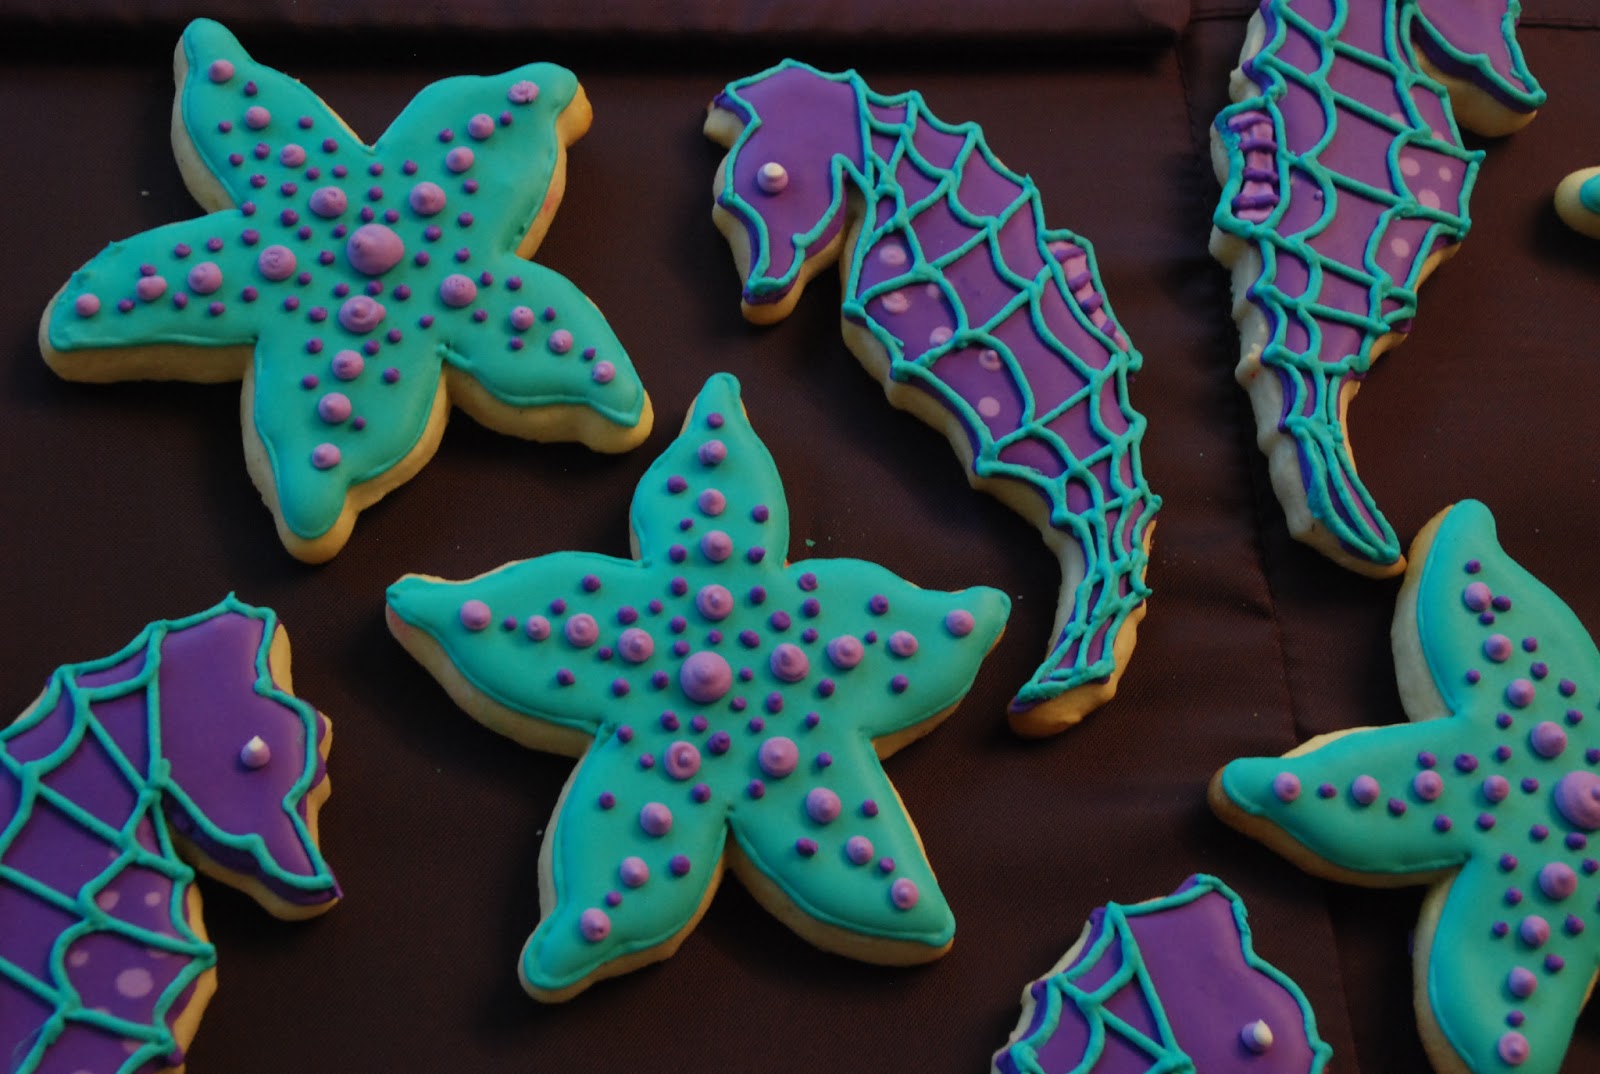
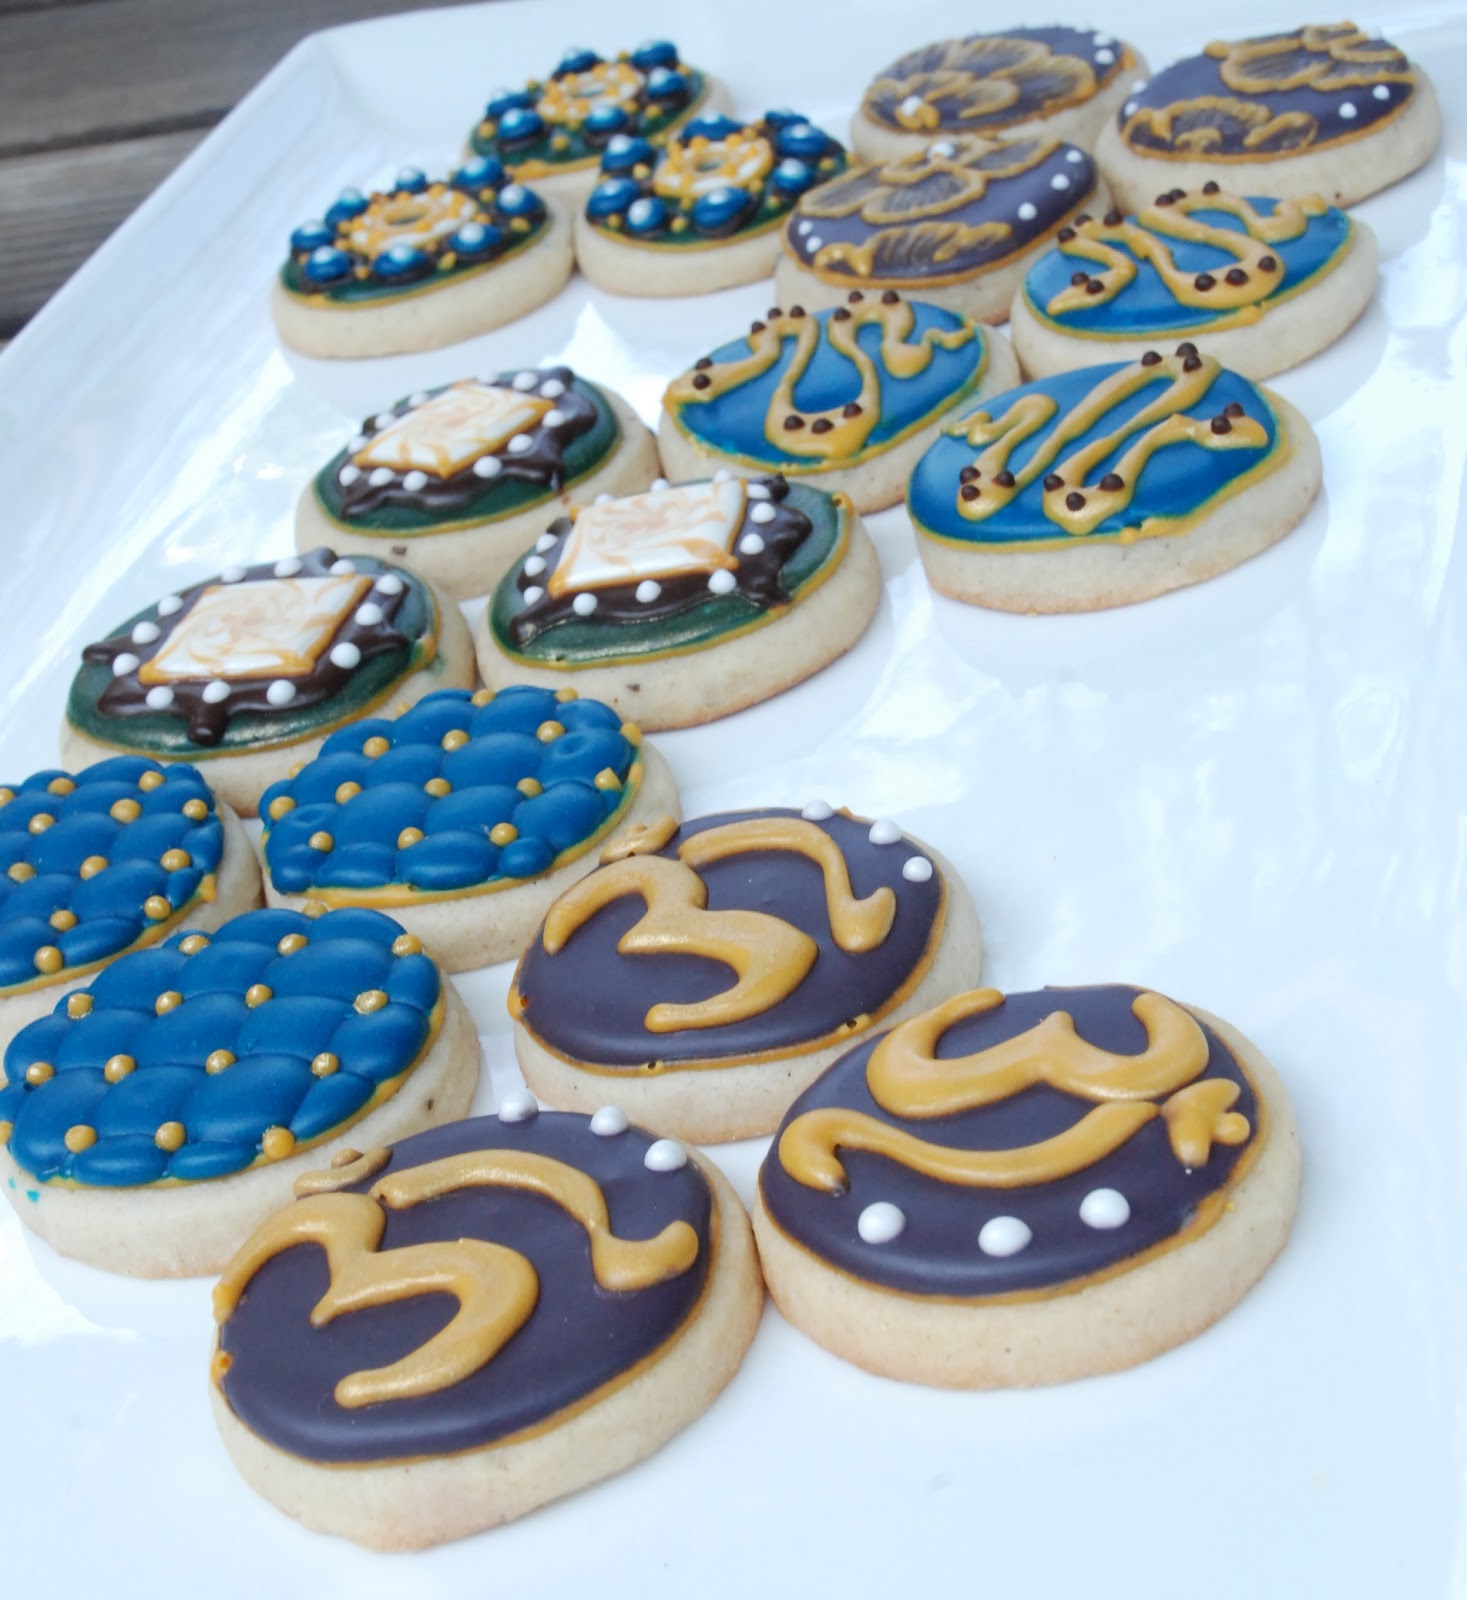
These were made for a birthday party and send all the way to Louisiana. Purple/team sea horses and starfish!

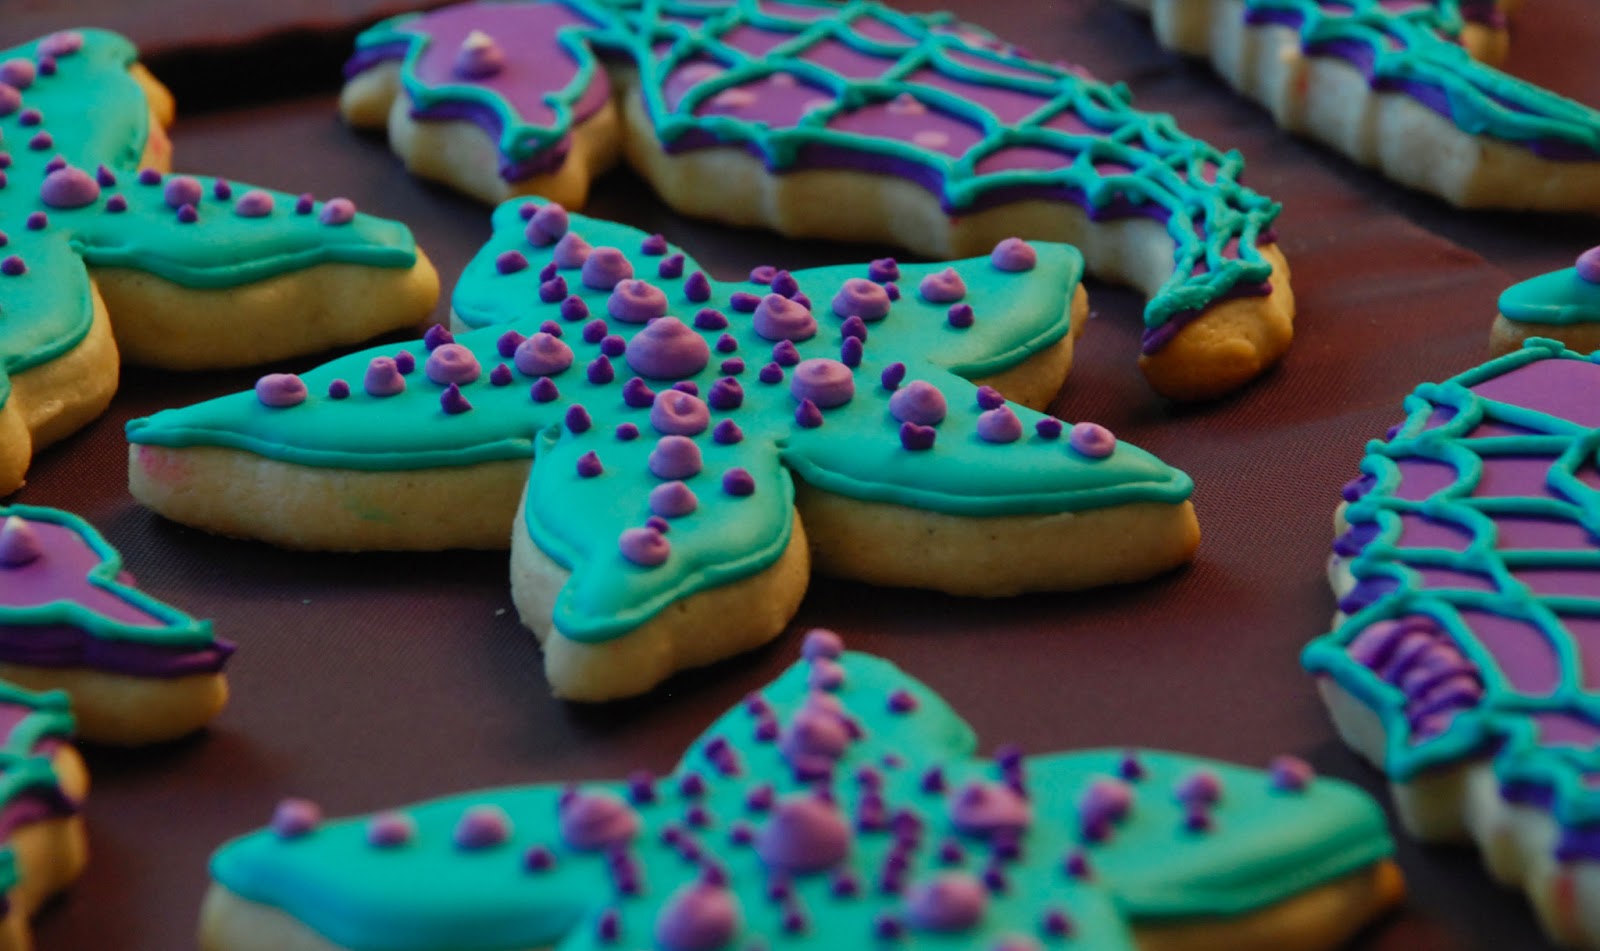
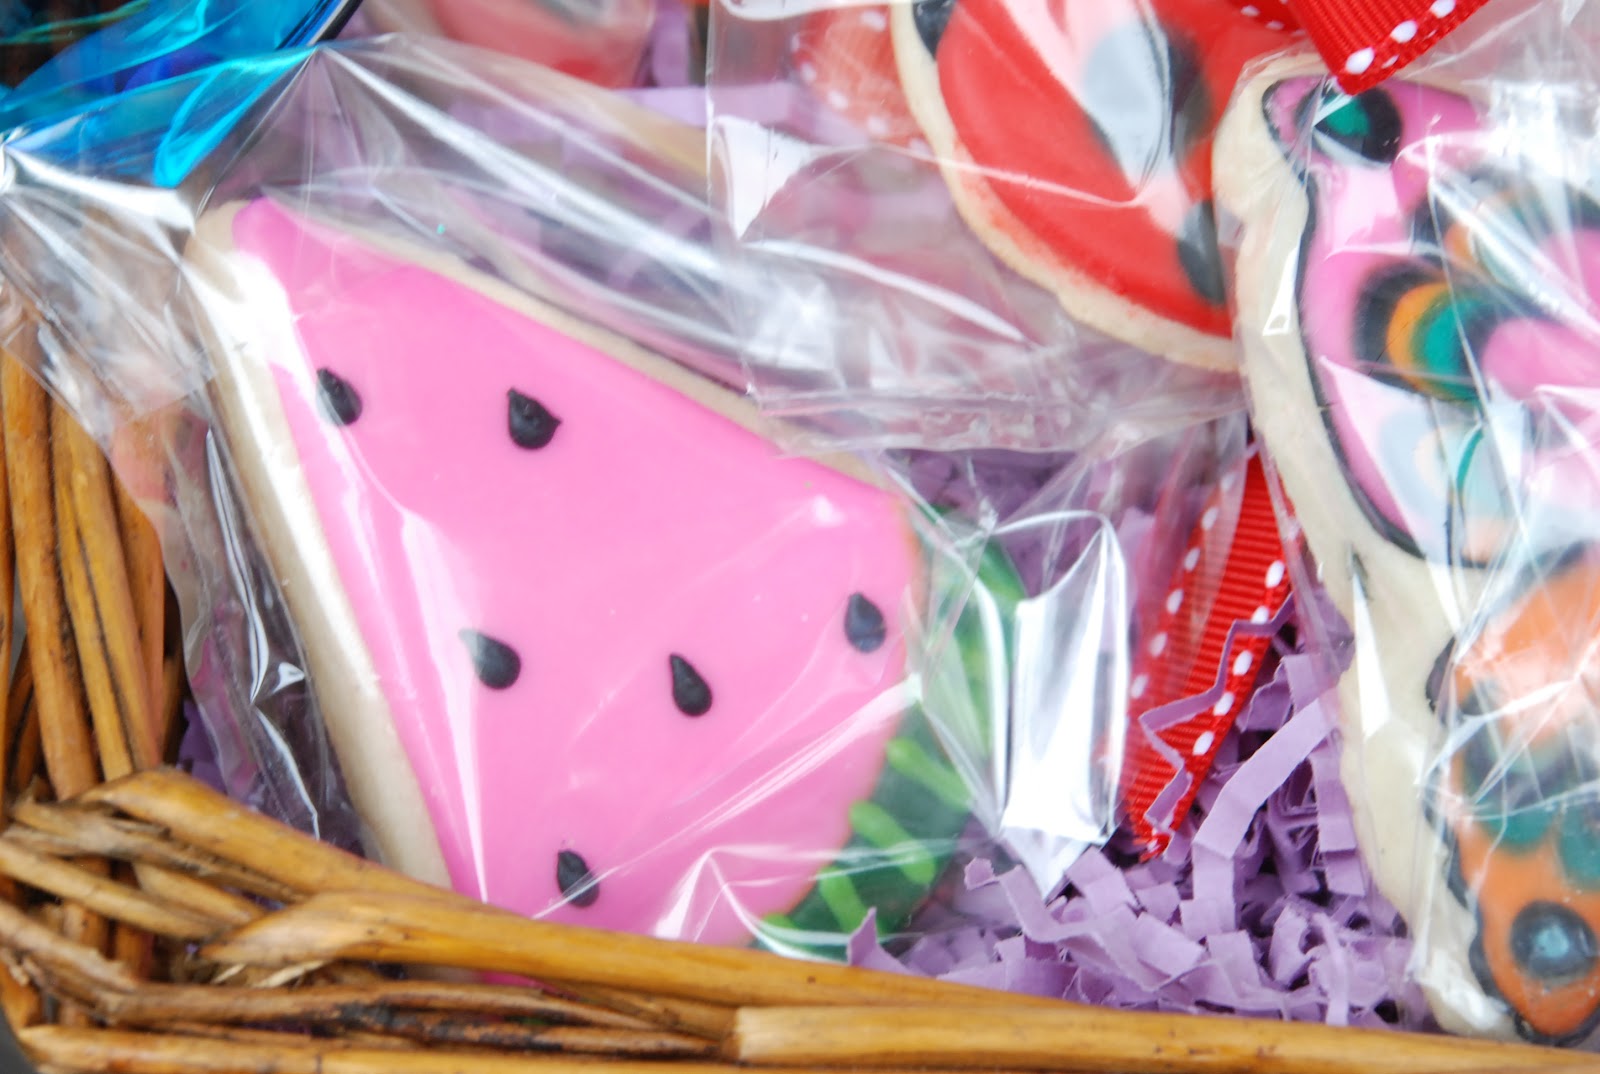
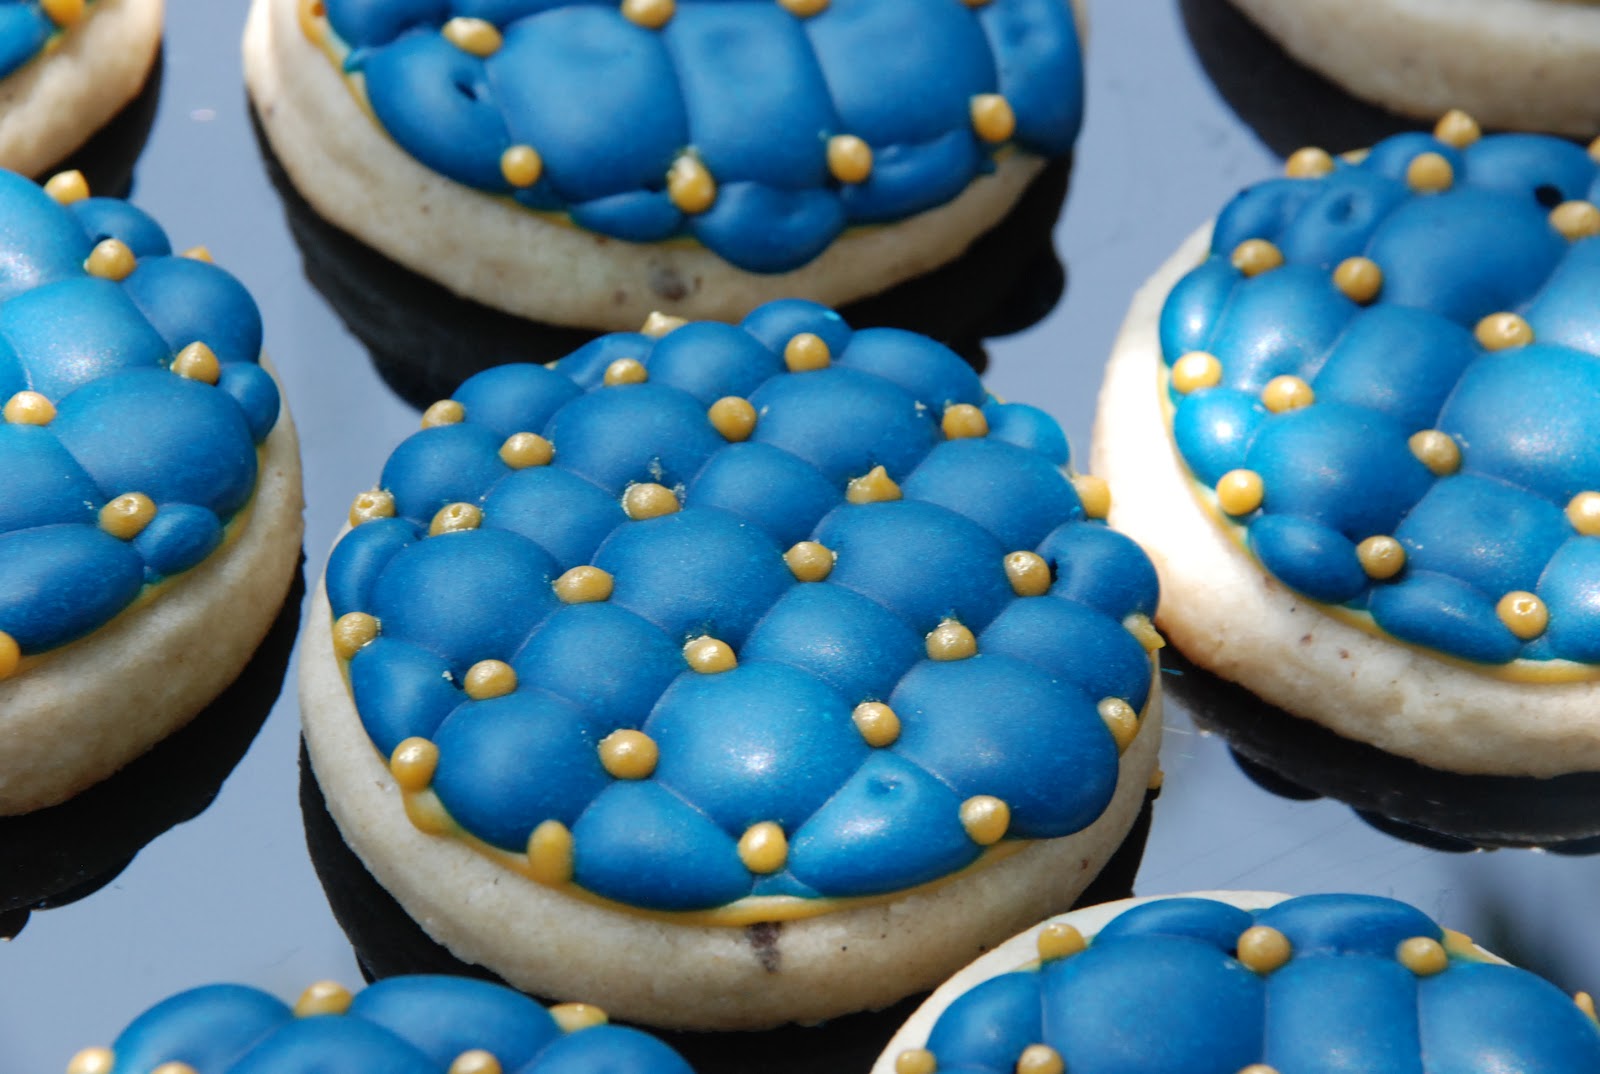
My favorite part about these cookies was the texture from all the little dots on the starfish – it really makes them pop!

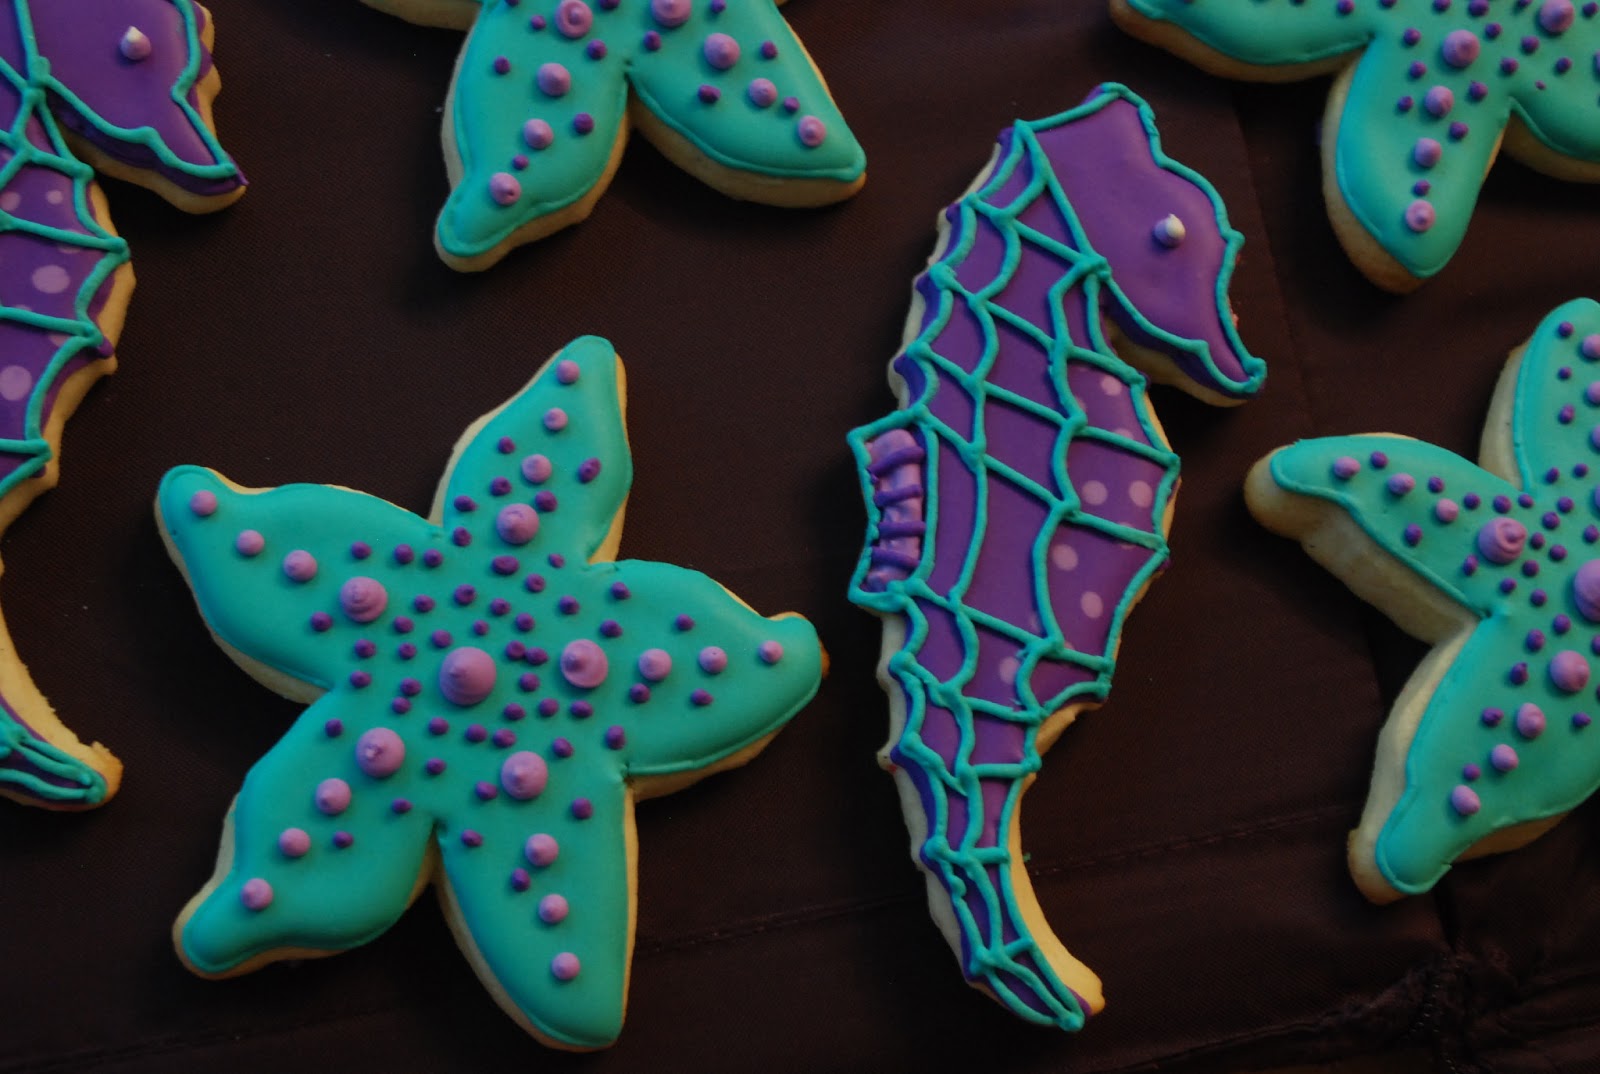
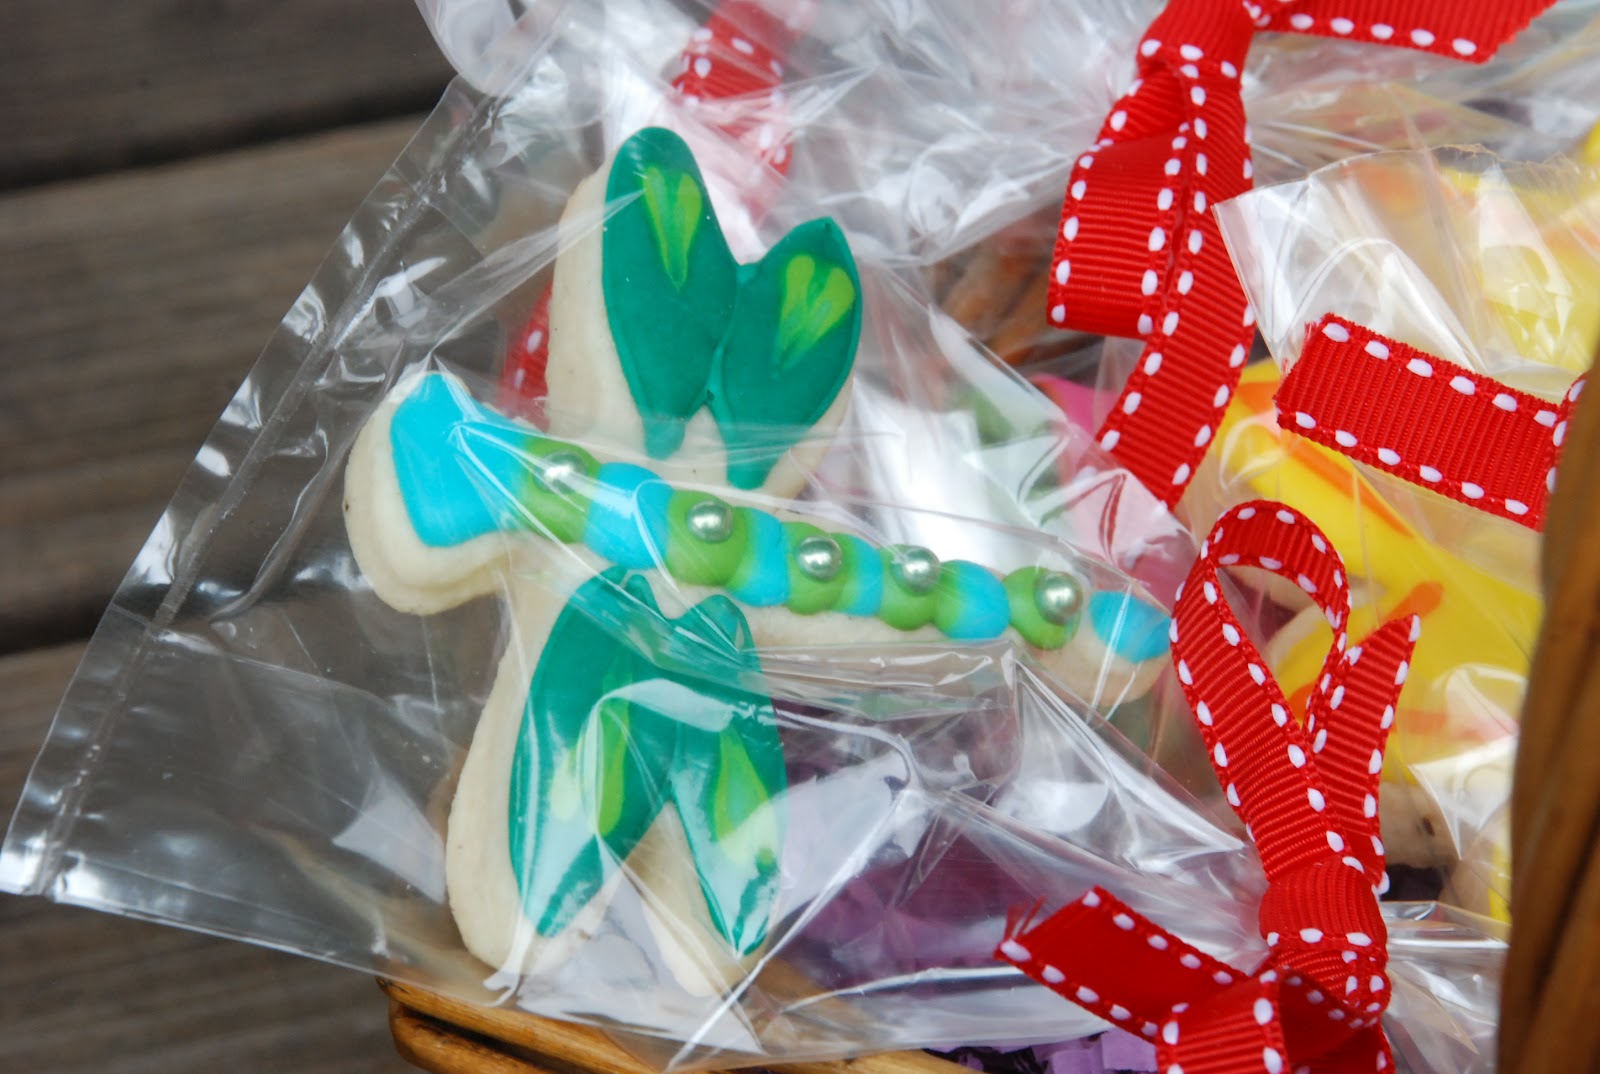
See the light purple on the seahorse belly and the little detail on the back fin? I tried to make these really special!

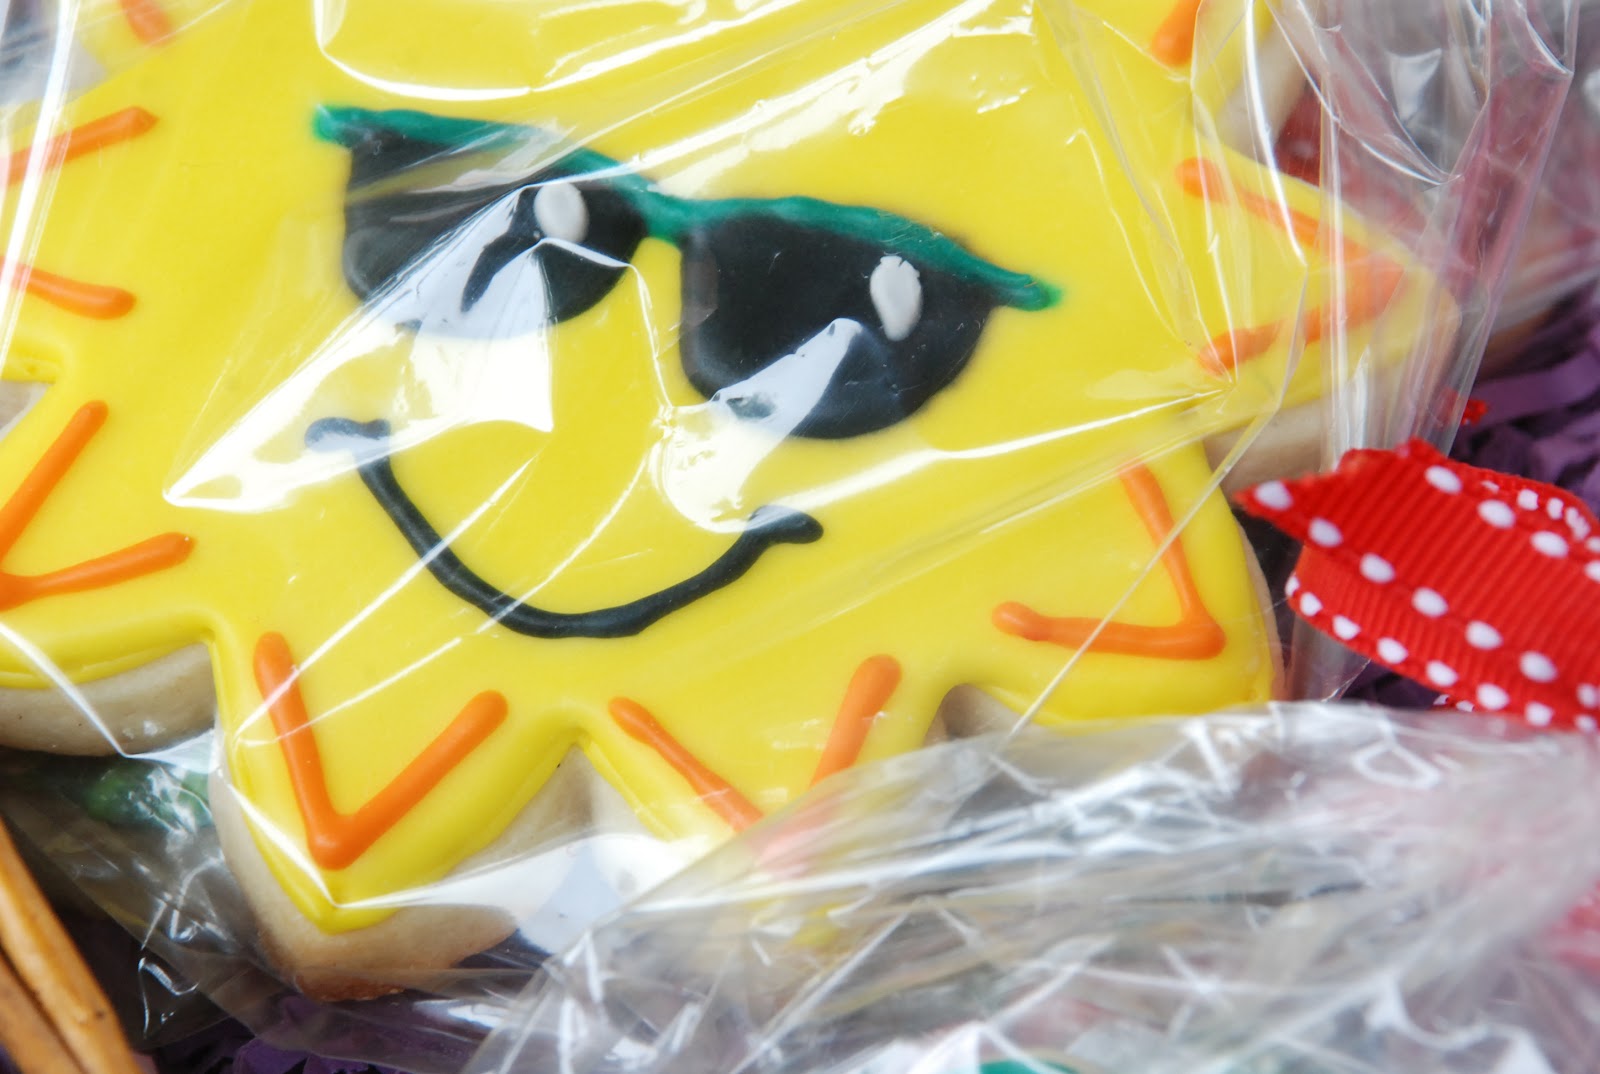
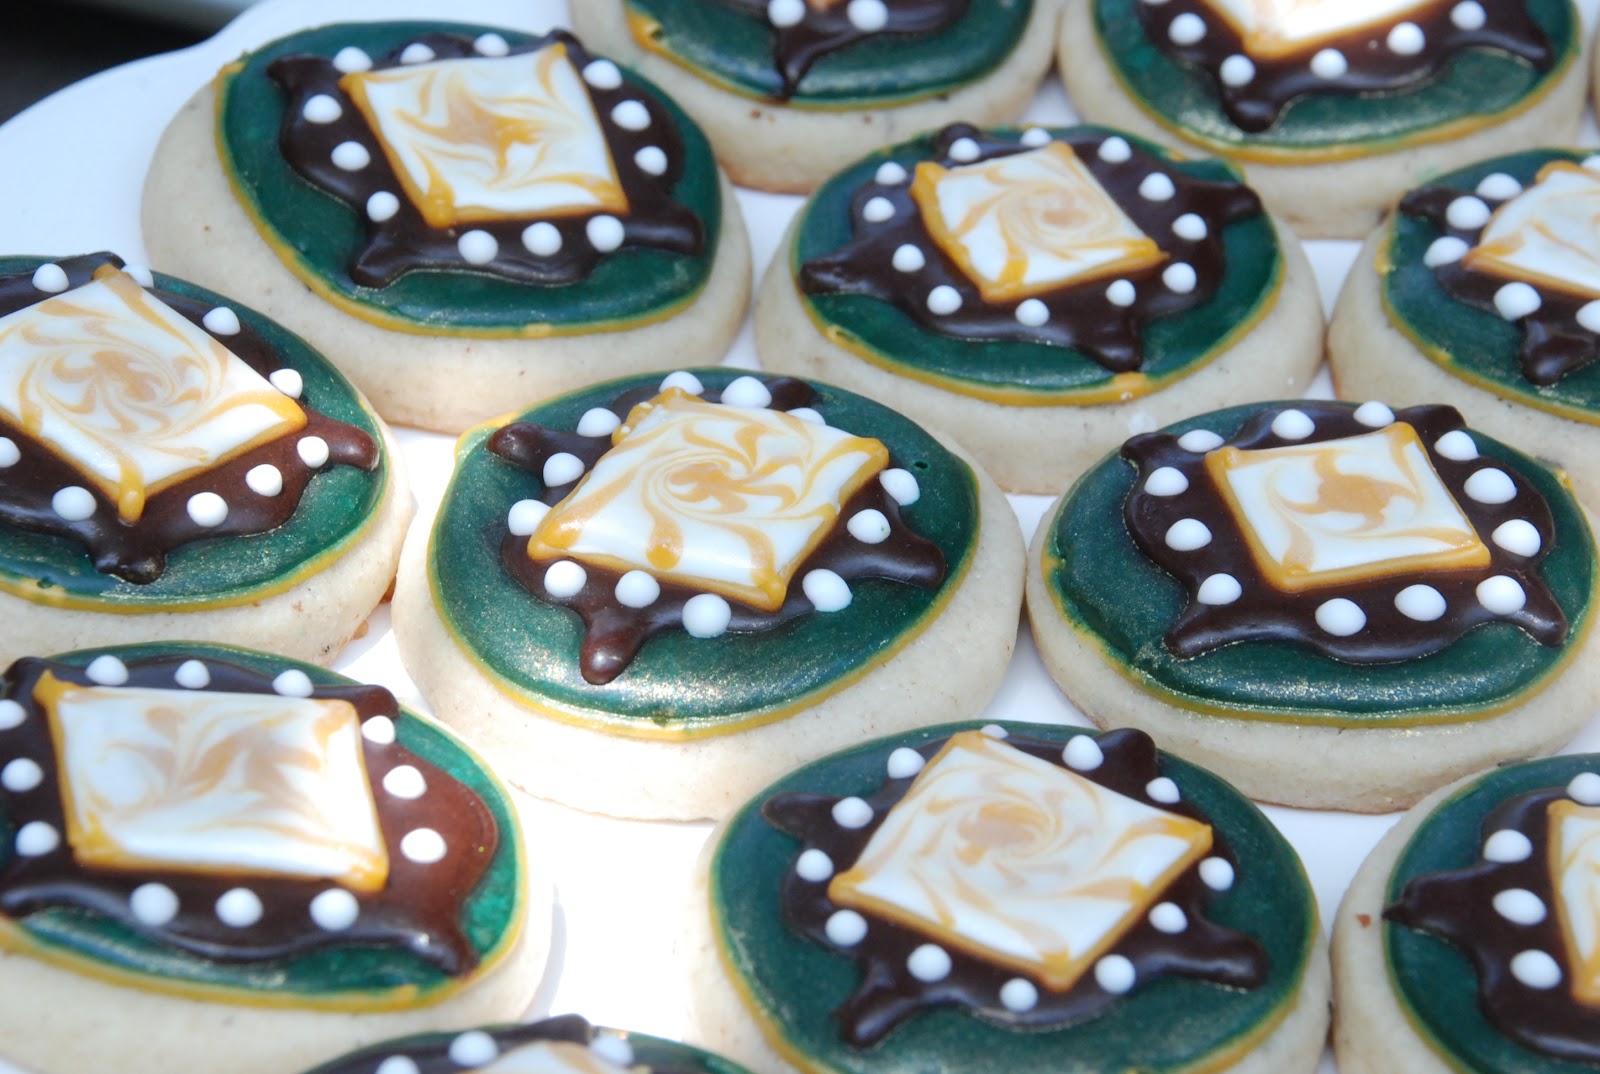
I tried to get some good detail without making them look to busy – the white to brighten up the eye was exactly what I was going for.

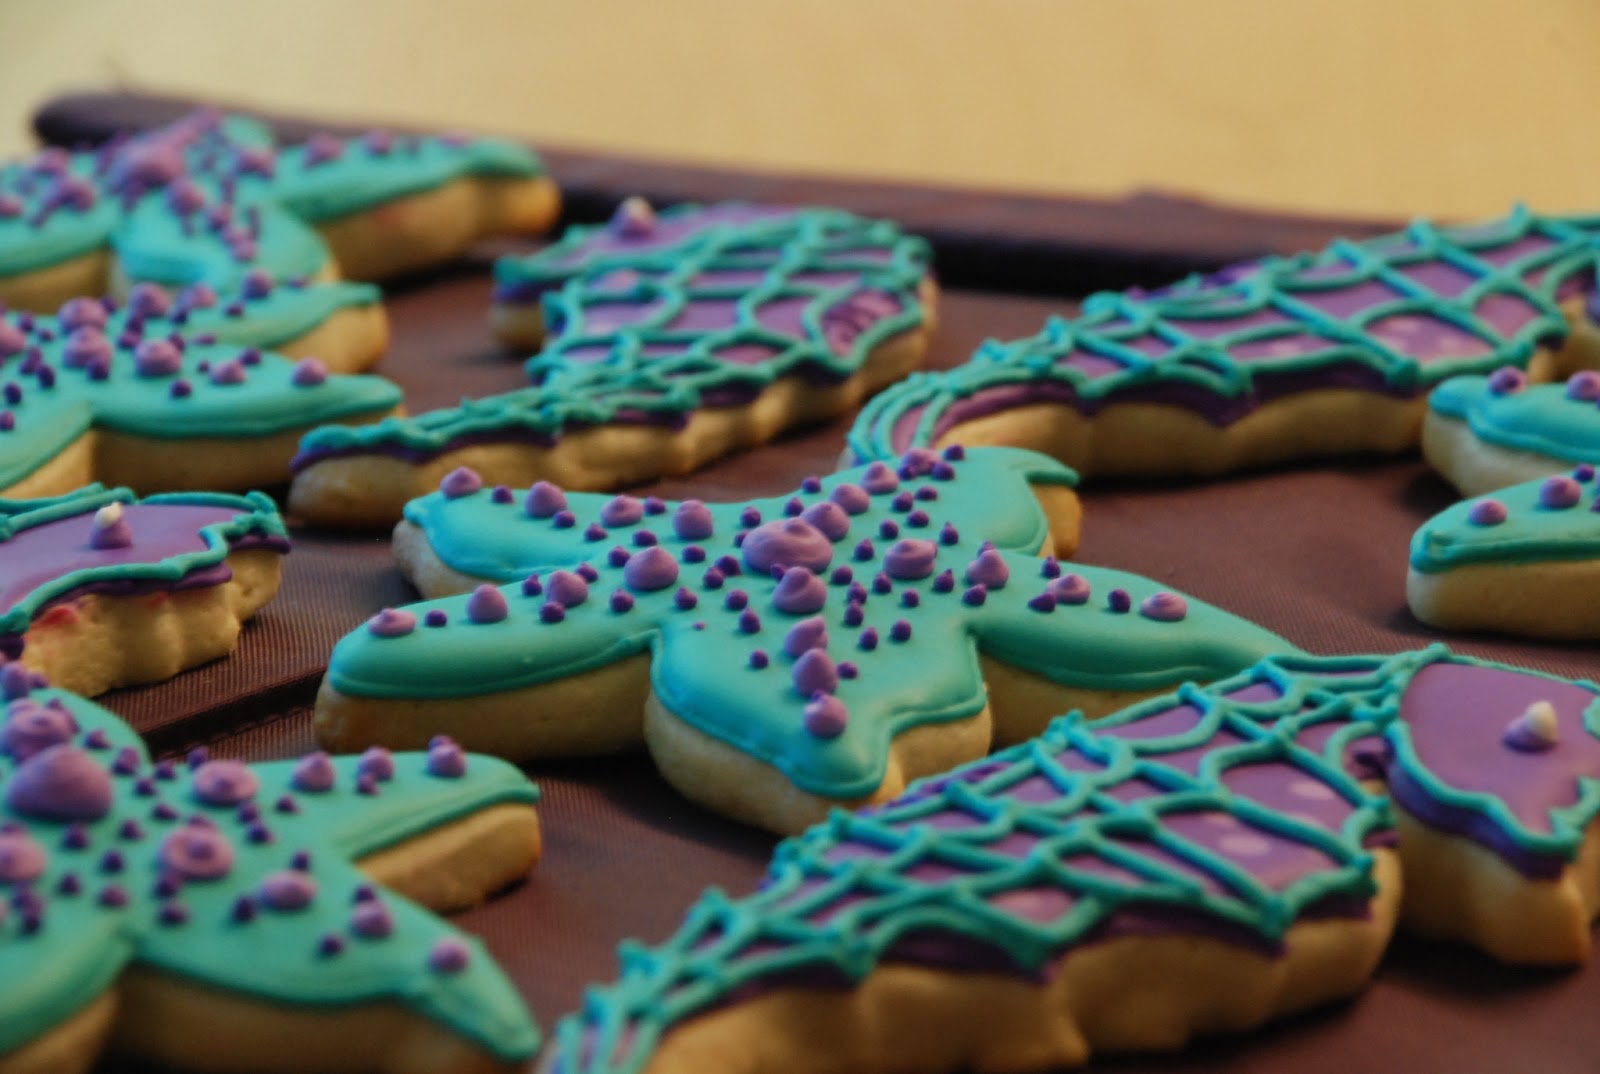
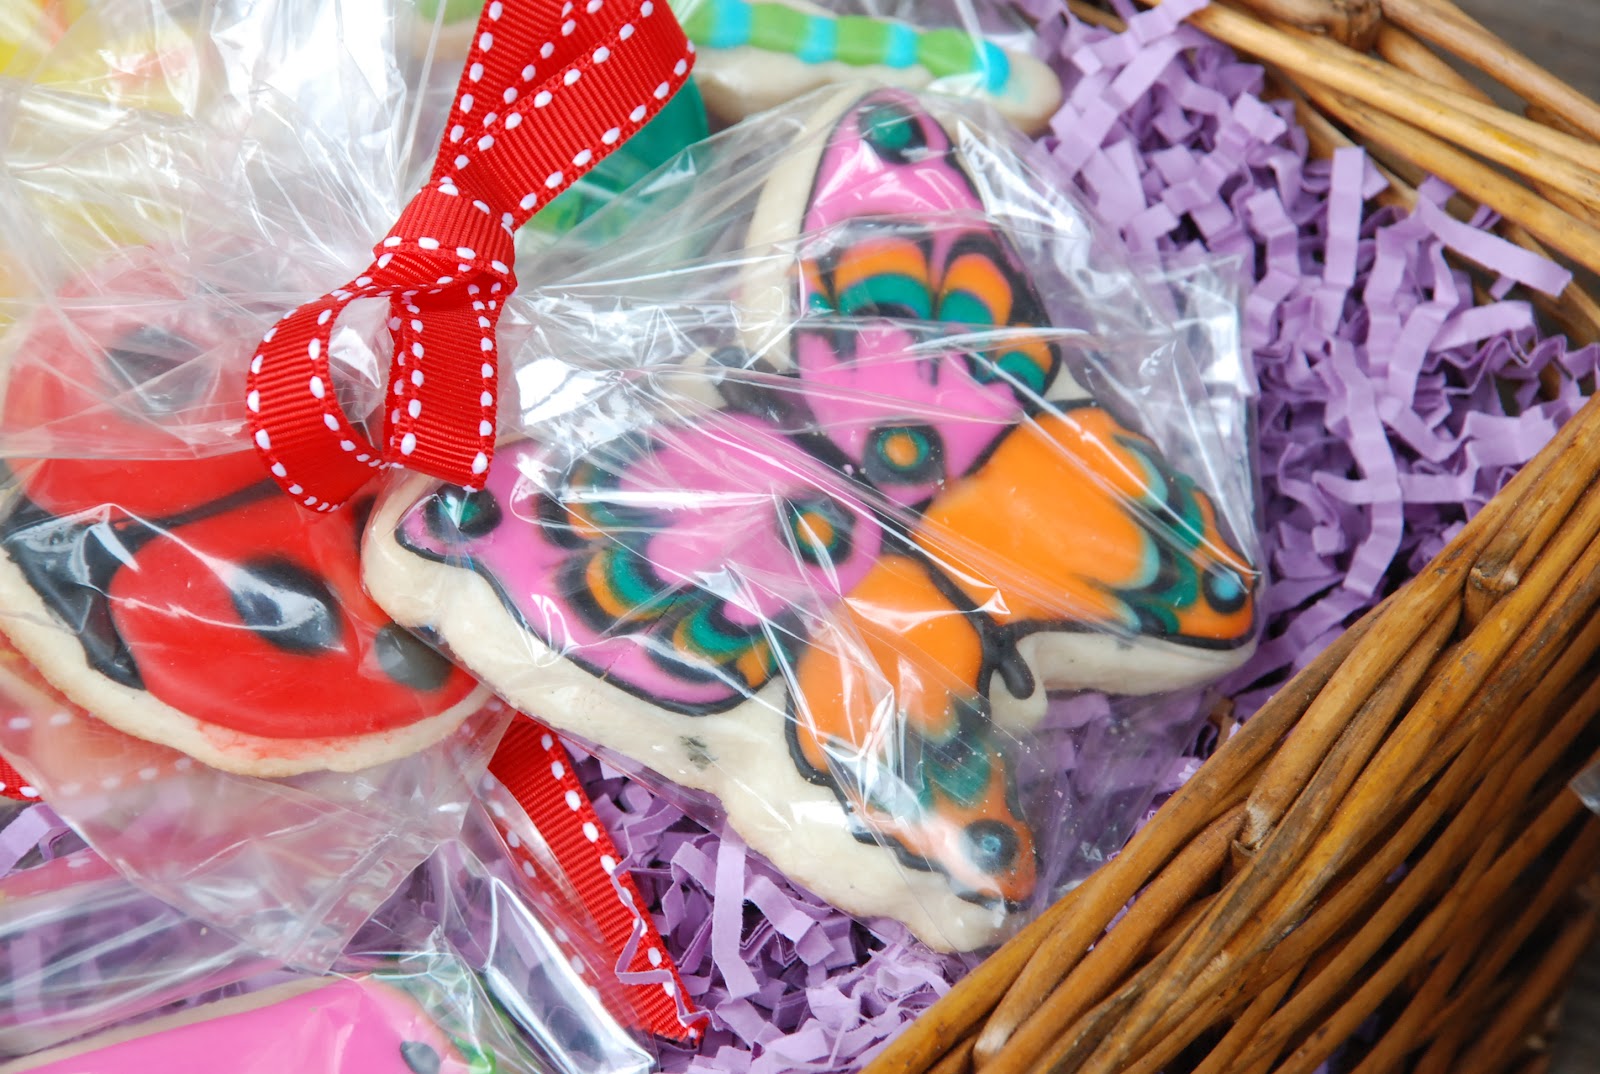
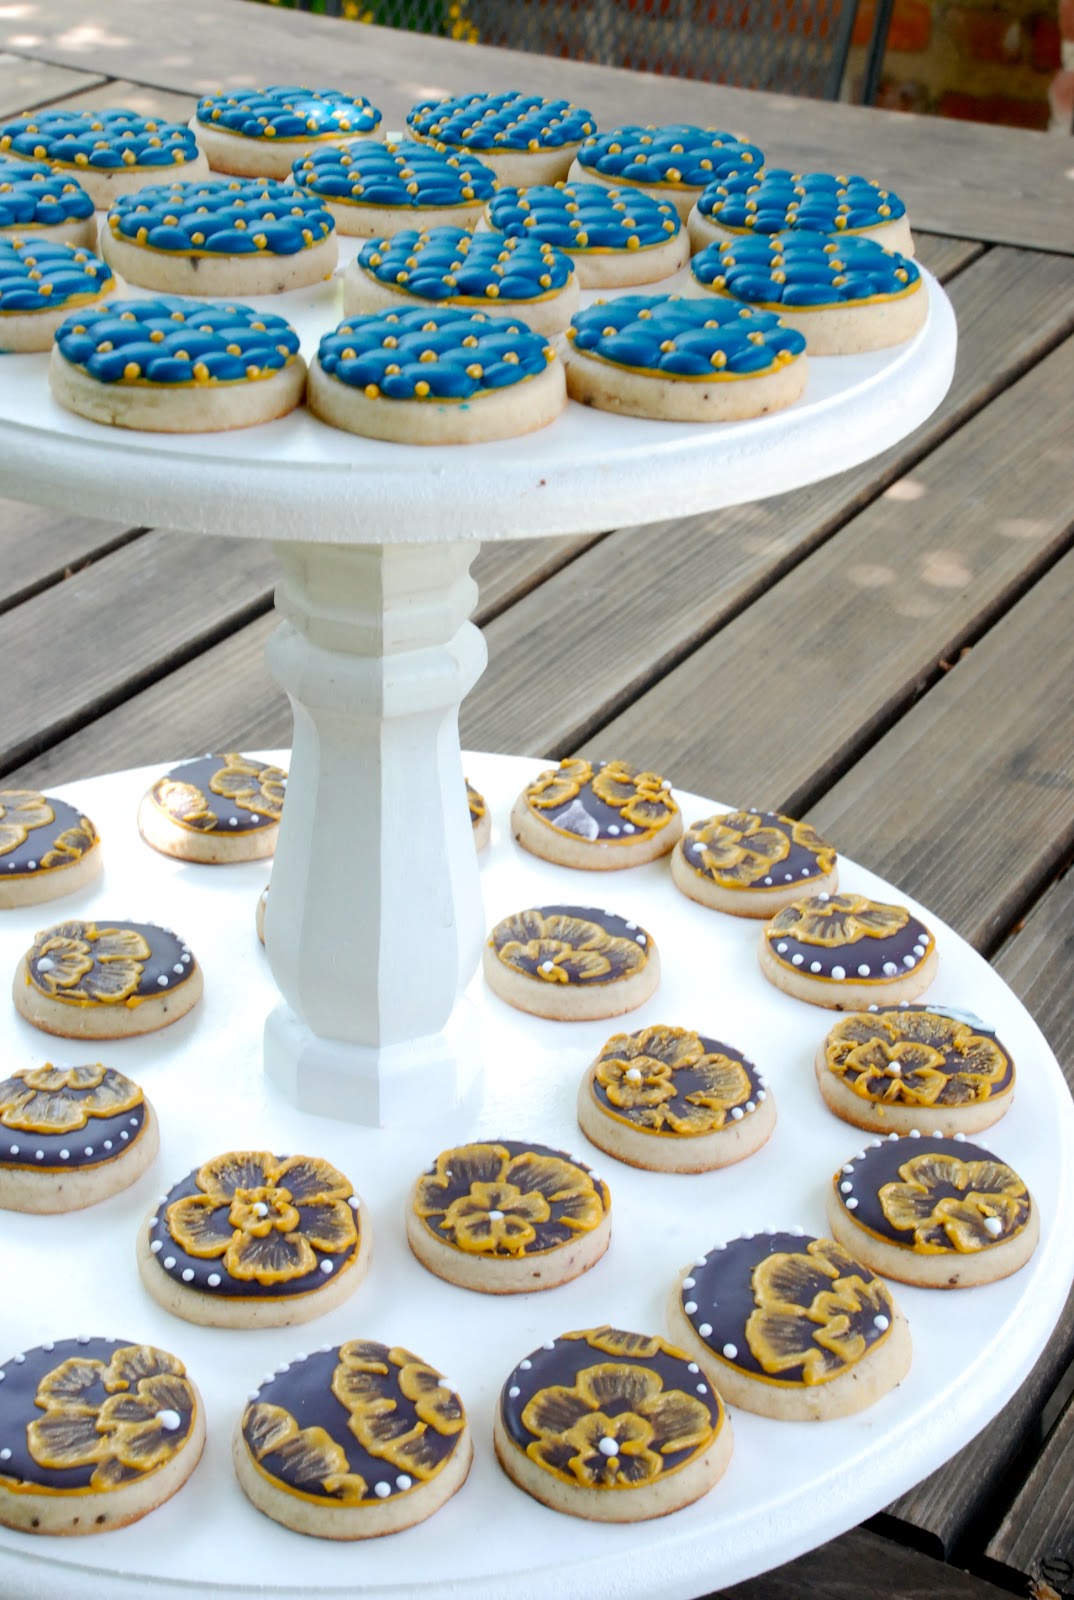
I wasn’t exactly sure what shades the customer needed, so I made sure to include a few and I think they turned out quite well.

Definitely an improvement on the first batch I made because of the increased detail and realism. Plus, I like how the colors fit together.

Gingerbread Friends

Gingerbread friends! Little gingerbread men and women and girls and boys. And some Christmas trees at the end of the post.


This little gingerbread lady is all bundled up for the winter.

By the way, no, those aren’t headphones on the gingerbread man, they’re earmuffs.

See the happy ice skating couple?

And, of course, the classic simple gingerbread people.

Messier piping than I’d like, but they’re still cute and I was so proud of it.  I made them a year ago!

Here you can see the criss-cross piping details on this skirt.

And some Chanukkah friendly gingerbread people. Winter blue and white colors.

And with the scraps I figured I’d have fun making some odds and ends. Christmas trees and stars.

I finally got a chance to use my colorful dragees. Sweet and simple.

Butterfly sugar cookie, summer theme picnic set

Picnic Sugar Cookies

I made these super cute picnic themed cookies for a staff appreciation lunch my mom organized at my sister’s school.

Unfortunately, I wrapped them up before getting good pictures, so you’ll just have to believe me when I tell you that they were super cute.


Happy sun cookies with sunglasses brightened up the basket.

Because I used a marbling technique, every butterfly was different.

I love the watermelon cookies! The seeds just made me “awww!”

The dragonflies were decorated with silver, green, and blue dragees to make them magical.

The ladybugs were stuffed into every corner of the basket and each one had a different number of spots.

I tried to get a closeup of the royal icing marbling technique here. Basically, you pipe out lines of different colored icing next to each other and run a toothpick through them before they set. It’s a very fun and forgiving technique.

I insisted on making the watermelon slices have bites taken out of them, and I’m glad I did!

The baskets were arranged with tissue paper and a few other picnic items (sunglasses and sunscreen) were tossed in.

Here they are on the tables with sunflowers!

They were a big hit and I love how perfectly they fit the theme.

Mini S’mores Cupcakes

Mini s’mores cupcakes. They taste just like the real thing, but with more marshmallow and chocolate.

These baby cupcakes have a sweet graham cracker bottom crust.

The cake is chocolate with graham cracker pieces and more graham cracker crumble on top.

The topping is marshmallow frosting, which I then gleefully attacked with a blowtorch.

So adorable and so easy to eat. Everyone had a few because they’re so hard to resist! My favorite thing about these cupcakes is that they don’t have to be perfect. The marshmallow frosting droops a little and sometimes they’re torched unevenly, but I think that just adds to their charm.

Don’t you agree?

Chocolate Dipped Strawberry Cheesecake Macarons

I made some more french macarons!

These little guys are strawberry flavored. I sliced strawberries thinly, stuck them into the oven on low for a few hours until they were dried out, then ground them up and put them in the batter. Pretty light flavor, but still tasty.

Some have cheesecake filling and some have strawberry-chocolate ganache.

I accidentally over baked most of these, so I brushed them with pink luster dust to disguise the dark color! Oops!

Still quite tasty, though, especially dipped in chocolate.

chocolate+dipped+straewbery+cheesecake

Halloween Cookies

I wanted to make Halloween sugar cookies. I did not want to buy more cookies cutters. Actually, I did want to buy more cookies cutters (because I always want more cookies cutters!) but I decided to be smart and use what I had.
Below are some Frankenstein’s monster cookies, just made with simple rectangles. I love the hair and the cute little wiggly smile.
Halloween Cookies, frankenstein's monster. Cute halloween sugar cookies with ghosts and candy corn.

And some Candy Corn triangles. I used a big circle cookie cutter then just sliced it into 6 wedges. The candy corn cookies were the most fun to decorate!

Halloween Cookies, frankenstein's monster. Cute halloween sugar cookies with ghosts and candy corn. candy corn coookies

You can see how there’s quite a bit of size variety, but I didn’t really care about perfection for this batch, just cuteness.

Candy corn cookies for halloween, very cute and easy to make!


I love the cute wiggly smiles on the Frankensteins and the 3D effect of the eyes popping up.

Halloween in Maddieland is never scary.

And here are the ghosts. These turned your mouth black when eating them, but they’re so much fun that on one really cared.
Boo! Ghost sugar cookies for Halloween.

Happy Halloween!

Halloween sugar cookie set assortment with candy corn, frankenstein, and ghosts

BOO!

Yummy Mousse/Chocolate/Cheesecake/Raspberry Thing

I don’t really have a name for this fabulous dessert, so I’ll just explain what’s in it, layer by later.

At the bottom, I cut out a ring of flourless chocolate cake.

Above the chocolate cake layer is a tin but decadent layer of dark chocolate ganache.

The pink layer is a tart raspberry mousse, made with raspberry and whipped cream. That was my favorite and I used the leftovers to fill a cake. So tasty and it helped lighten up this super-rich dessert quite a bit.

The chocolate layer in the middle is a mixture of mini chocolate chips and chocolate ganache. This added some nice texture with a crunch from the chips.

The light layer almost at the top is vanilla bean cheesecake. Deliciously perfect.

It’s all drenched in gooey chocolate ganache.

And drizzled with homemade raspberry sauce.

I was happy with how all the elements went together nicely. Even though this was a very rich dessert, most of us completely polished off out plates! Next I have to try this with a layer of ice cream…

Vet Logo Cookies

These cookies were made for a new veterinary practice. They wanted a treat to bring to animals hospitals in the area to announce their presence, and I think the message came accross pretty clearly!

I was worried that the red, black, and white colors in the logo would bleed together, so I waited quite a bit of time between piping each layer.

So that the cookies wouldn’t get stale, I started by just piping all 125 cross logos in red onto wax paper. This was great because it let me fix my mistakes, but, most importantly, I had a printout of the logo under the clear wax paper, so I could trace the design. This helped me keep them consistent.

I waited a day before piping the black dogs onto the red crosses.

I baked the cookies, outlined them in red royal icing, and let the red dry a day. That same day, I painted the black dogs from the decals in silver luster dust to cover any imperfections and make them even more memorable.

The next day, I flooded the centers of the cookies in white icing and while it was still wet, I carefully peeled off the decal I mad made and plopped it onto the wet icing, pressing gently.

Once they dried, my mom used an edible marker (basically food coloring in a marker with a felt tip) to write the name of the hospital on each cookie.  Finally, I boxed them up with layers of wax paper and tissue paper. Each dozen cookies got their own little box.

These cookies took days and an incredible amount of work! My kitchen was covered in cookies for days because they’re HUGE and took up every available tray, tupperware, and surface.

But they’re pretty cute, aren’t they?

Jewelry Cookies

These cookies were so much fun! They were made for a jewelry company to send out to prospective clients, so they match the jewelry design. Thanks to Stephanie Fishbein for the beautiful pictures.

I made 25 of each of 6 designs. 

These quilted cookies are some of my favorites because they’re simple to make (tutorial coming!) and look amazing. 

I used a new technique, brush embroidery, for these flower cookies. You use a small damp brush to pull the lines of frosting inward while the icing is still wet. 

The swirls in the middle of these were improvised, but I think they look so cute!

It’d hard to tell in the pictures, but the gold on all the cookies was brushed with luster dust to make them shimmer and give them a special touch. 

I learned that the purple cookies above are the “Om” symbol.

 The snakes were some of my favorites to pipe out because of all the zig zags

Each box of six cookies was beautifully wrapped with a big bow on top. Enjoy!