
“Whooo” loves sugar cookies?
Oh, yes, that’s right. I do.


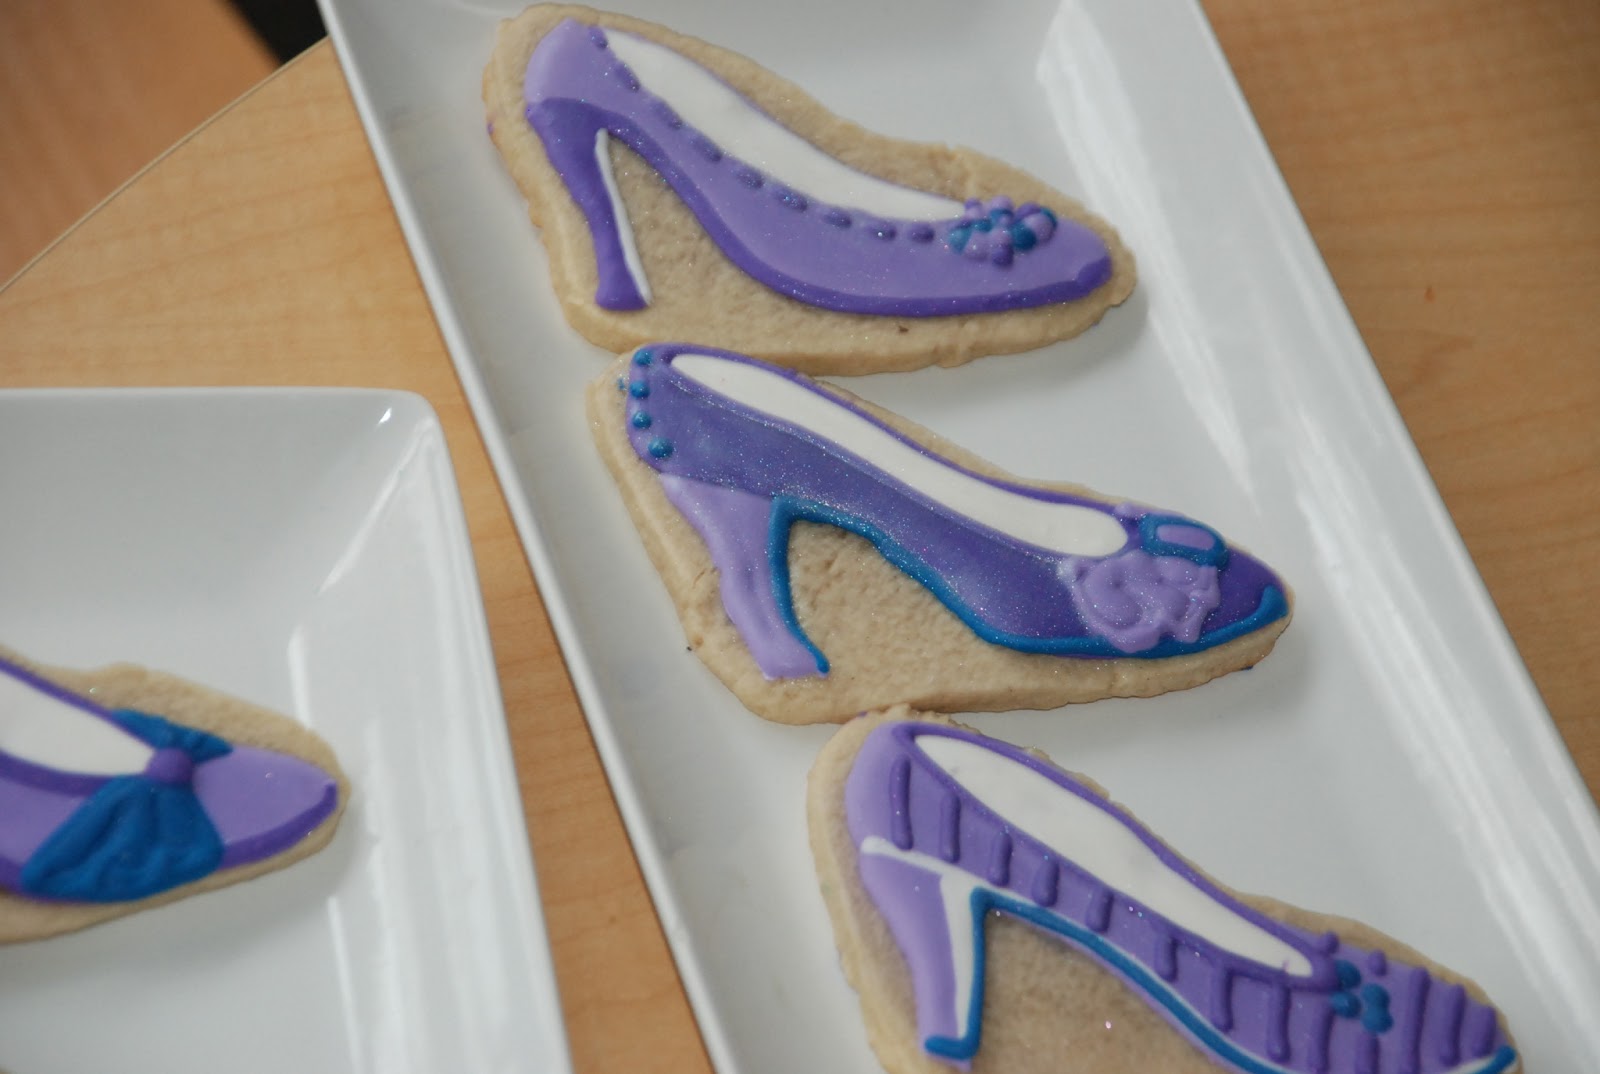
I didn’t have a heel cookie cutter and it was too short-notice to buy one, so I cut the basic shape by hand.

The heel shape got piped onto the cookie and I left the background blank. I wasn’t sure how it’d look, but I like the way it came out. Really lets the shoe shine. Next time, I’ll be more careful to keep the sparkle on just the icing, not the cookie base!
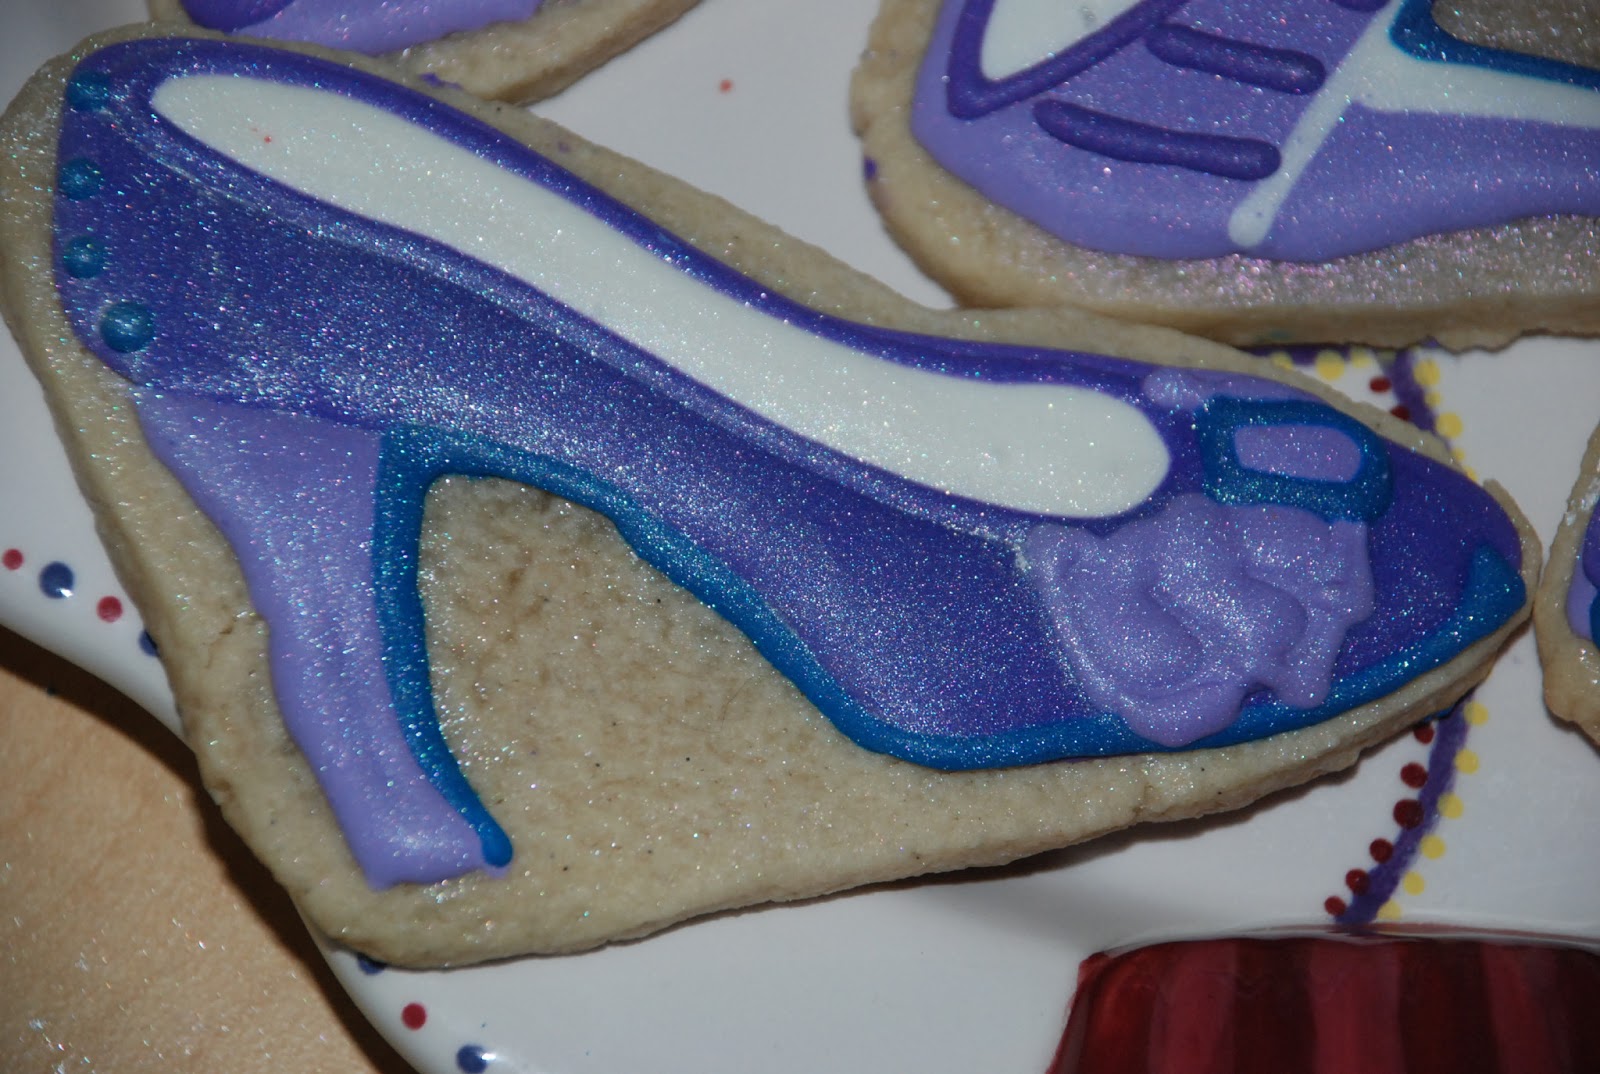
Everything was covered in luster dust and glitter dust for an extra sparkle and shine.
Simple, but sweet.
This one here was one of my favorites.
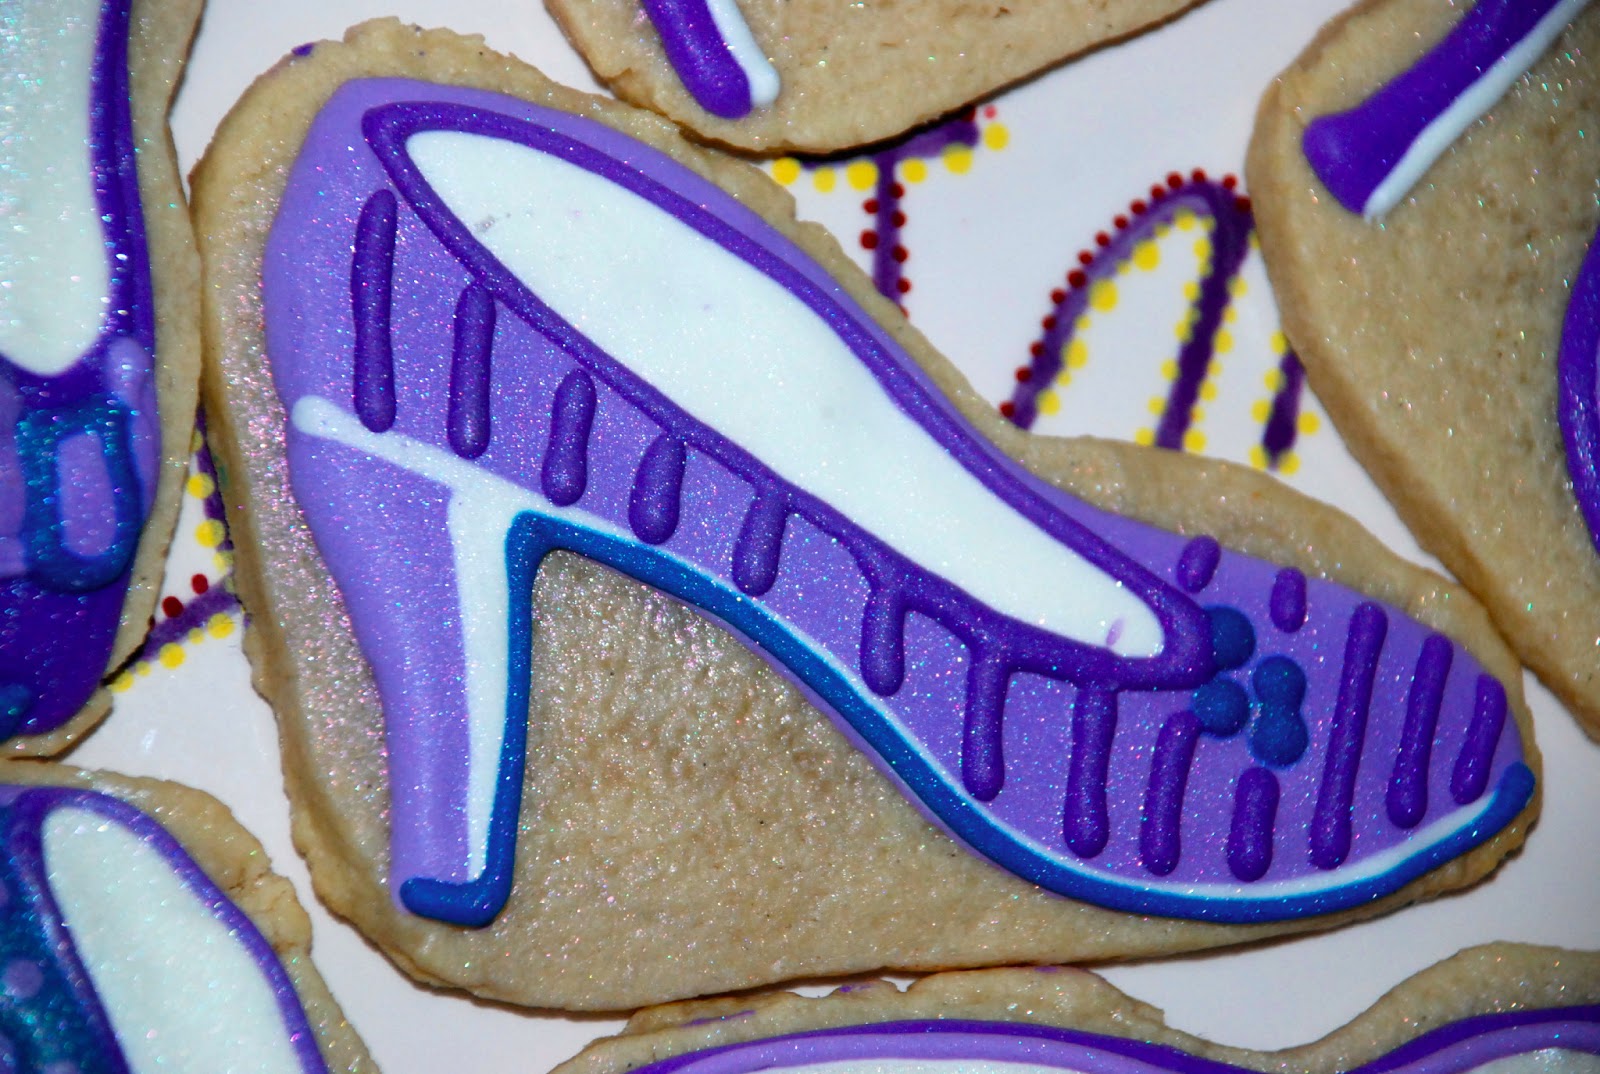
Fashionable and fun! I’d totally wear that purple shoe with the teal bow.

All lined up and ready to go out for a walk.
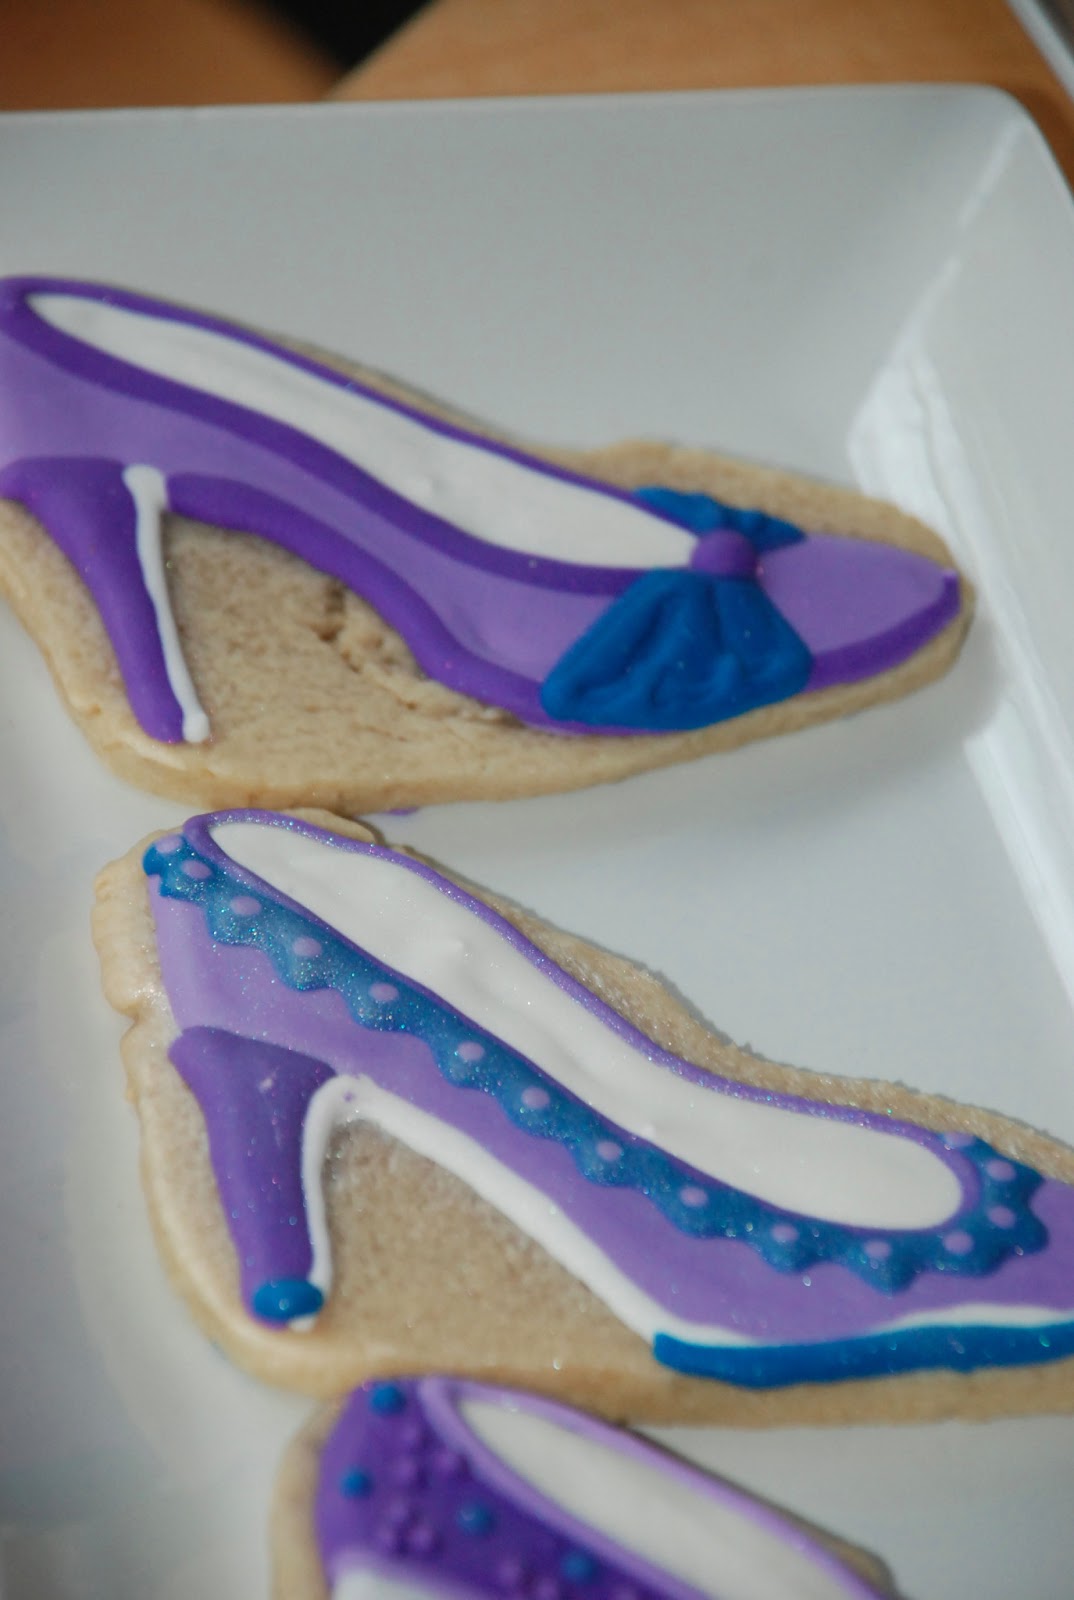
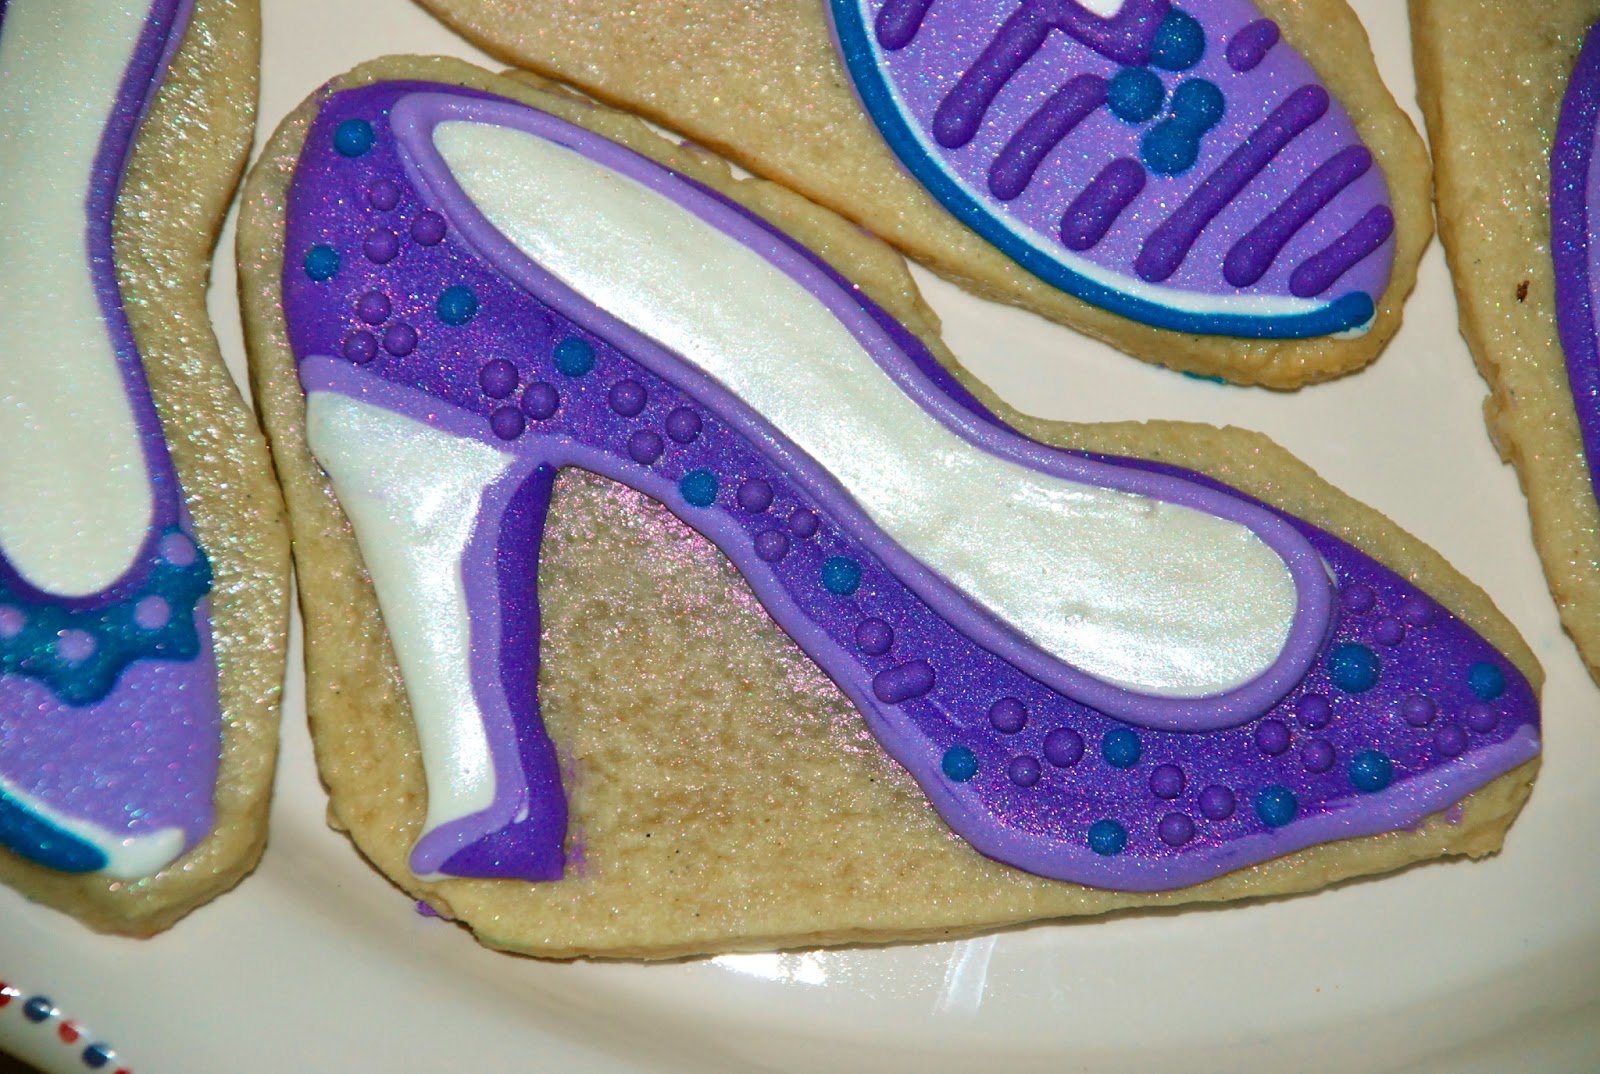
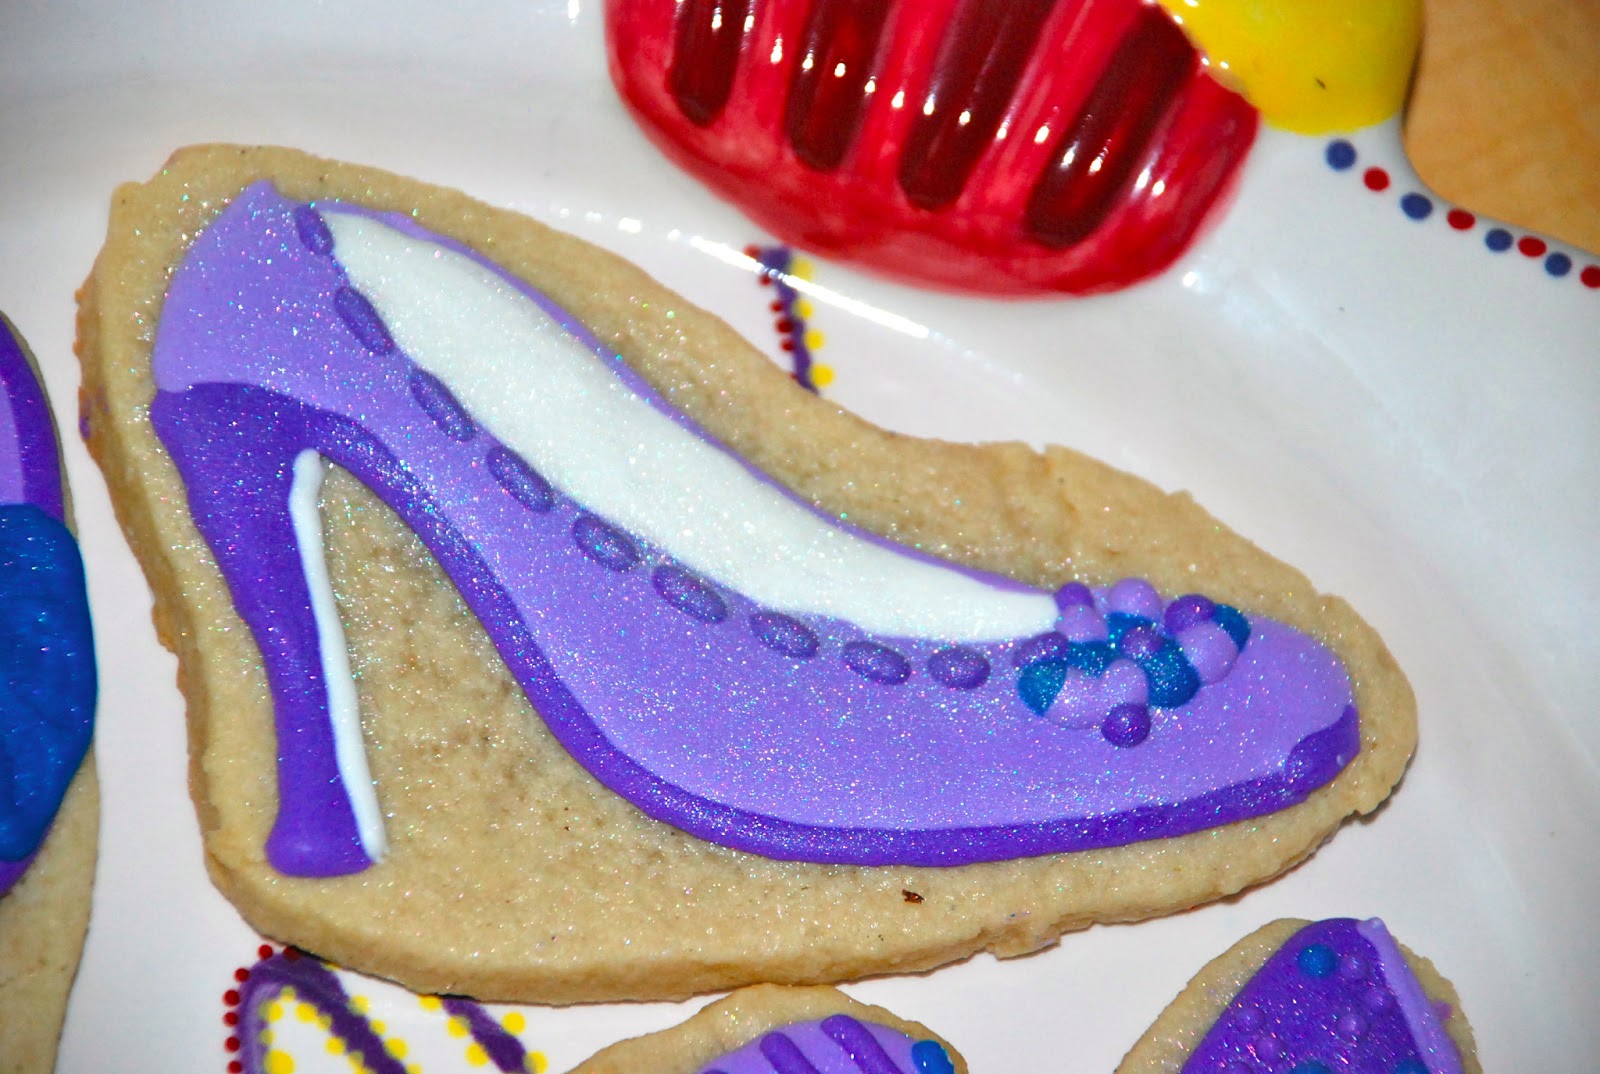
Some of the shoes came out rather funny-shaped, so I think I need to give these another go so I can really perfect them. Perhaps a high heel cookie cutter is in order.


I had fun with a basic red, white a blue starts & stripes theme.
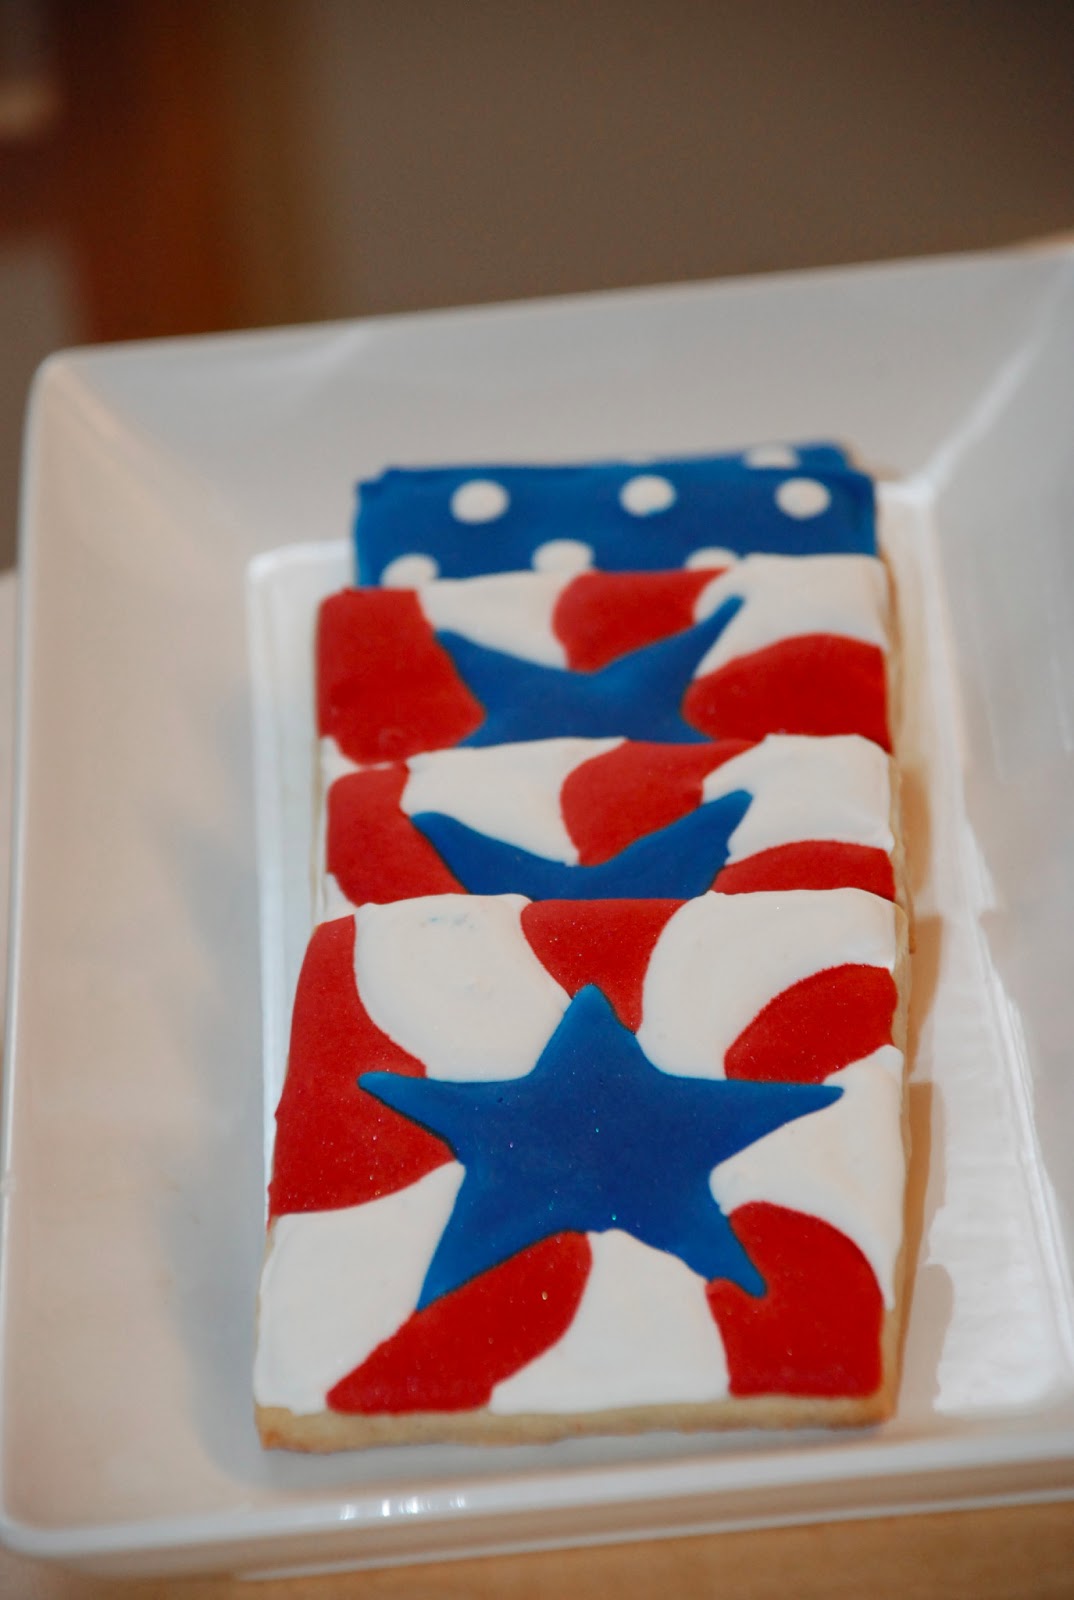
That one up there reminds me of Captain America a tad too much.
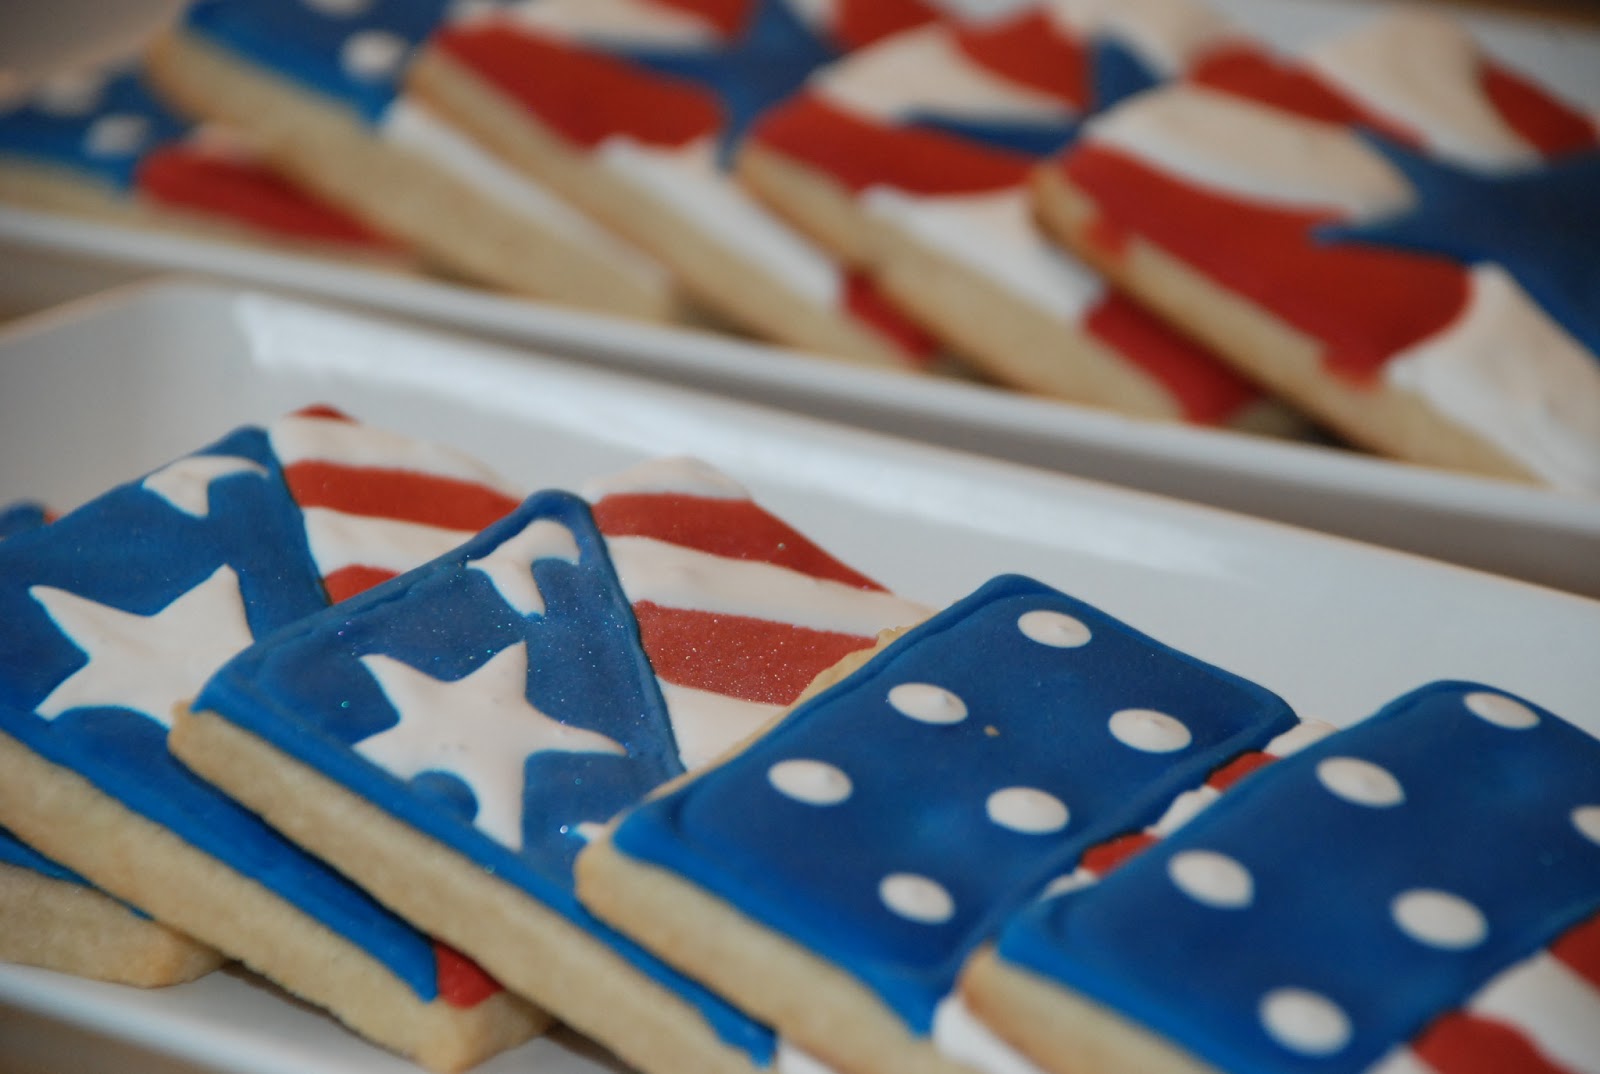
I added a touch of white luster dust to smooth out the details. Working with bold colors is very unforgiving and the dust helps soften them.

I like the diagonal ones the best. The stars were tricky to pipe freehand but I finally got the hang of it.

It took long enough, but let’s celebrate the sun FINALLY coming out after a long winter.
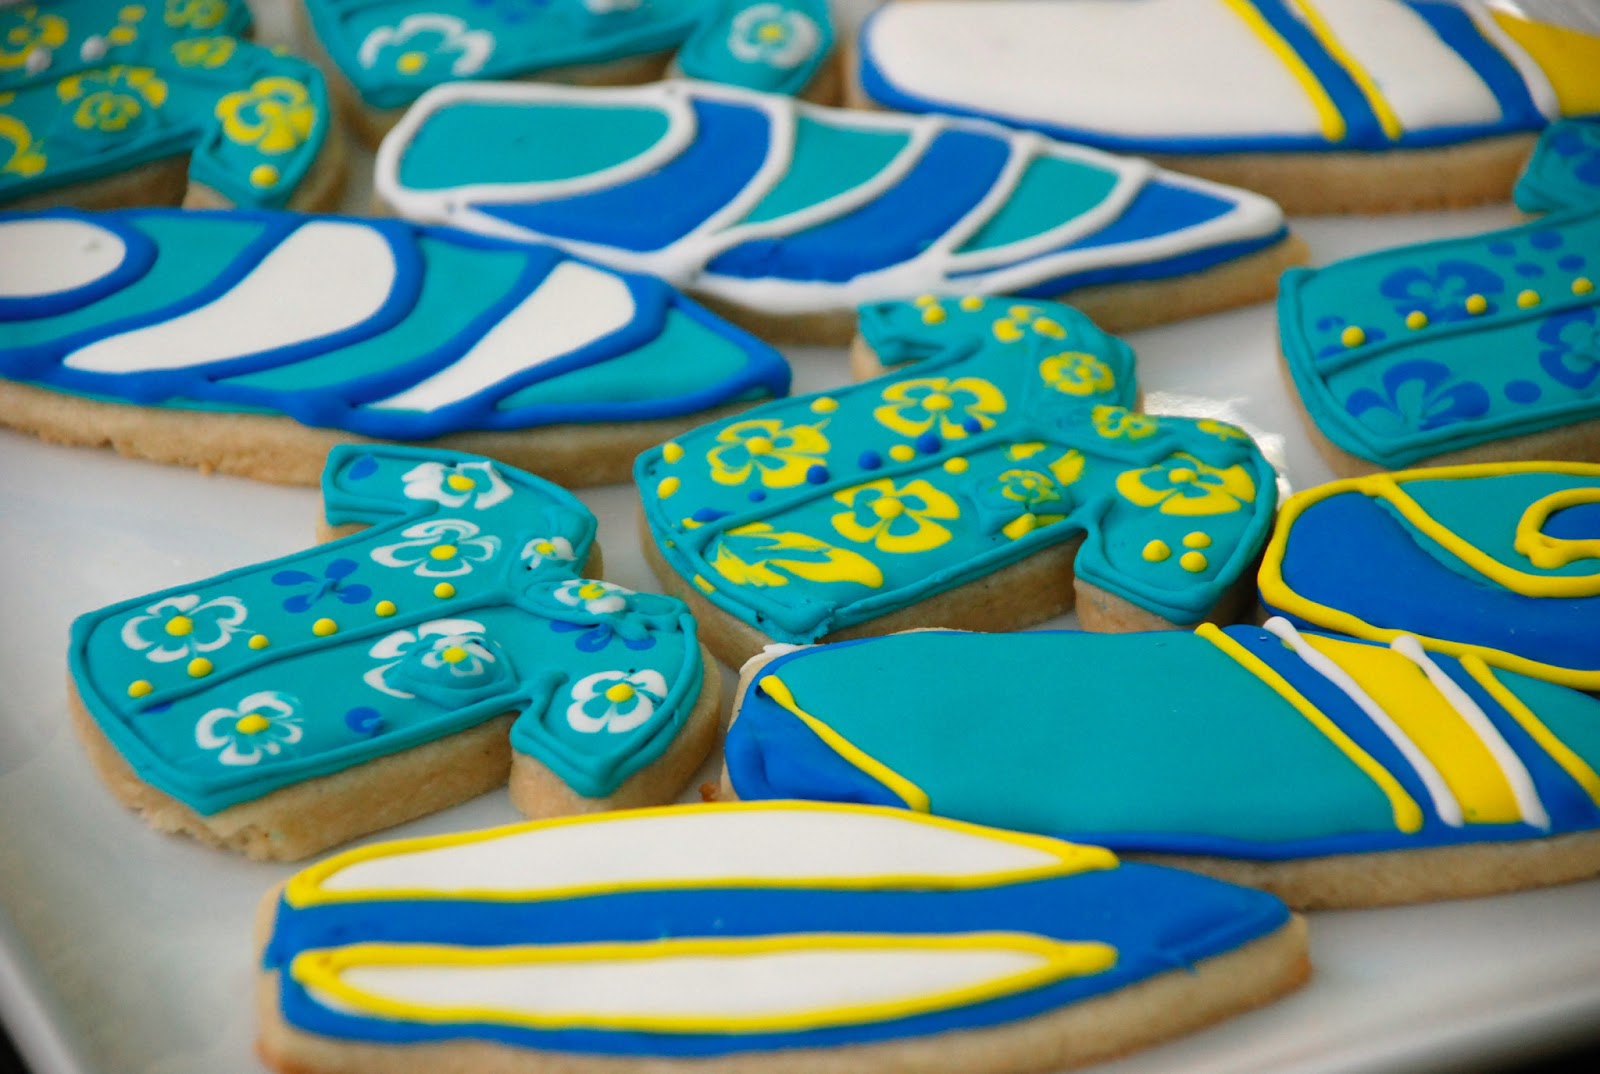
These were actually Christmas/Holiday cookies for some of my dad’s surfing pals, but I didn’t think my East Coast readers would appreciate the bragging about SoCal weather had I posted them back in December.

Hawaiian shirt cookies and edible surfboards.
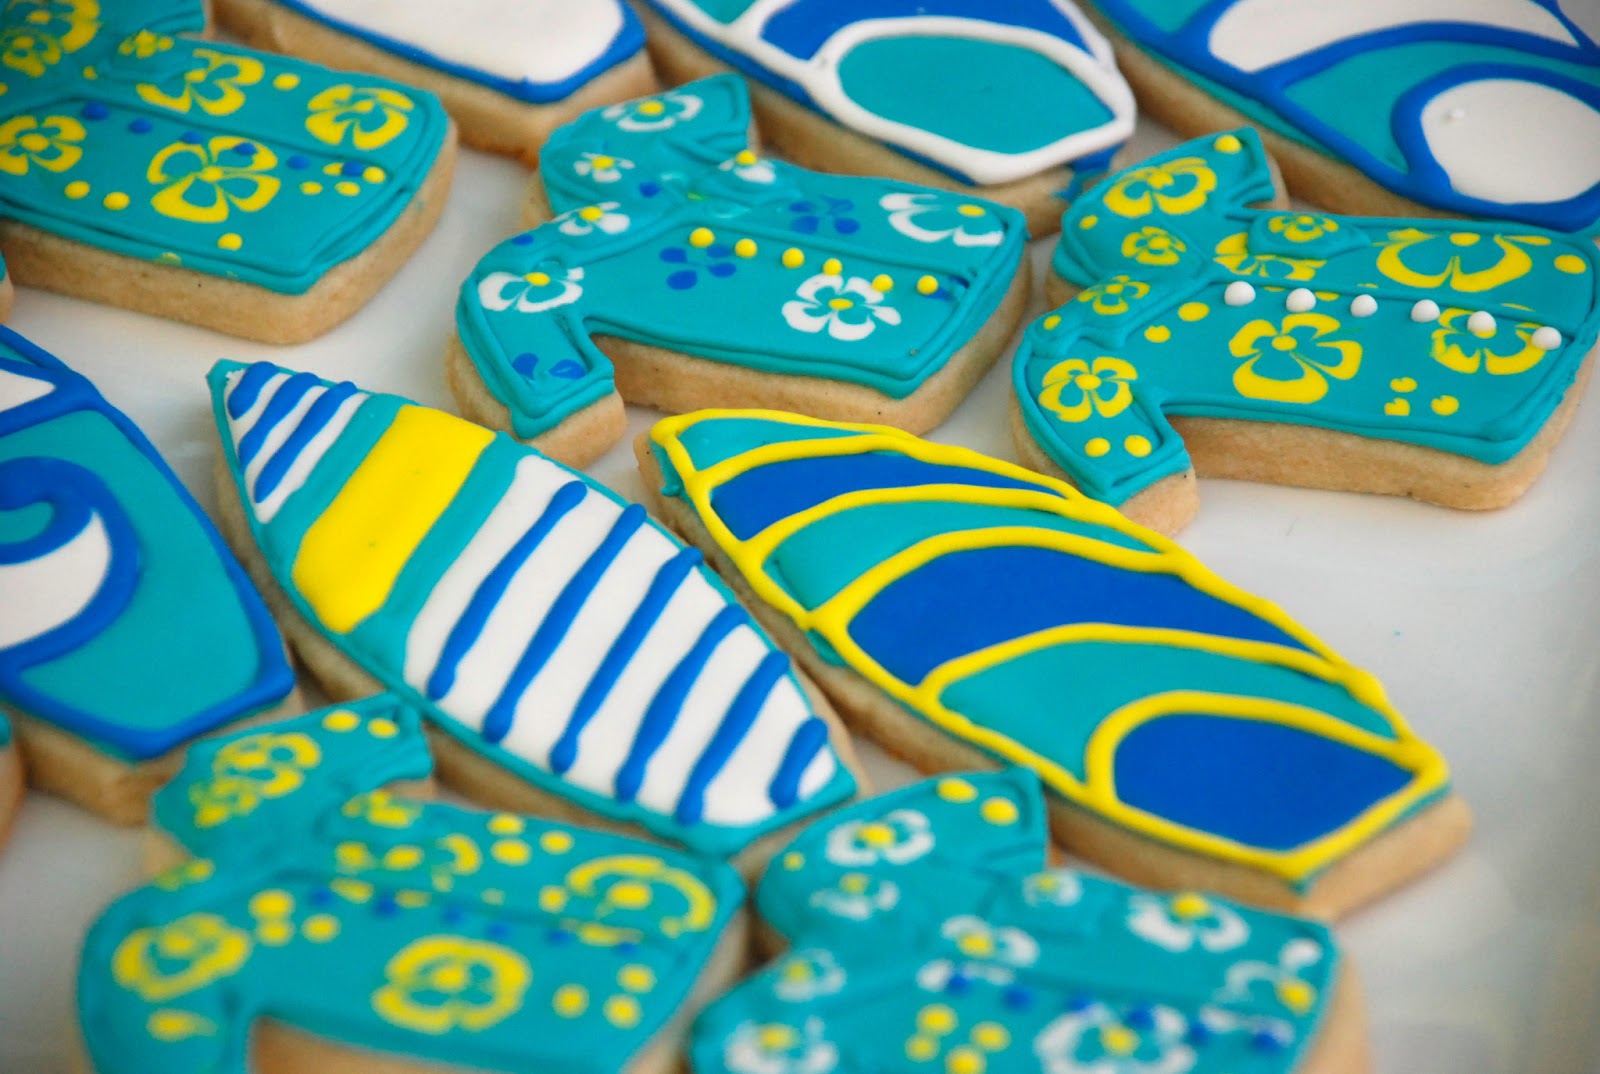
The floral print on the Hawaiian shirt cookies was done using a marbling technique. I put icing drops of one color onto the still wet base and used a toothpick to draw each dot in to make a petal. I always want to make a tutorial, but you have to work fast with this technique and I never have enough hands to keep the camera frosting-free!
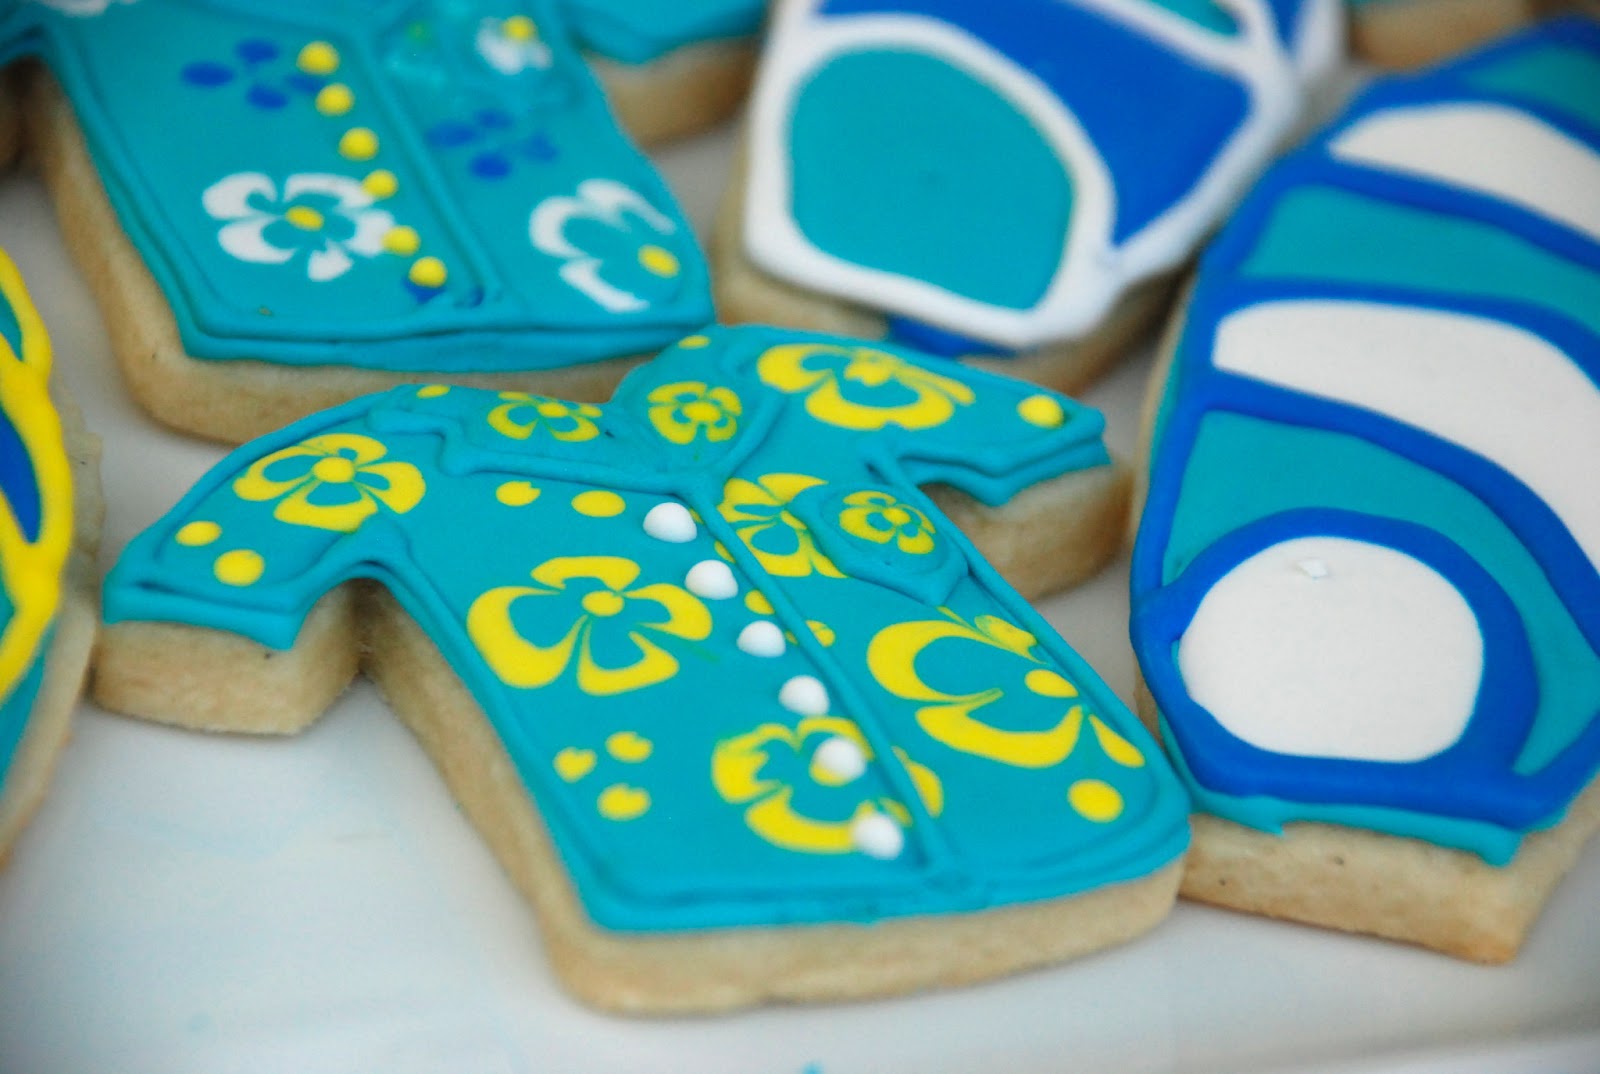
The little pocket on the breast of the shirt is my favorite.
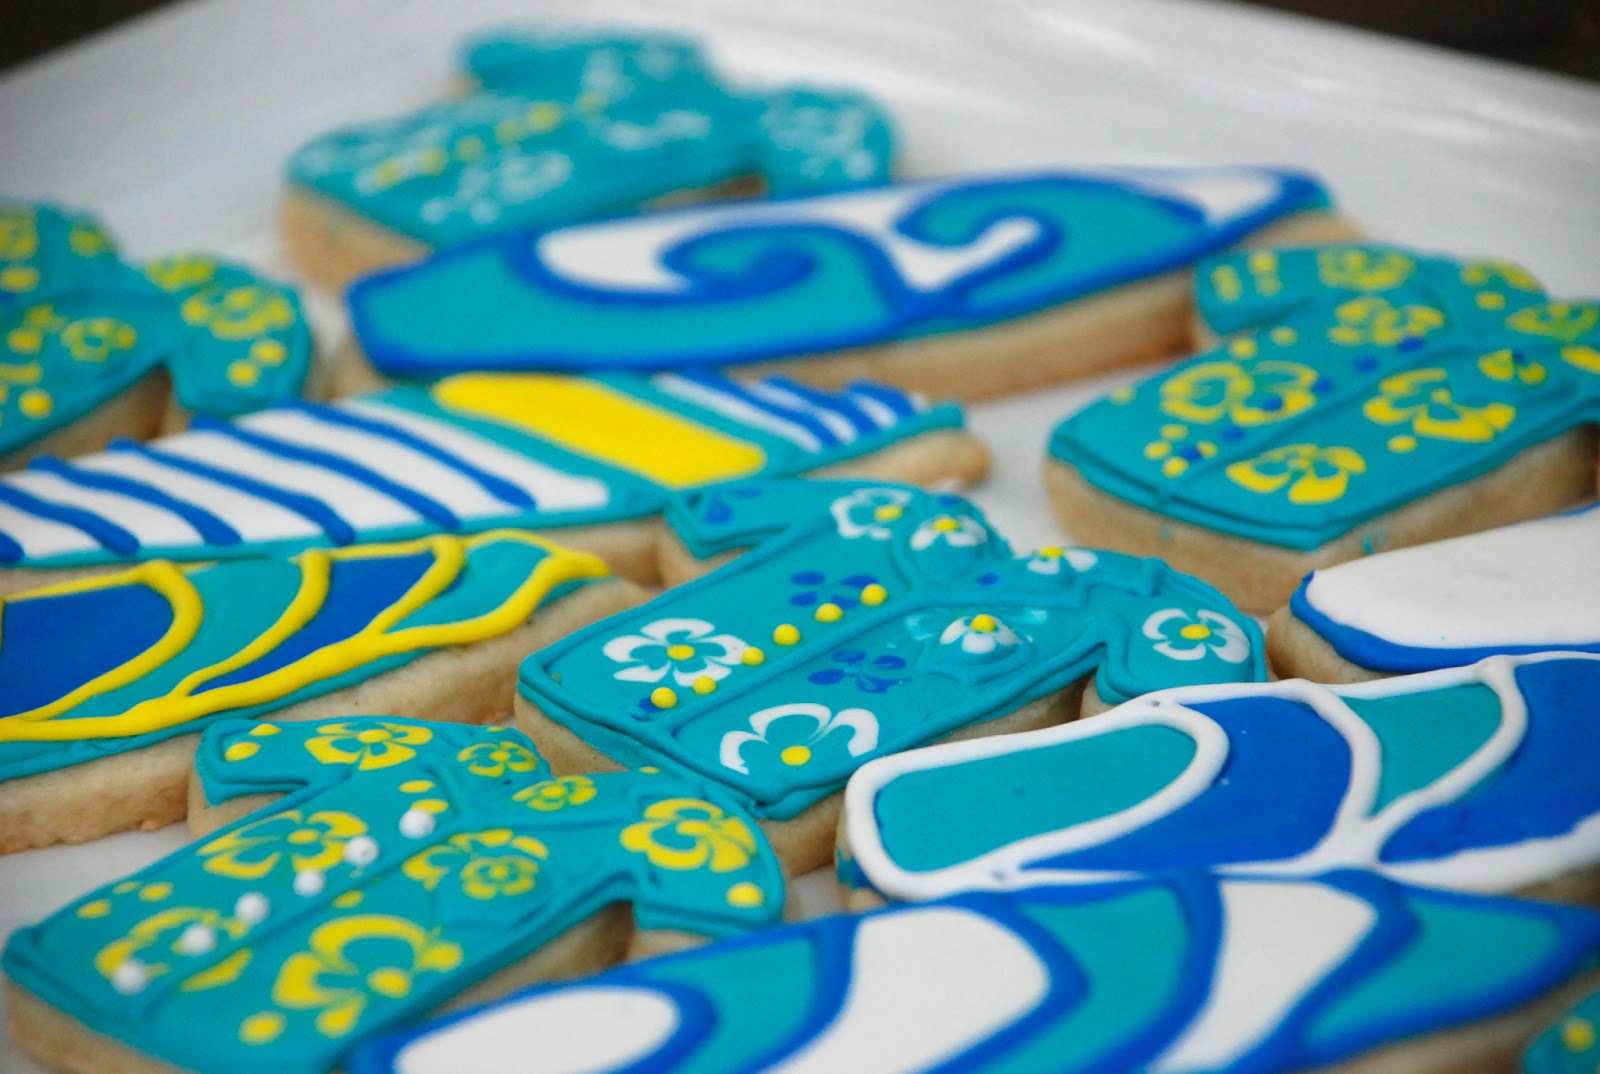
I had fun with the surfboard designs. I just piped wavy lines and filled them in what whatever color pastry bag I was holding. I was running out of royal icing at the end so I eeked out whatever was left and I just made it!
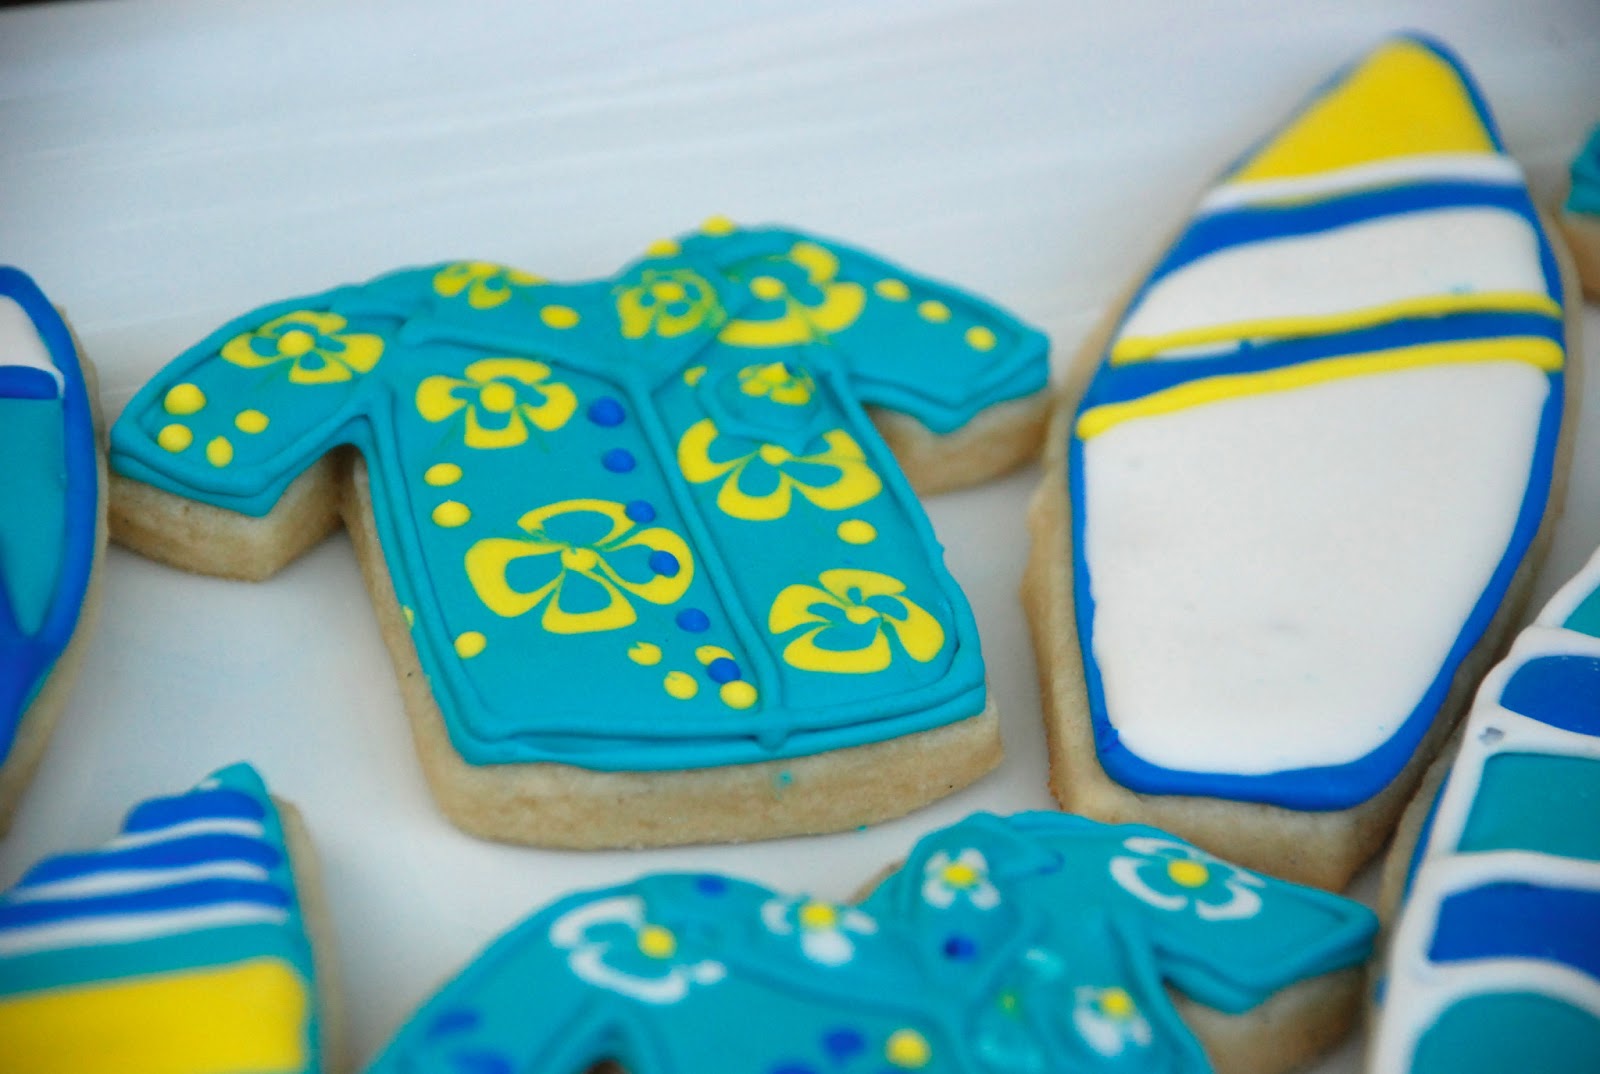
Don’t they make you want to head to the beach and lay out in the sunshine?

Here’s to springtime and summer!

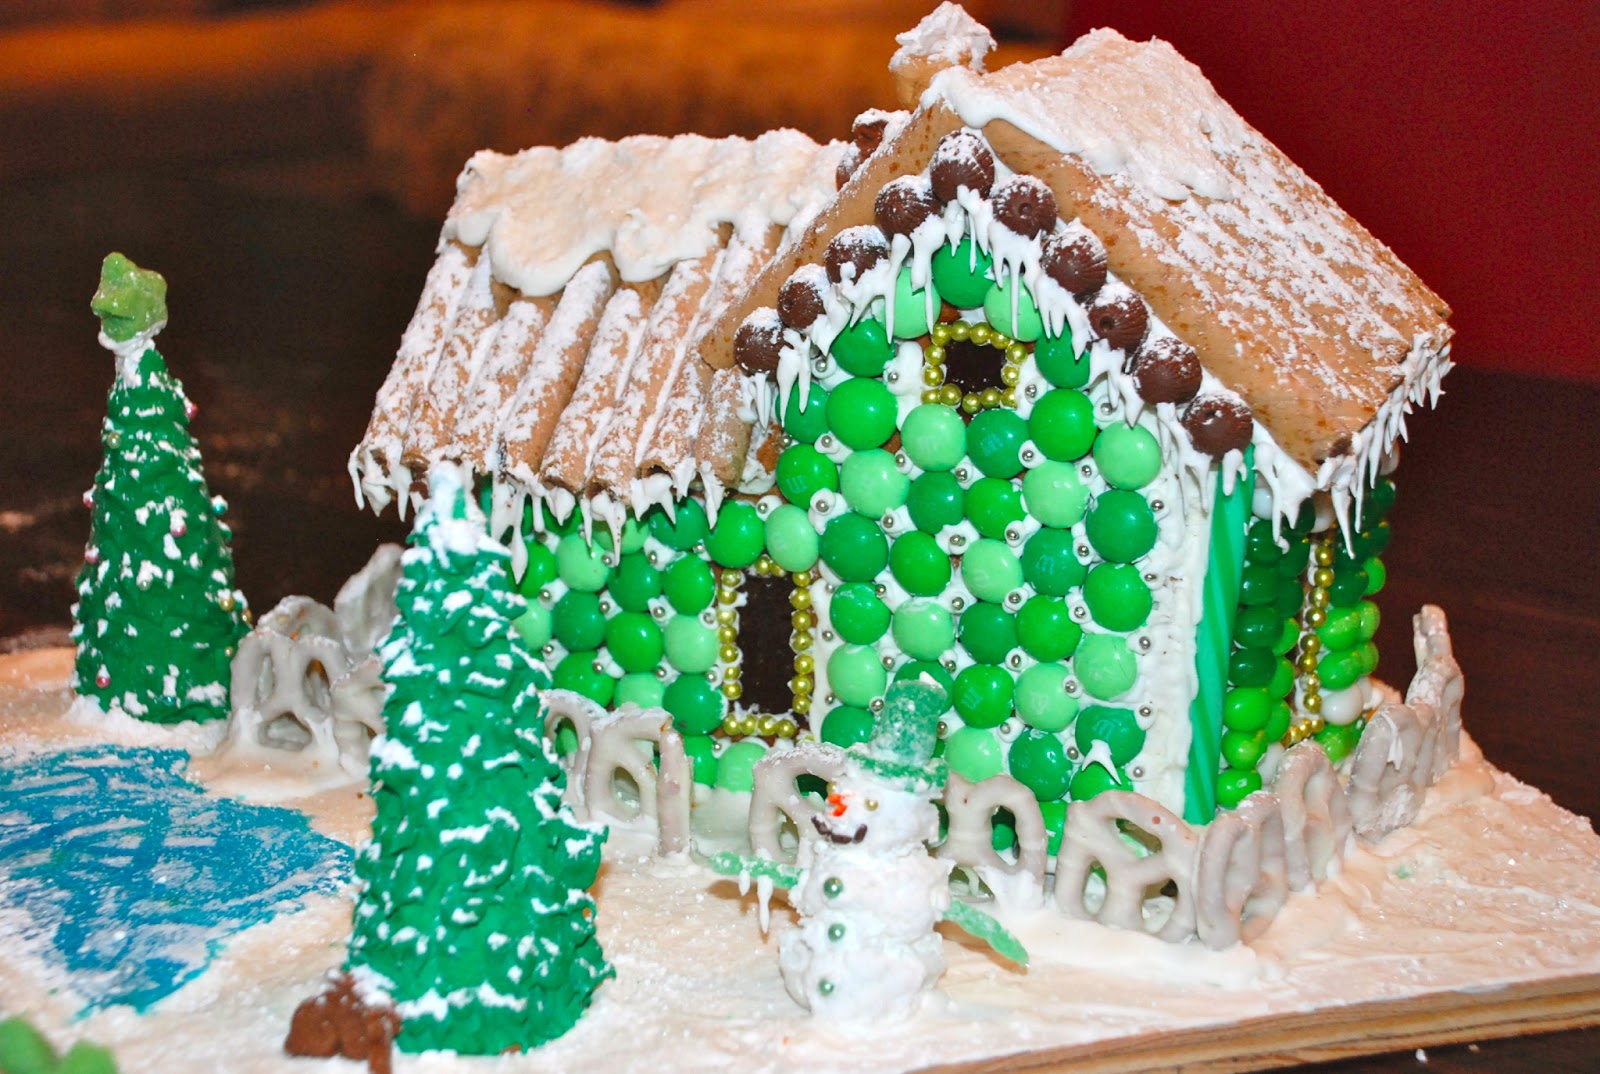
With all the snow from Nemo, I thought it might be a good time to post the snowy gingerbread bread house my mother and I made over the holidays.
For the first time, we made the gingerbread house from scratch and cut out the pieces! And of coruse, if I’m going to go through the trouble of making the gingerbread and cutting the pieces, it’s going to be more than just a little square house. Below is a front view of our Victorian-style gingerbread cottage.

We used Sweetopia’s simple, delicious, and sturdy gingerbread recipe and scaled up this amazing pattern by 100%


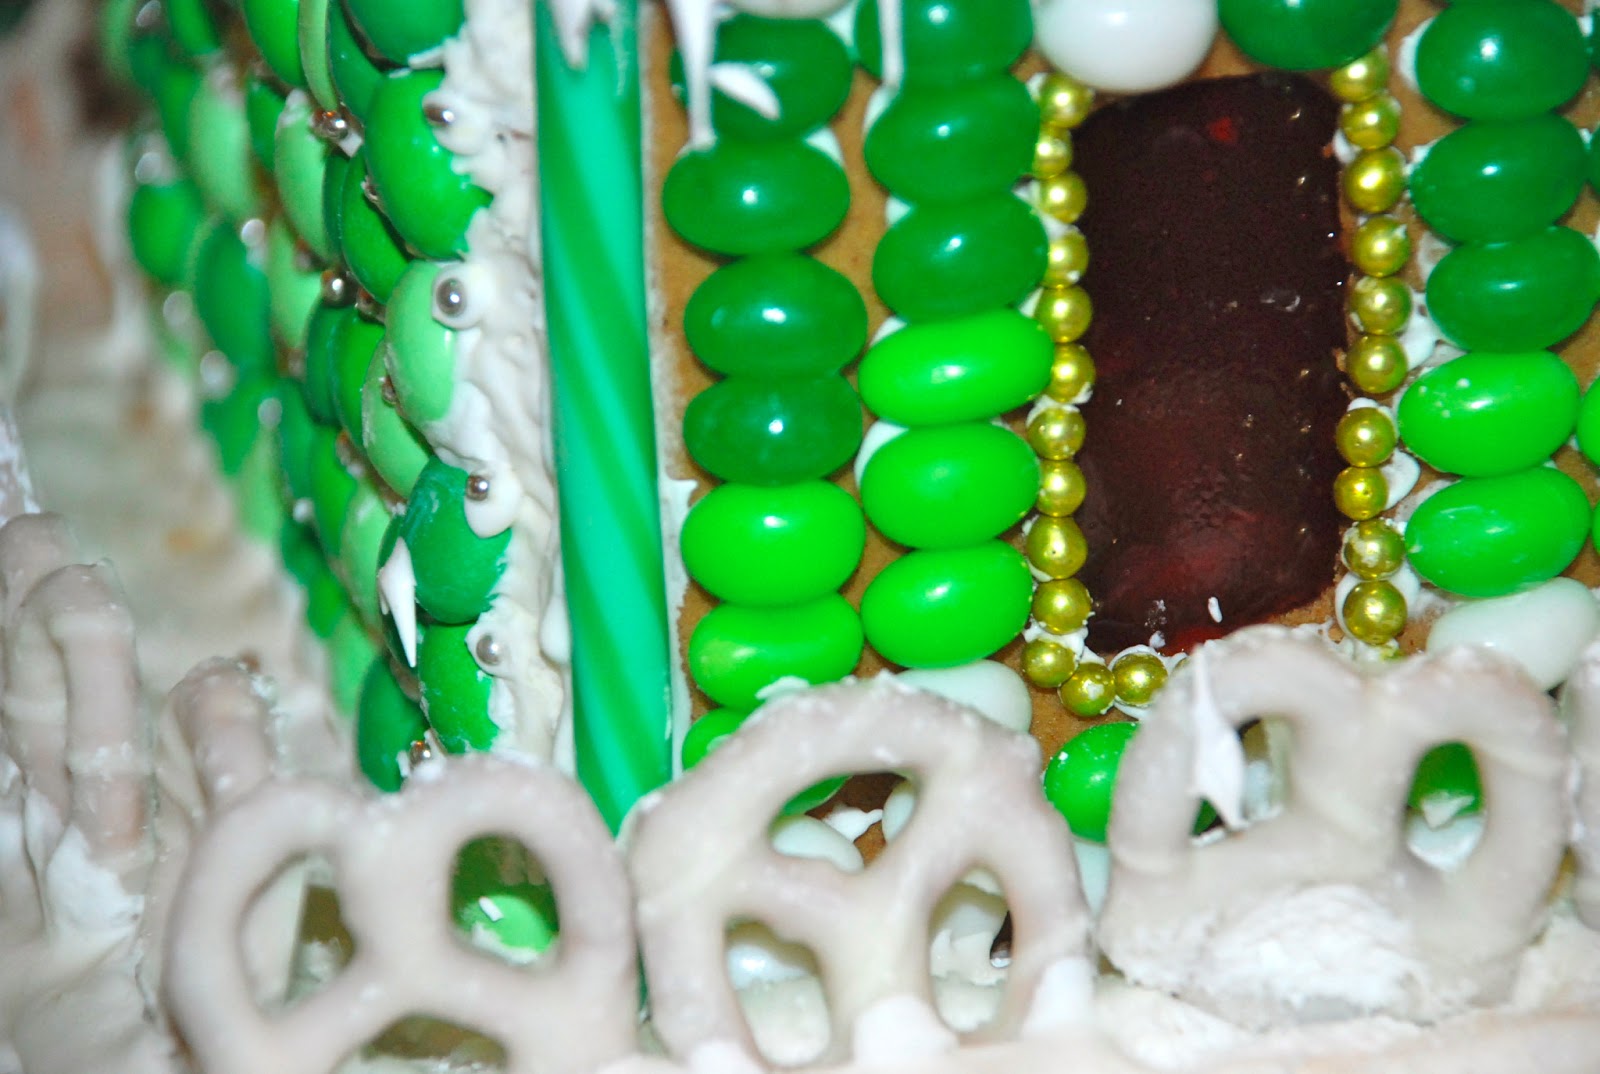
And here’s the back view. Little baby peanut butter cups as decoration along the roof, a marshmallow chimny, and green m&m’s (the mint flavor) along the back. Plus dragees for a little more sparkle

Ice cream cone trees (take a pointy cone, turn it over, and pipe green textured frosting on) and a pond in the back. We found these cute gummy candies as decoration and used Amy’s graham cracker bunnies to give the scene some life. Can you find the set of bunnies who are well, particularly loving?
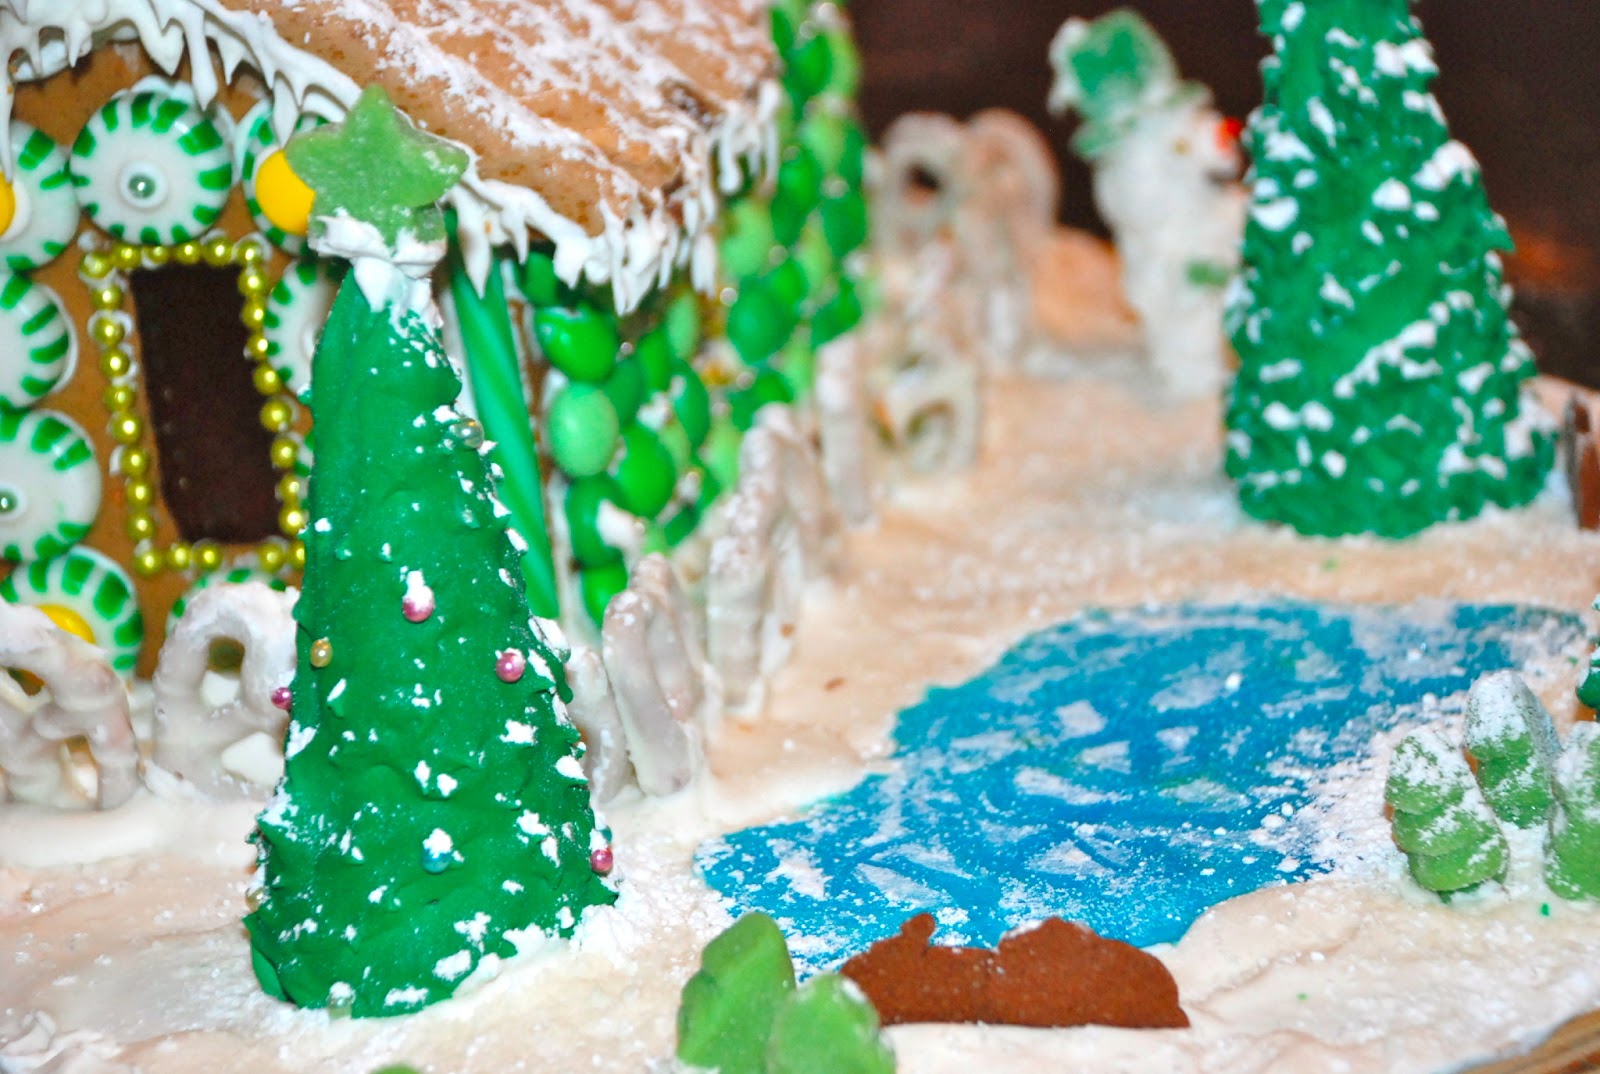
The pond is jolly rancher – we crushed them up, put them in a pile/circle on tinfoil, and watched the like a hawk as they were melting in the oven. Once they cooled, it was just a matter of peeling off the pond and plopping it into the board.
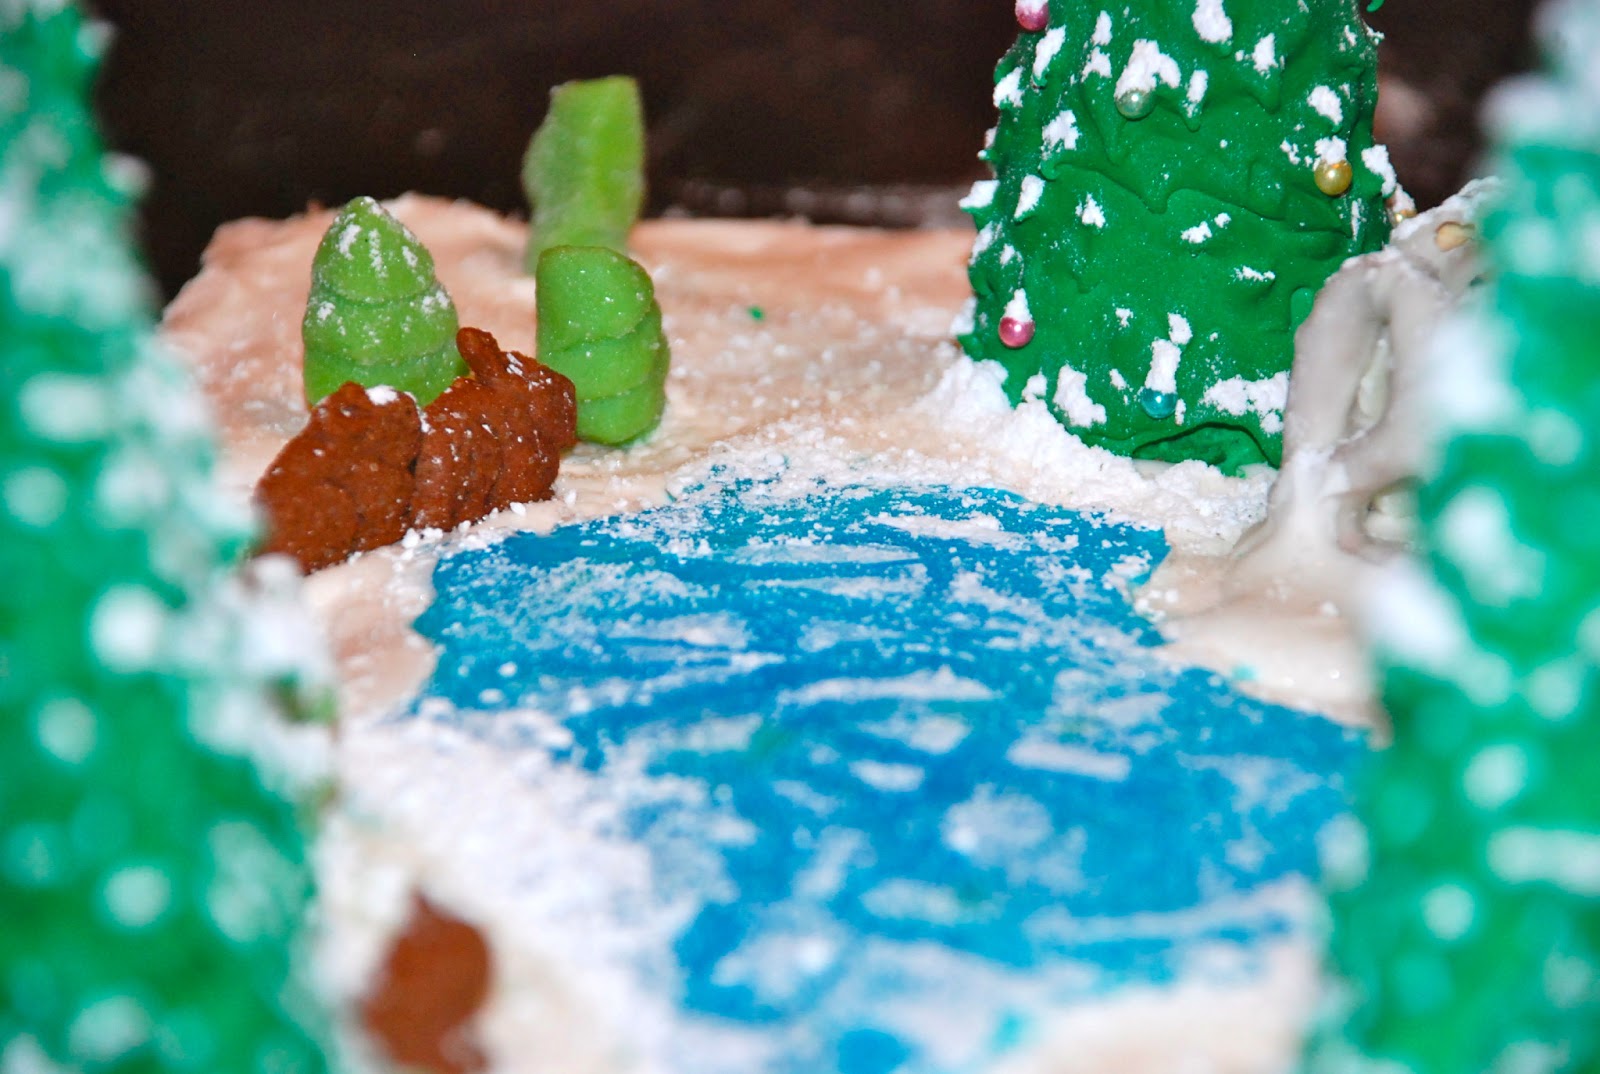
The ice-skating marks were made by running a wet paintbrush over the pond after it had been (accidentally over-dusted) in powdered sugar.

No winter gingerbread scene would be complete without a snowman. See the little pretzel fence in the back ground? That fence kept falling over, but we finally got it to almost stay up…

Jelly beans along the side. We bought the candy a few days after Christmas when it was all on sale!
And the whole back view. The snow on top is powdered sugar and, on top of the roof, roral icing smeared on thick.

The front bay is lined with Mike & Ike’s as well as green chewy disks. Not sure what brand they were, but they were definitely delicious. The walkway is made of mini peanut butter cups and cut-up cinnamon and chocolate marshmallows. I didn’t even know they made marshmallows in those flavors and sold them at the supermarket; must have been a seasonal thing.
The windows, by the way, were made using that same crushed jolly ranchers method. I cut the holes for the windows before baking and cleaned them up more right after the gingerbread came out of the oven. Once the giant cookies has cooled, I sprinkles the jolly rancher pieces in the holes and popped them back in the over for a bit until they had melted. It’s hard to see because there’s no light in the house,but the effect was really cool and looked like beautiful stained glass.
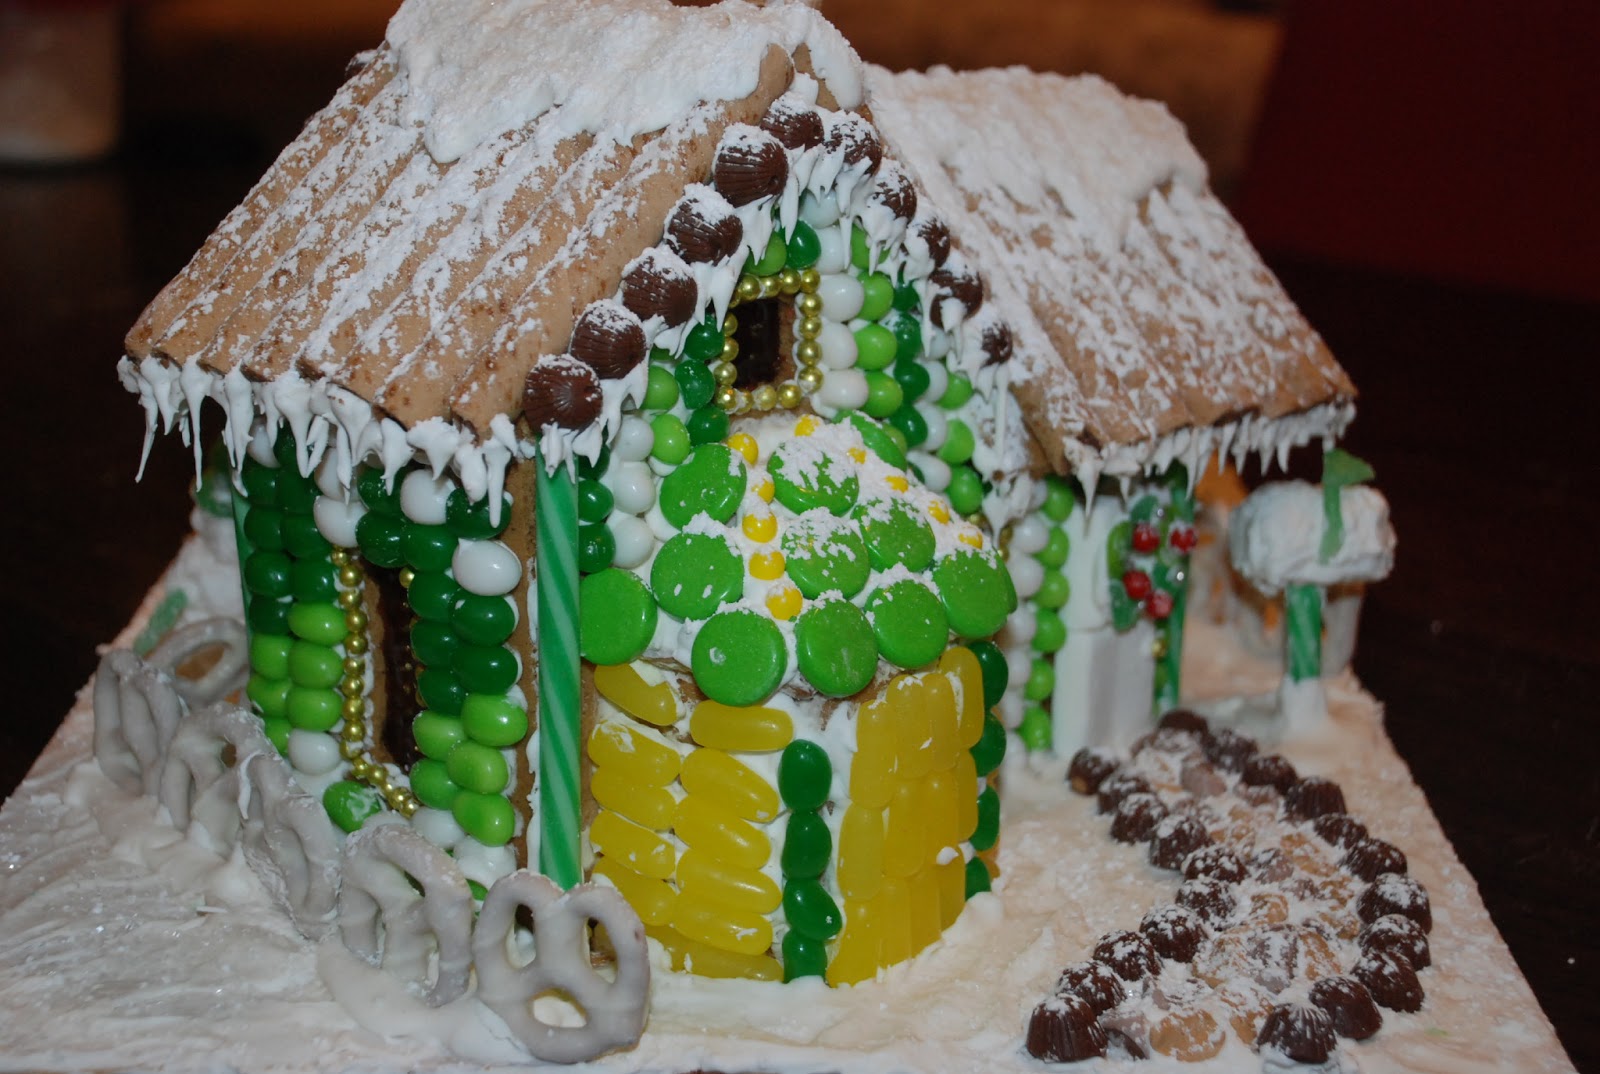
And the front view once more. With every year comes a new gingerbread house. I’d better start thinking about how to top this one!

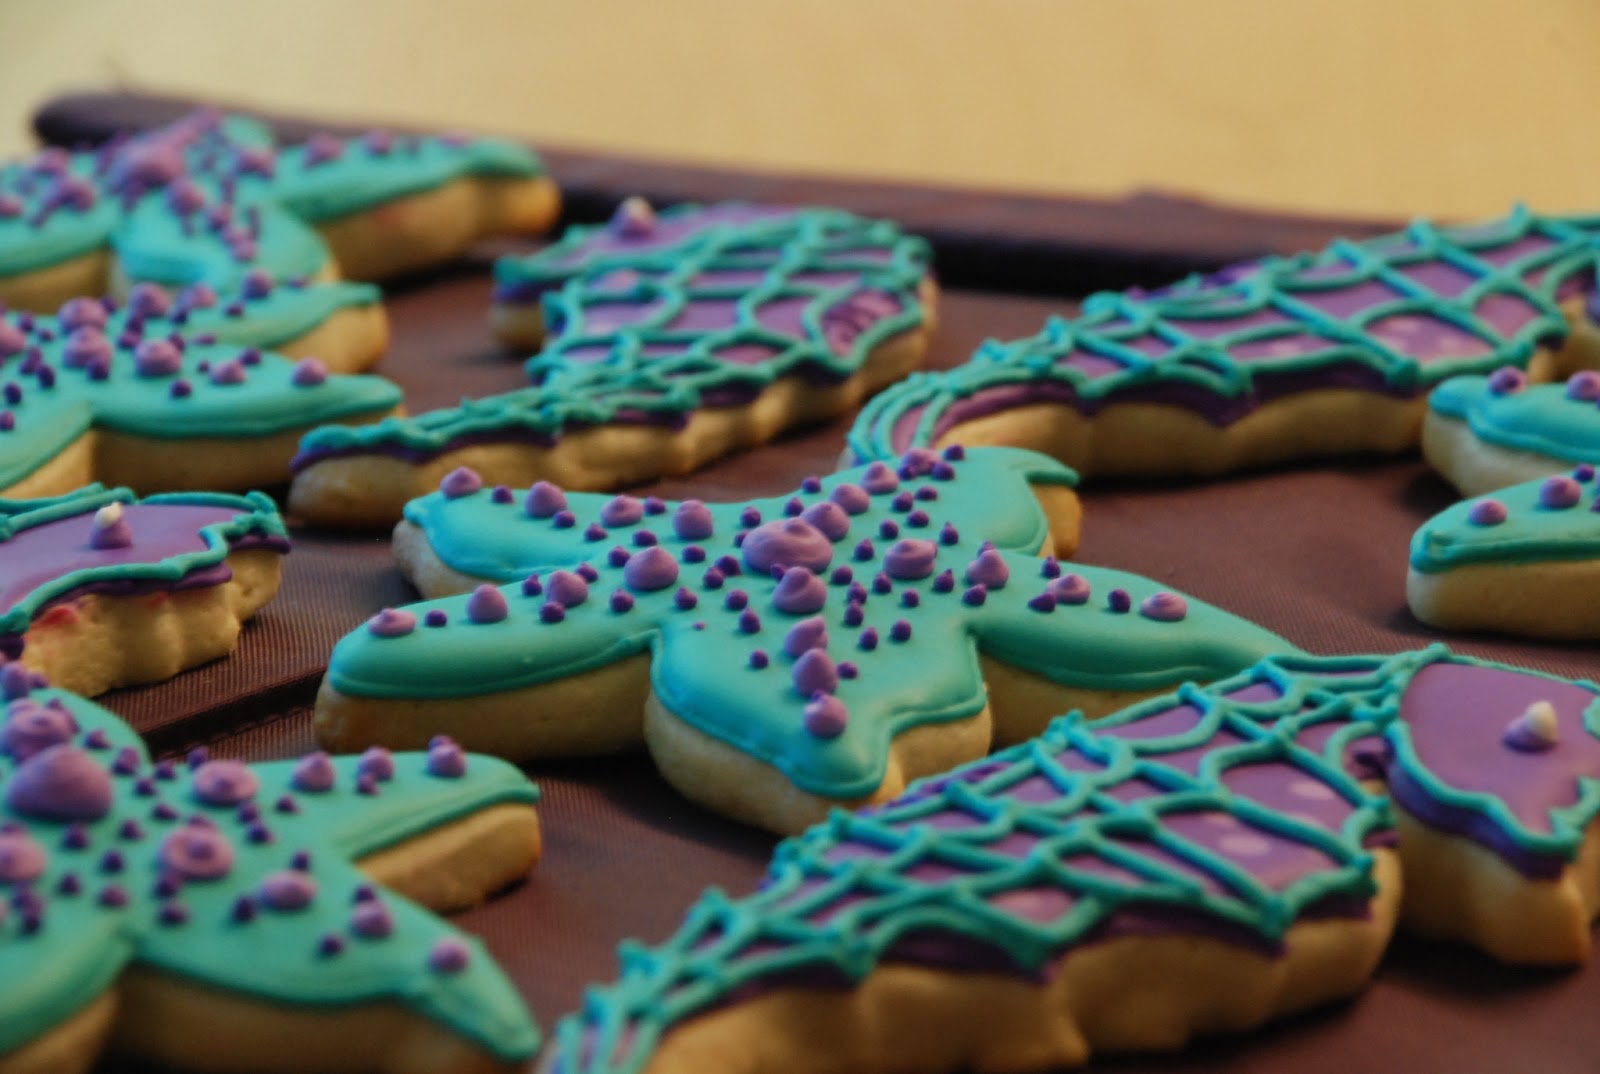
More under the sea cookies! The post on the first batch has some step-by-step pictures, but my lighting wasn’t good enough for that this time around.

These were made for a birthday party and send all the way to Louisiana. Purple/team sea horses and starfish!
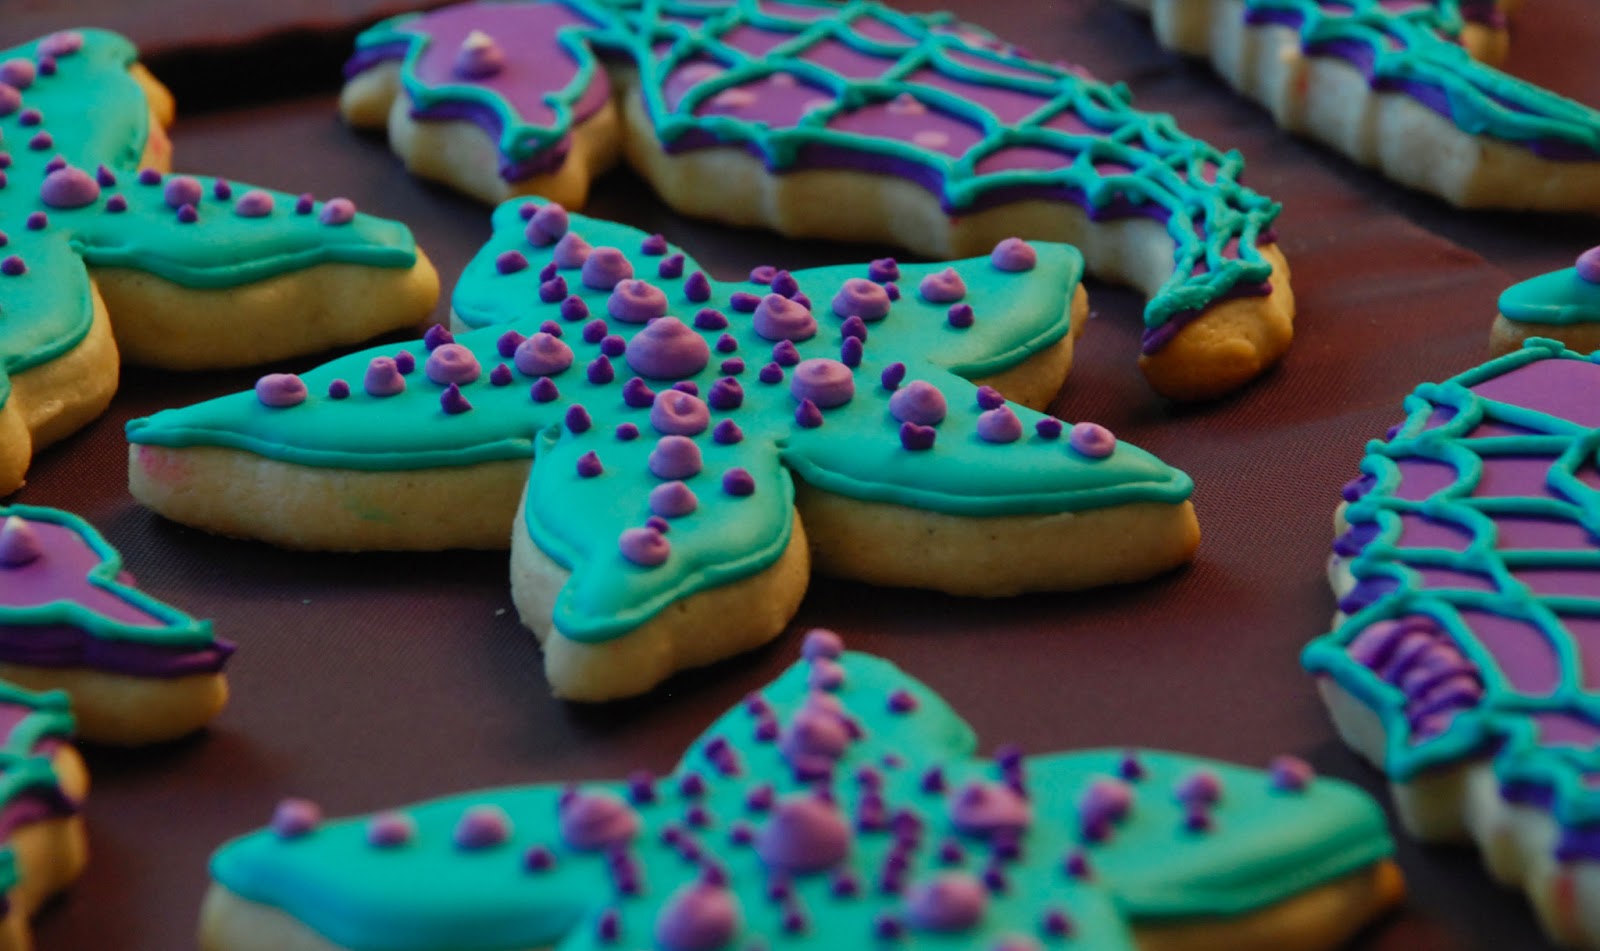
My favorite part about these cookies was the texture from all the little dots on the starfish – it really makes them pop!
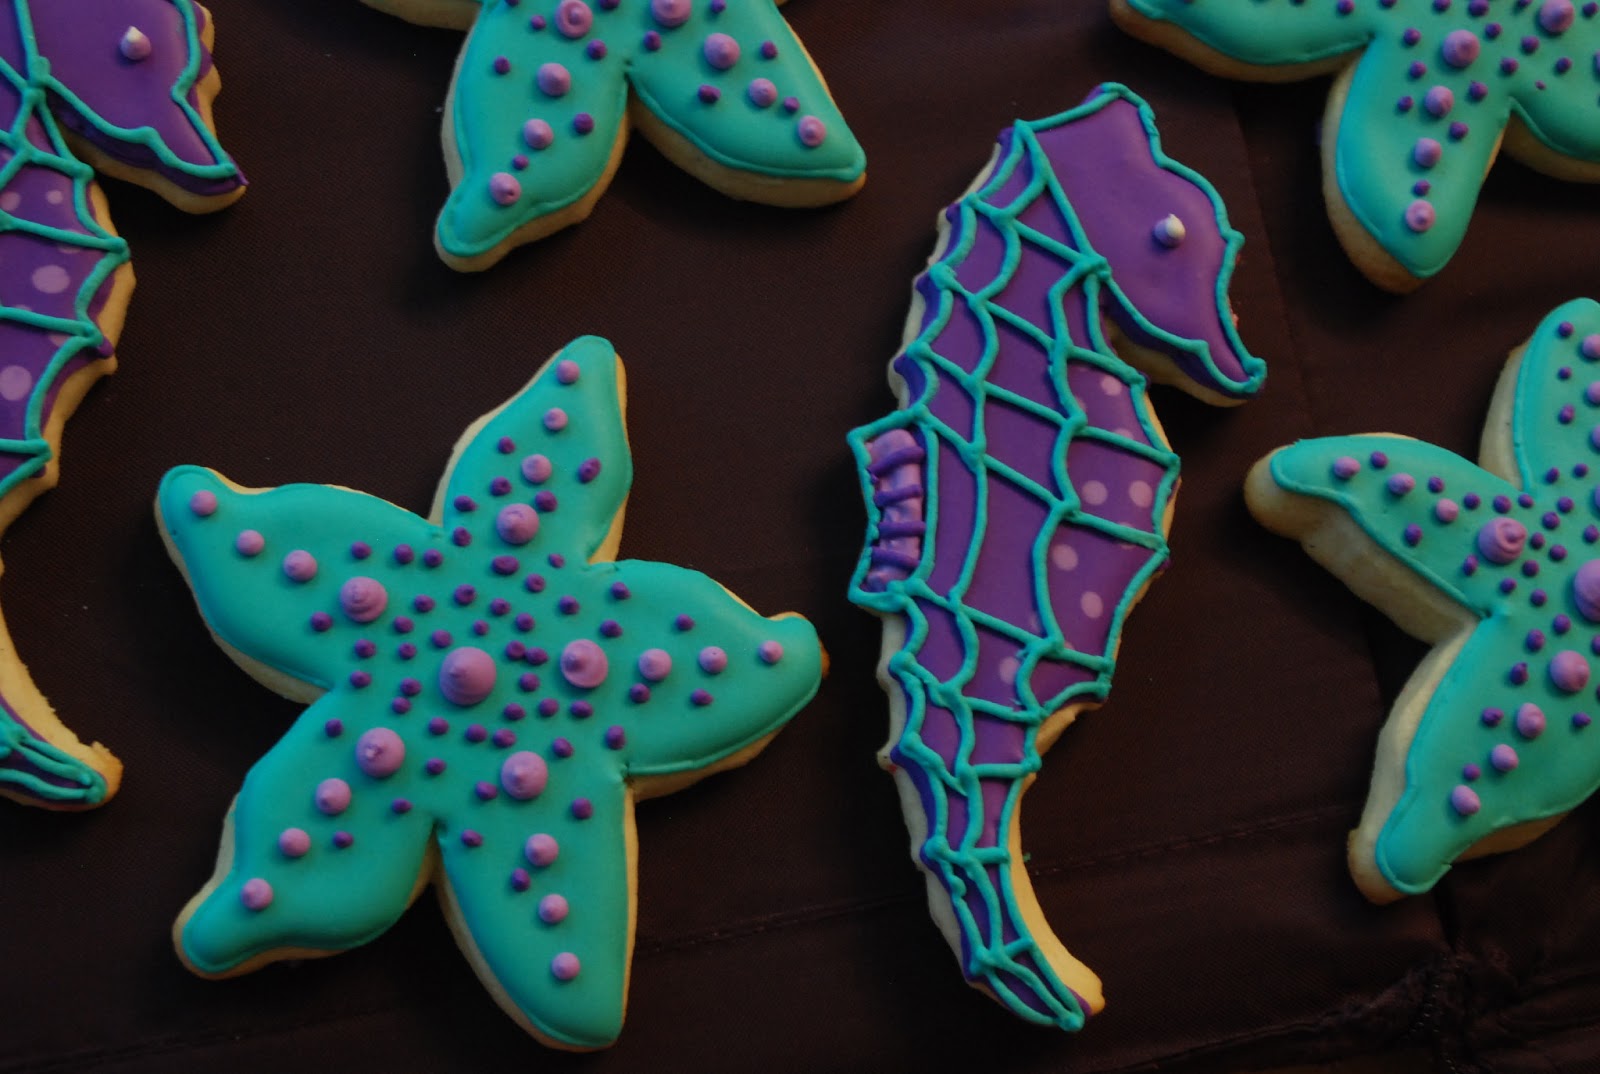
See the light purple on the seahorse belly and the little detail on the back fin? I tried to make these really special!
I tried to get some good detail without making them look to busy – the white to brighten up the eye was exactly what I was going for.

I wasn’t exactly sure what shades the customer needed, so I made sure to include a few and I think they turned out quite well.
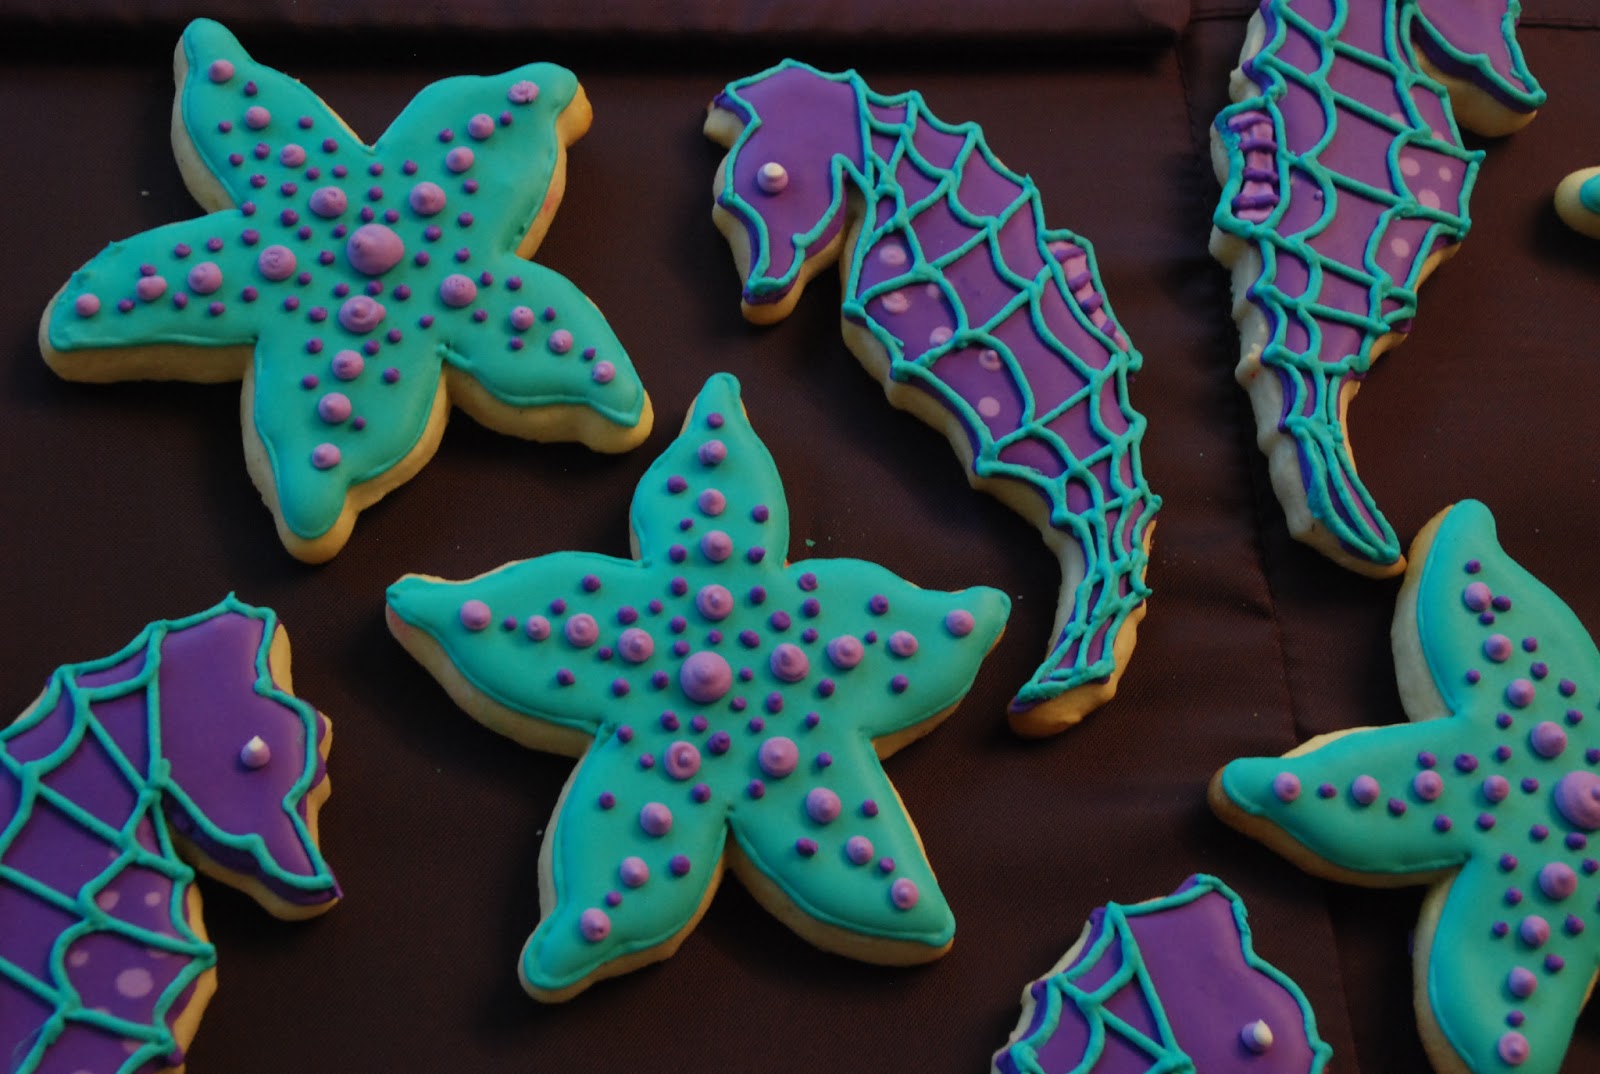
Definitely an improvement on the first batch I made because of the increased detail and realism. Plus, I like how the colors fit together.
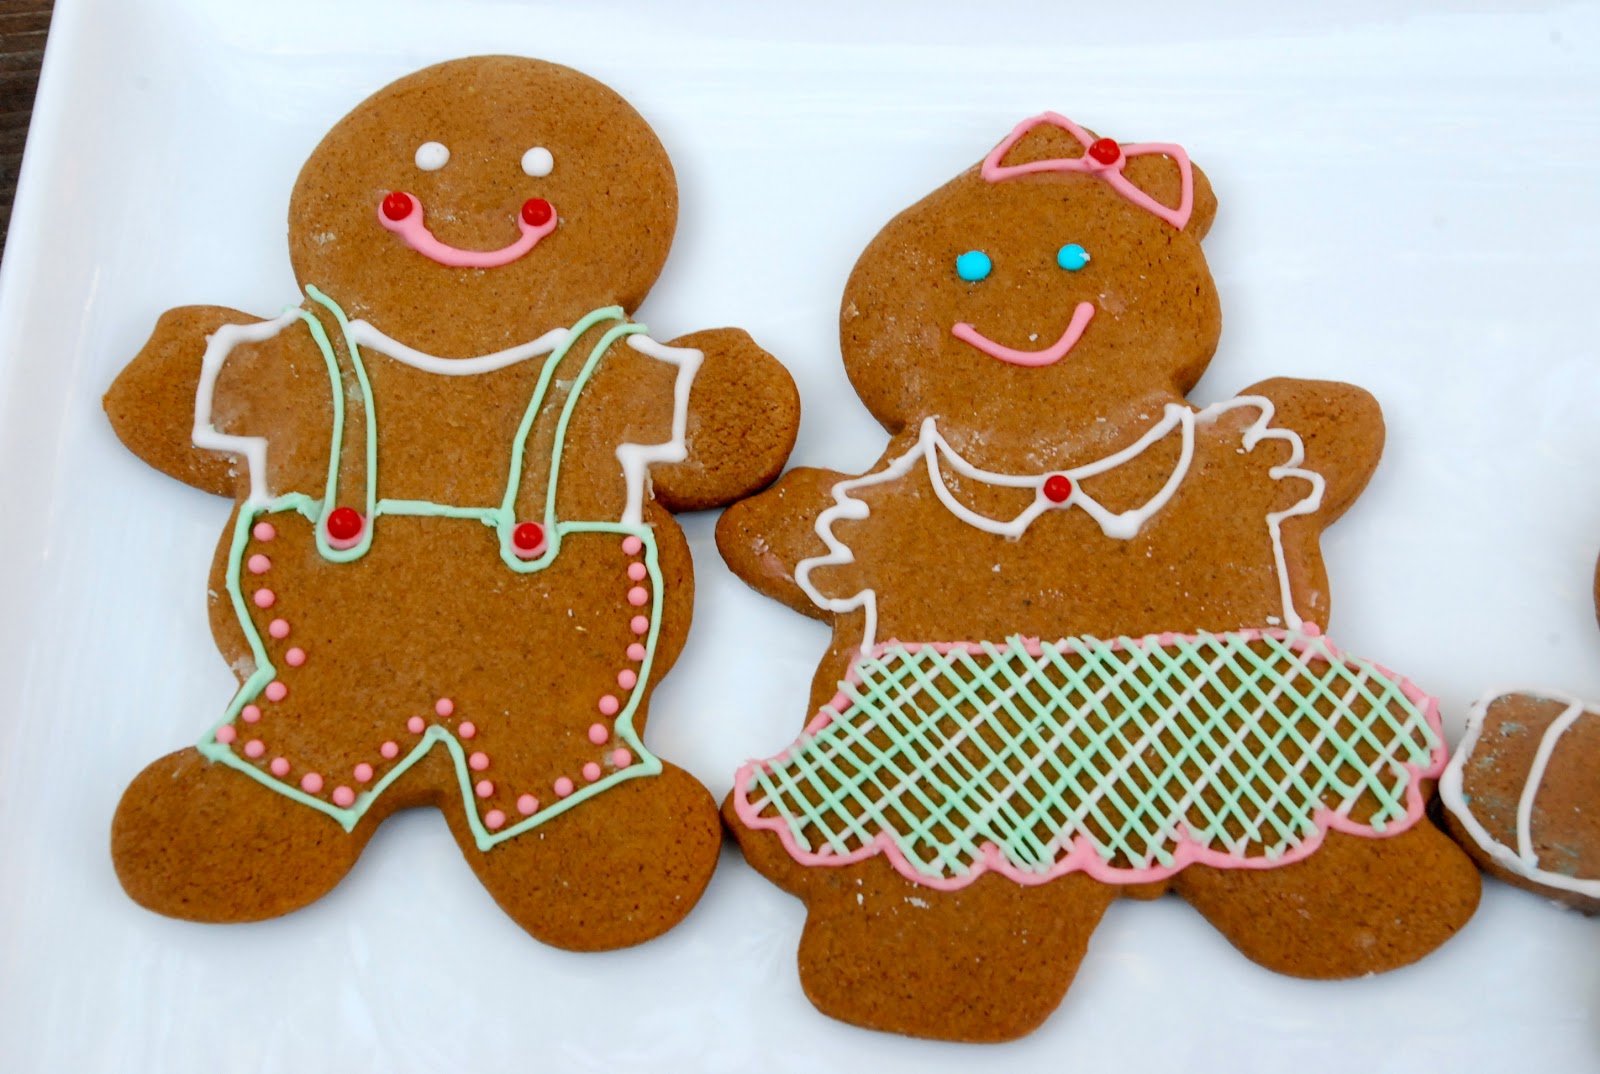
Gingerbread friends! Little gingerbread men and women and girls and boys. And some Christmas trees at the end of the post.

This little gingerbread lady is all bundled up for the winter.
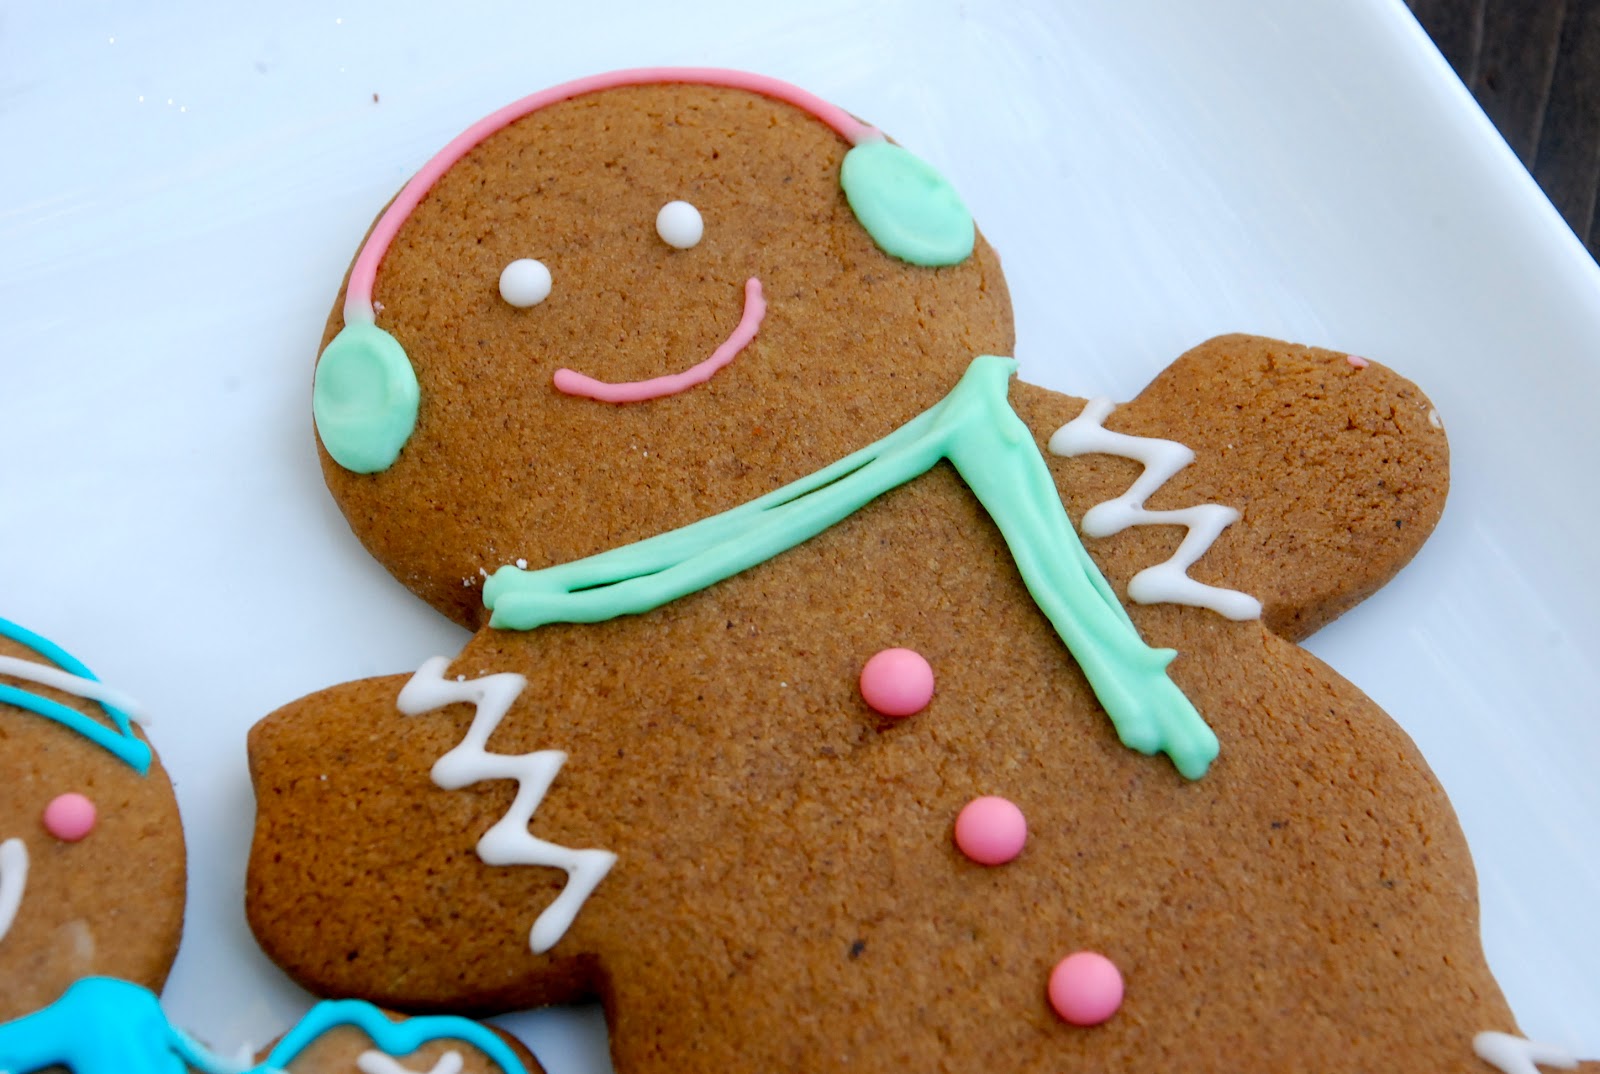
By the way, no, those aren’t headphones on the gingerbread man, they’re earmuffs.
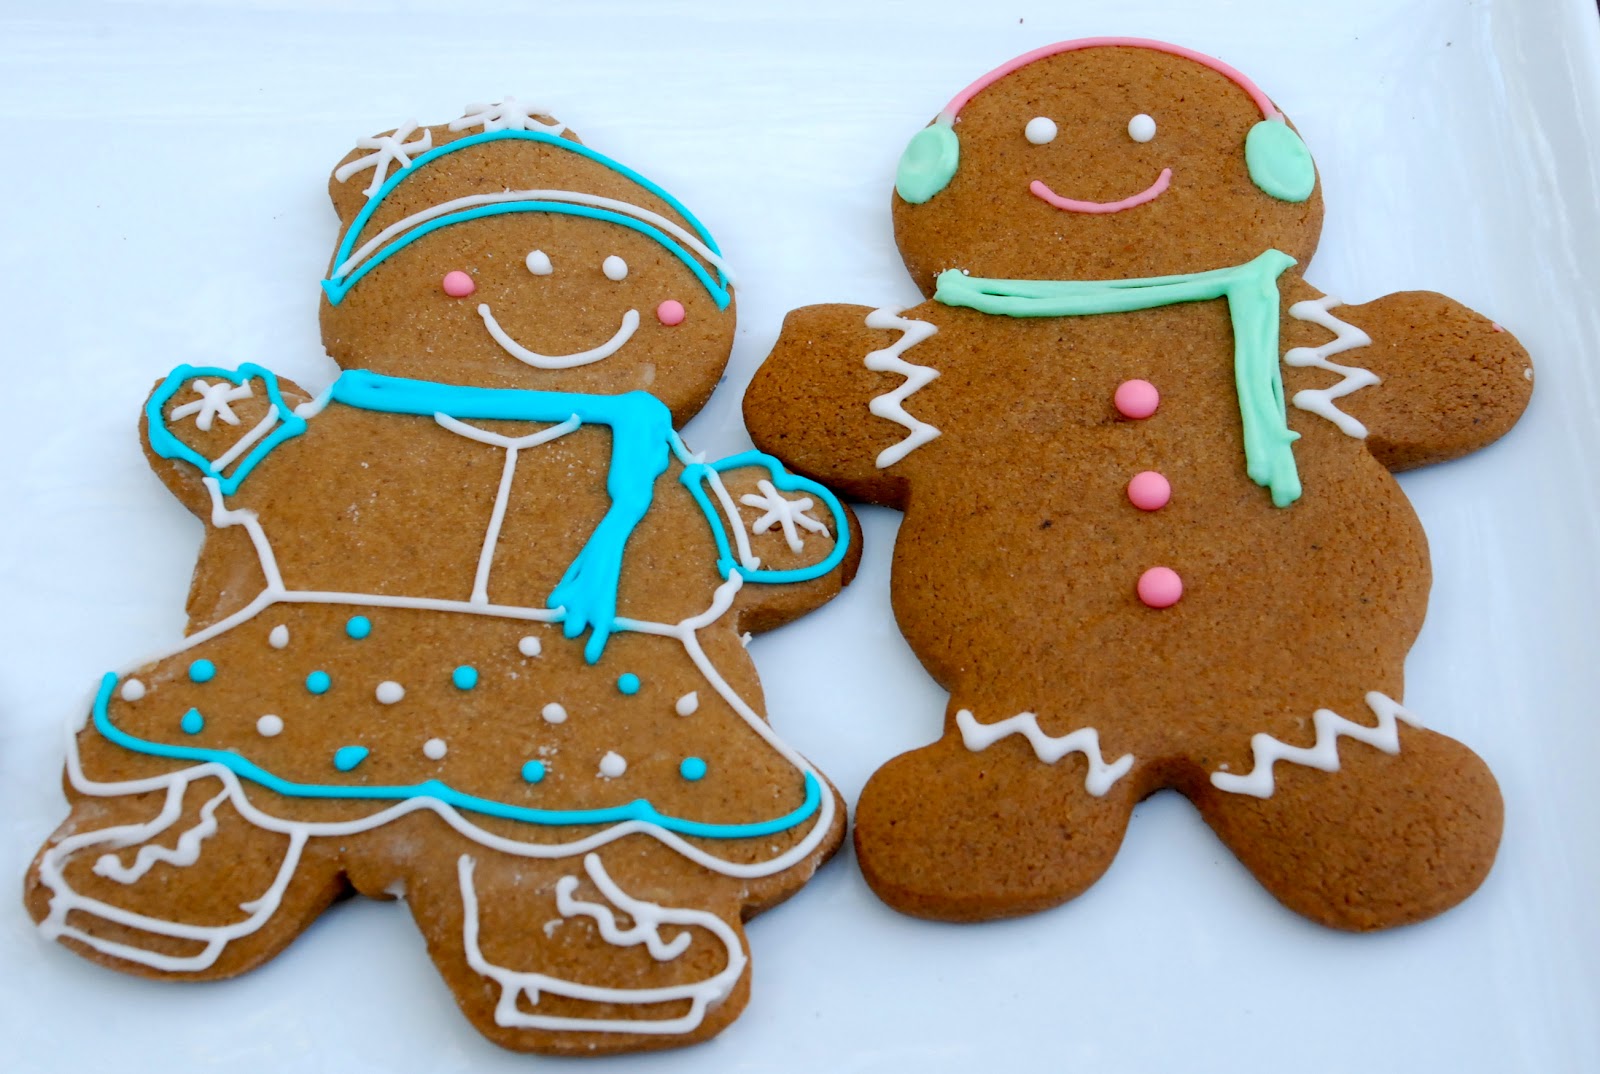
See the happy ice skating couple?
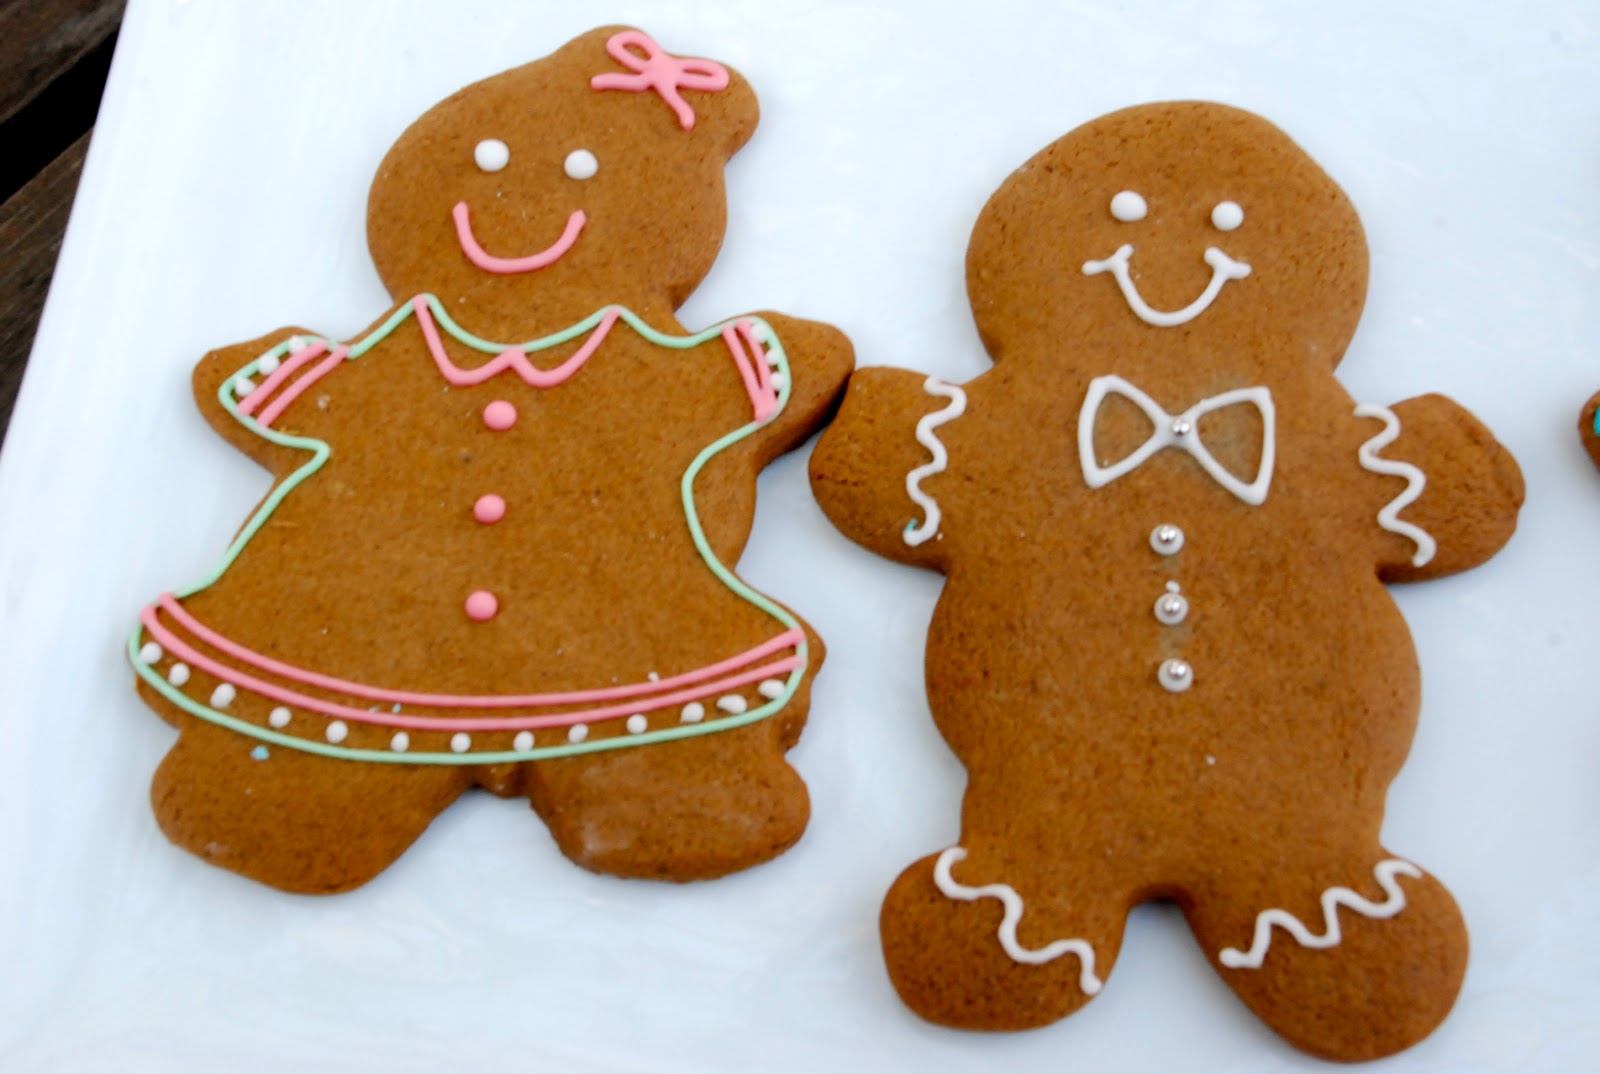
And, of course, the classic simple gingerbread people.
Messier piping than I’d like, but they’re still cute and I was so proud of it. I made them a year ago!
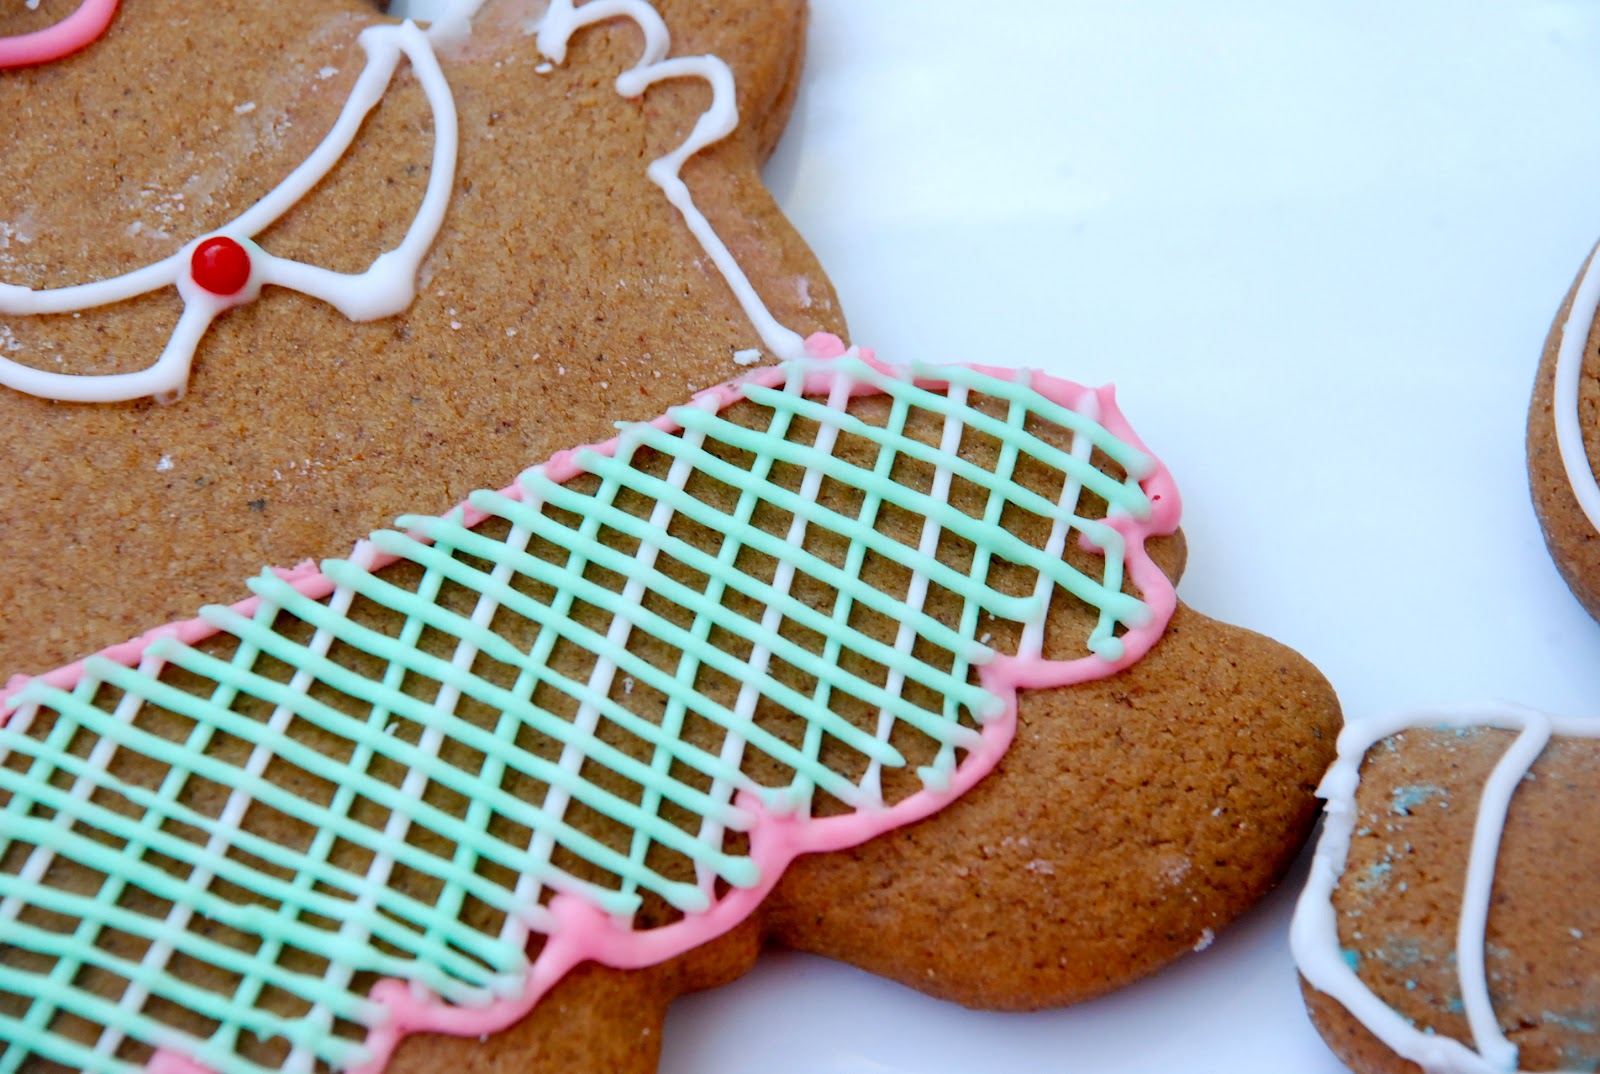
Here you can see the criss-cross piping details on this skirt.

And some Chanukkah friendly gingerbread people. Winter blue and white colors.
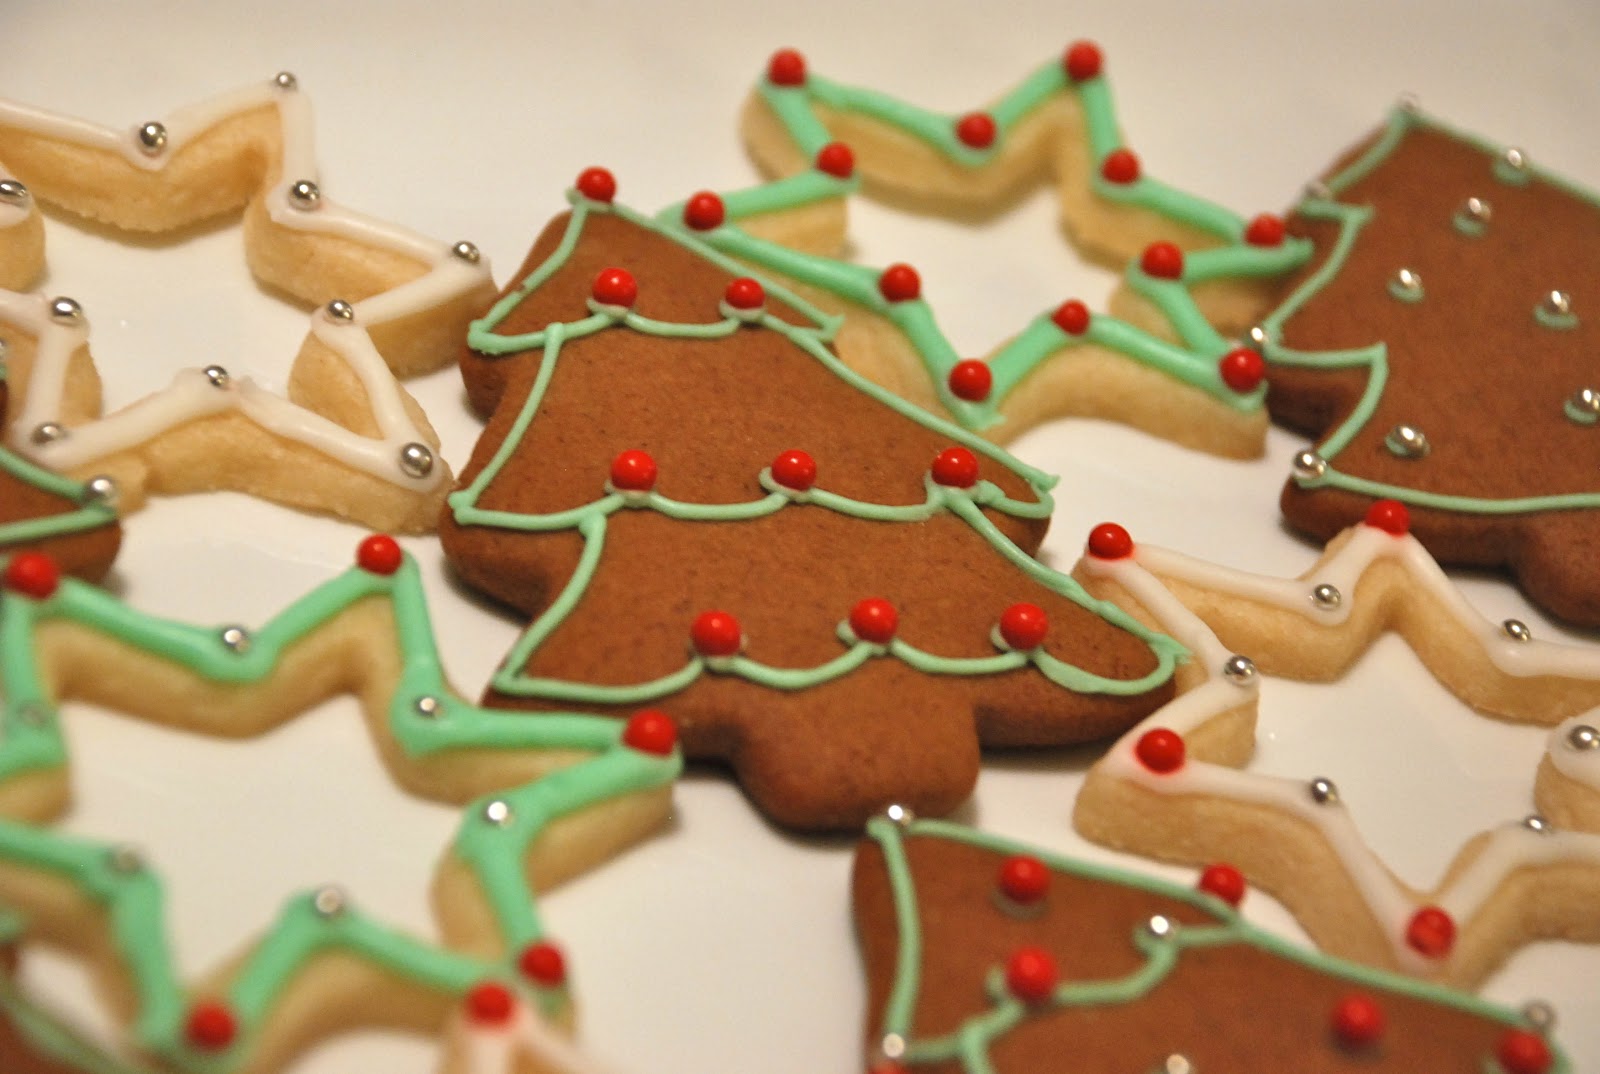
And with the scraps I figured I’d have fun making some odds and ends. Christmas trees and stars.
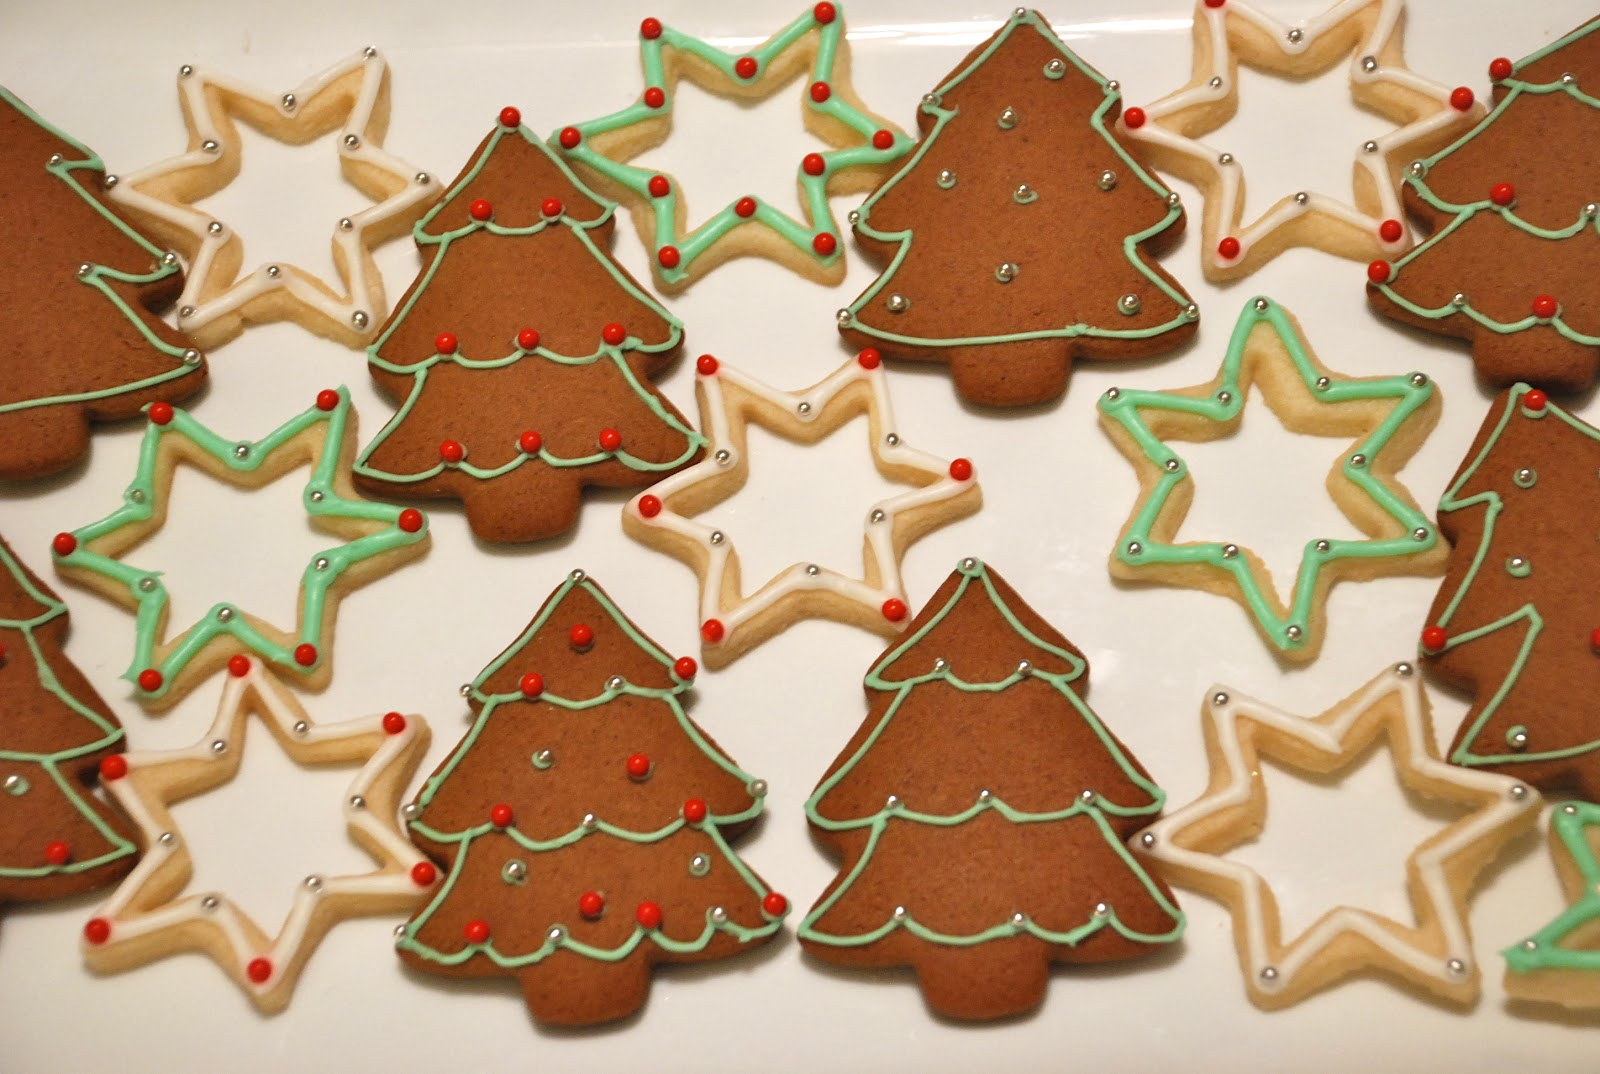
I finally got a chance to use my colorful dragees. Sweet and simple.

Unfortunately, I wrapped them up before getting good pictures, so you’ll just have to believe me when I tell you that they were super cute.
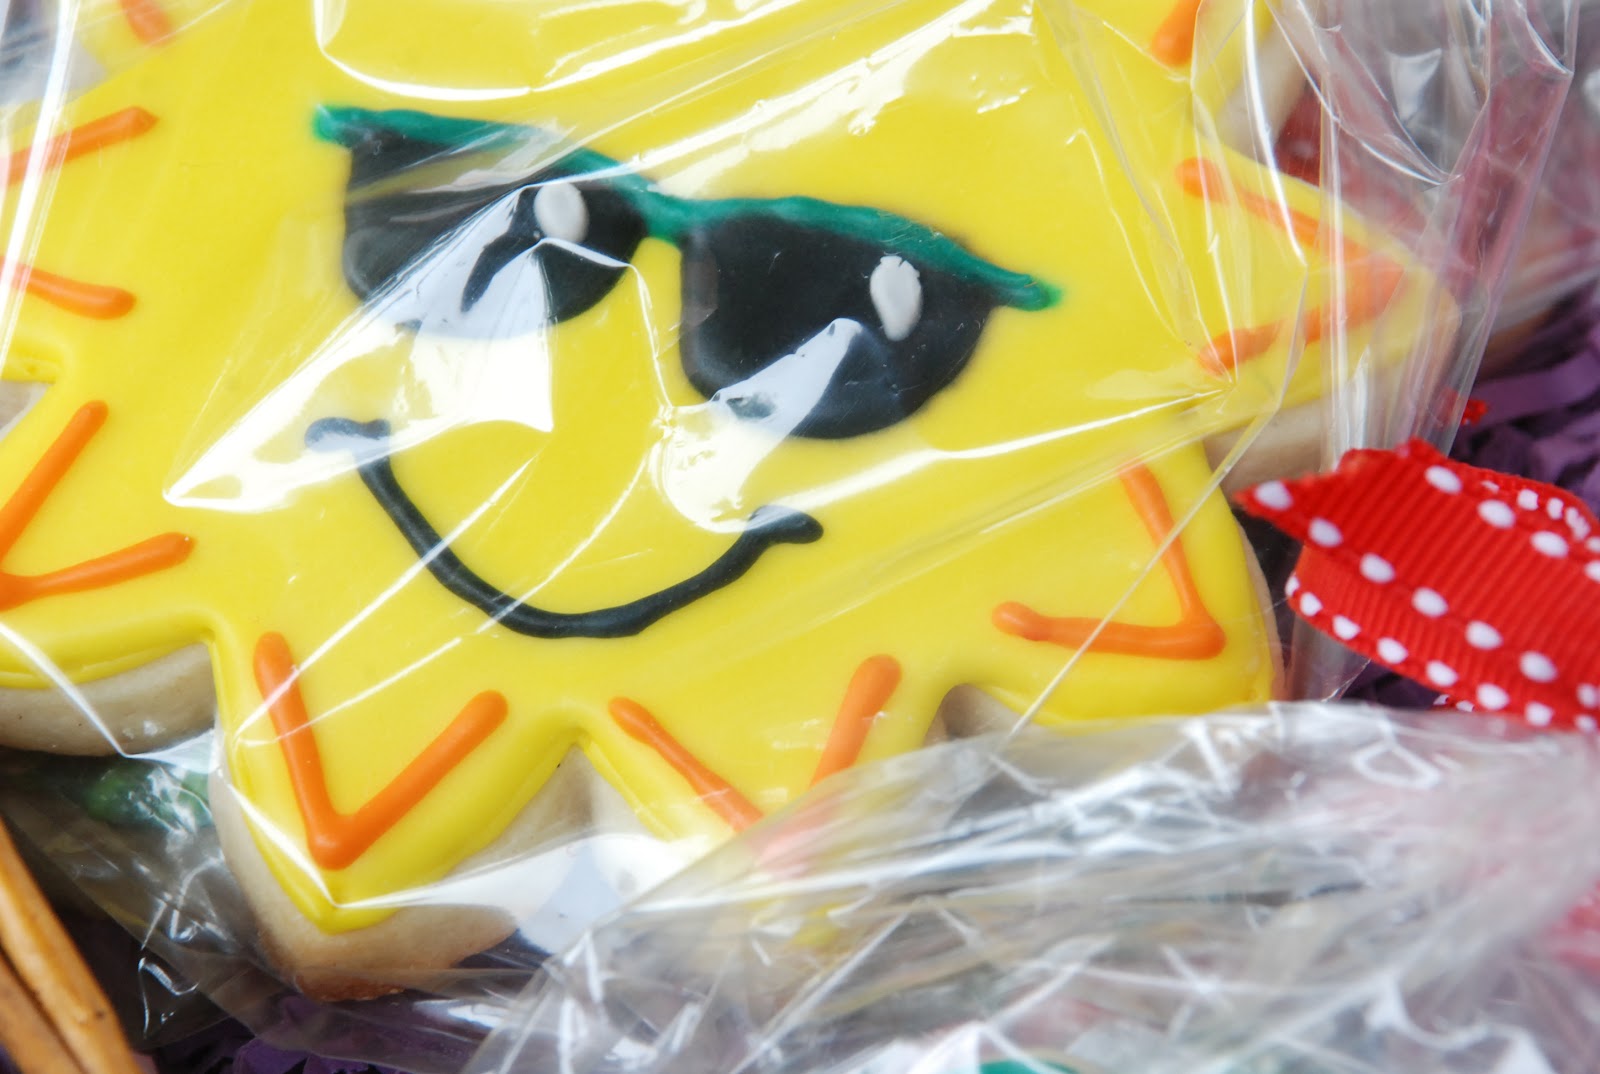
Happy sun cookies with sunglasses brightened up the basket.
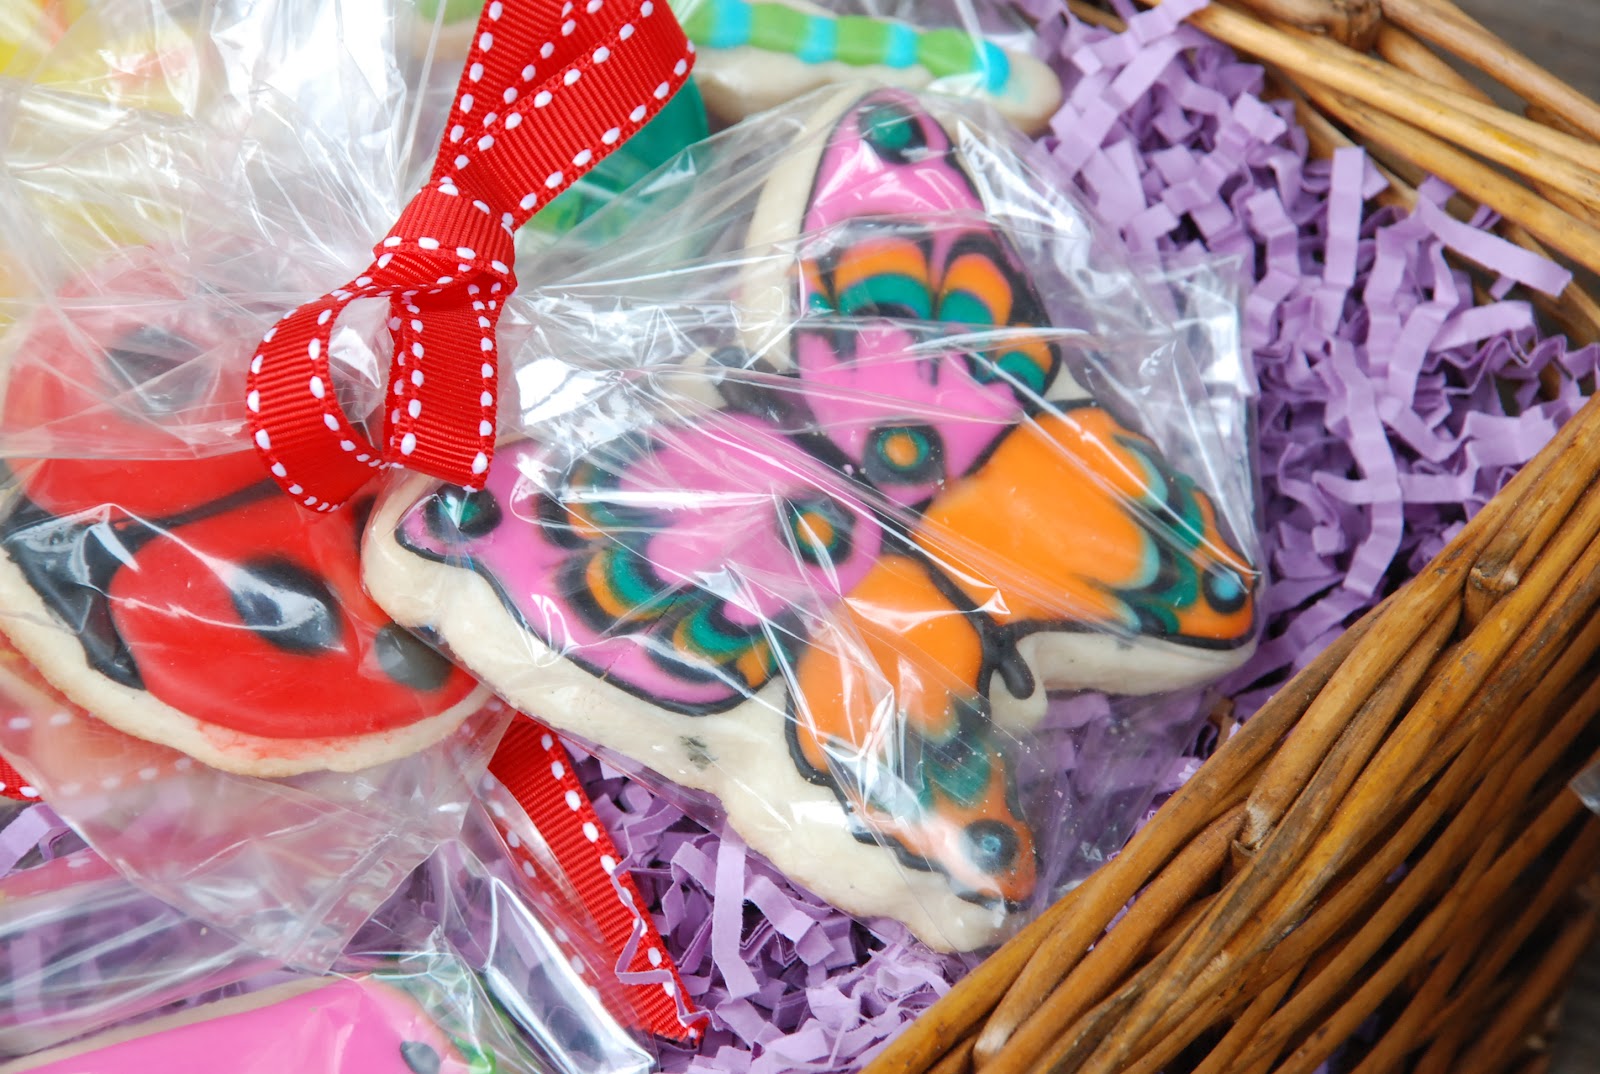
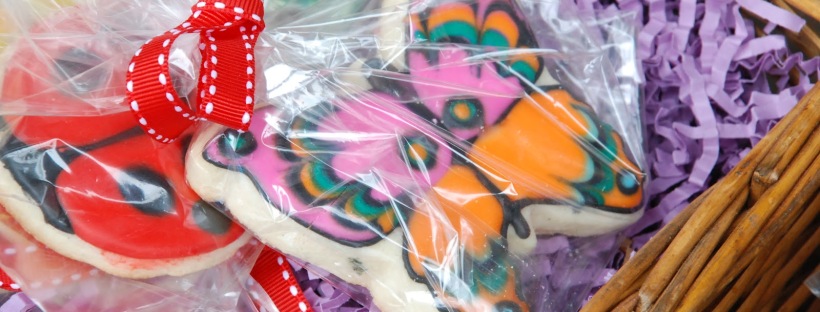
Because I used a marbling technique, every butterfly was different.
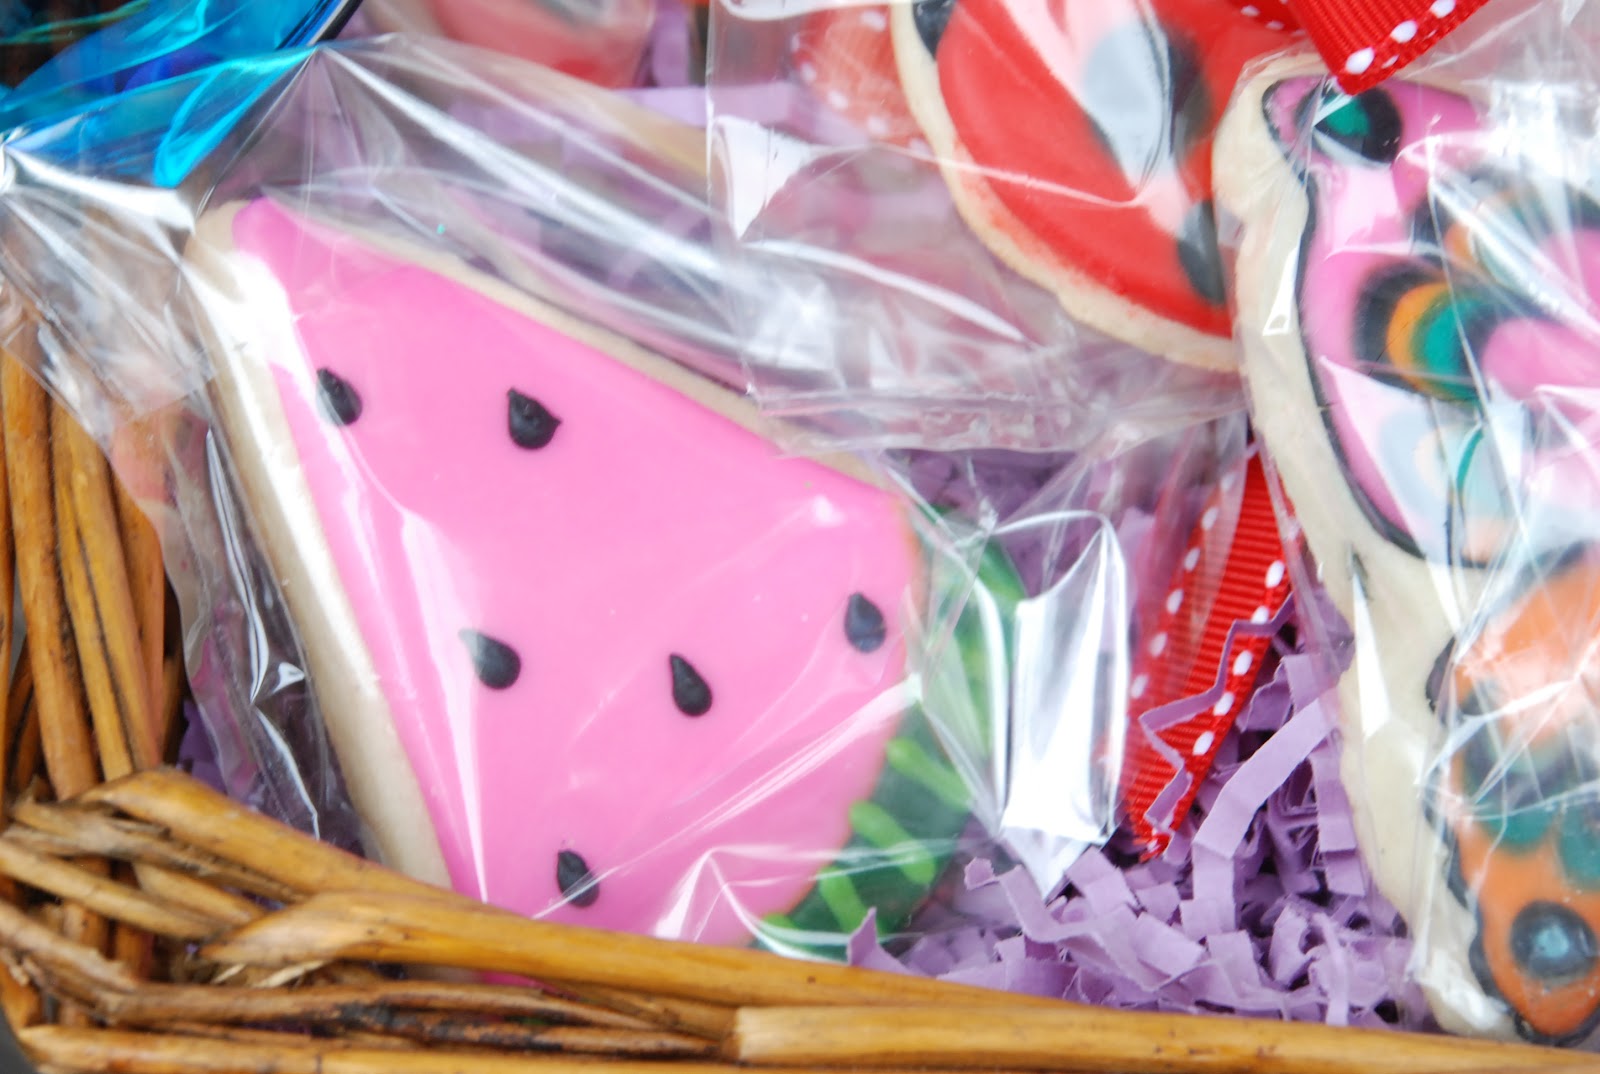
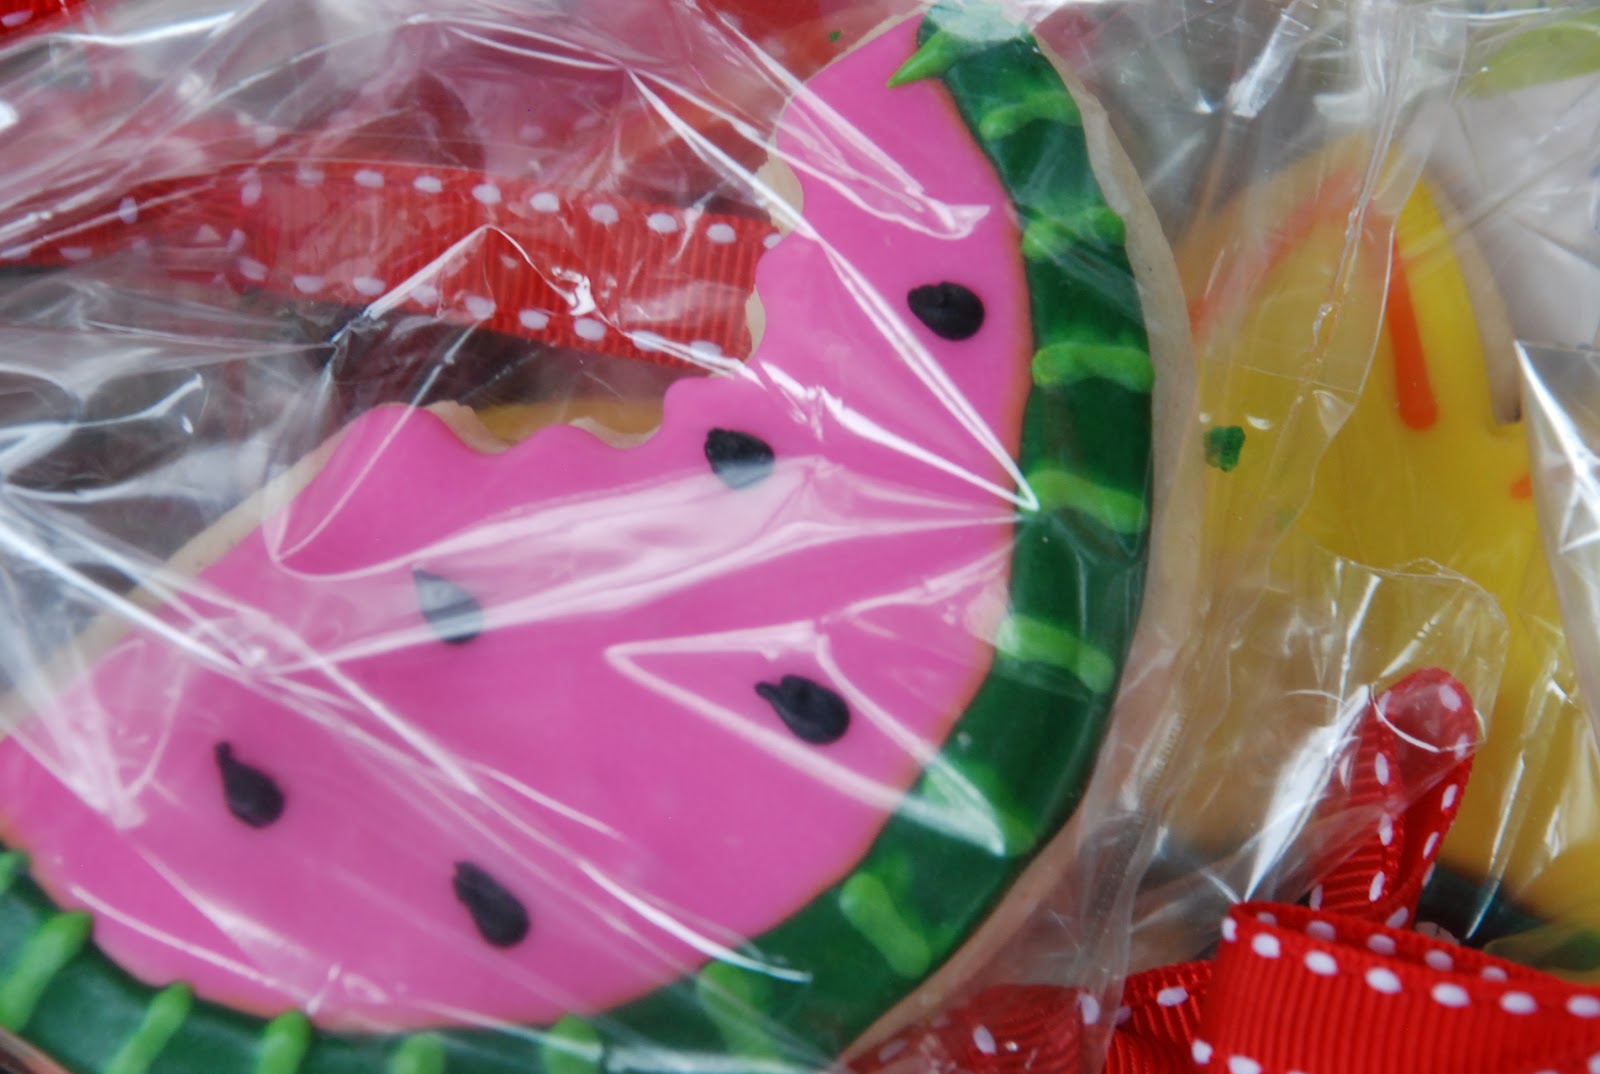
I love the watermelon cookies! The seeds just made me “awww!”
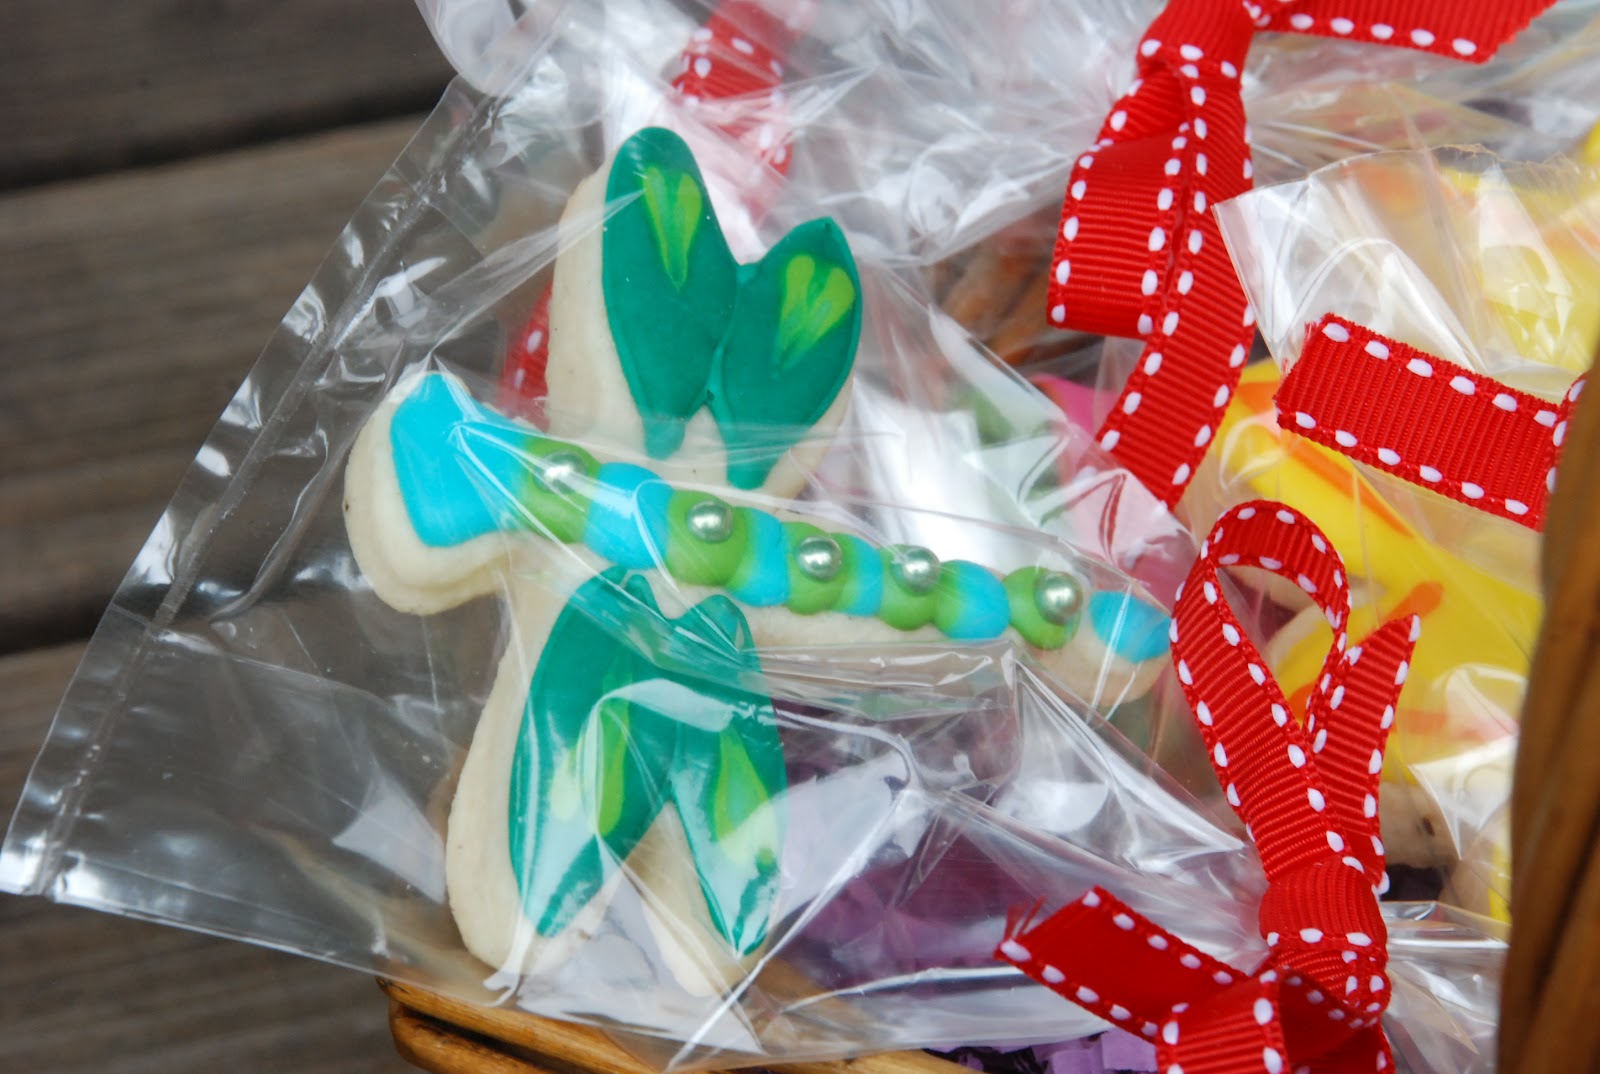
The dragonflies were decorated with silver, green, and blue dragees to make them magical.
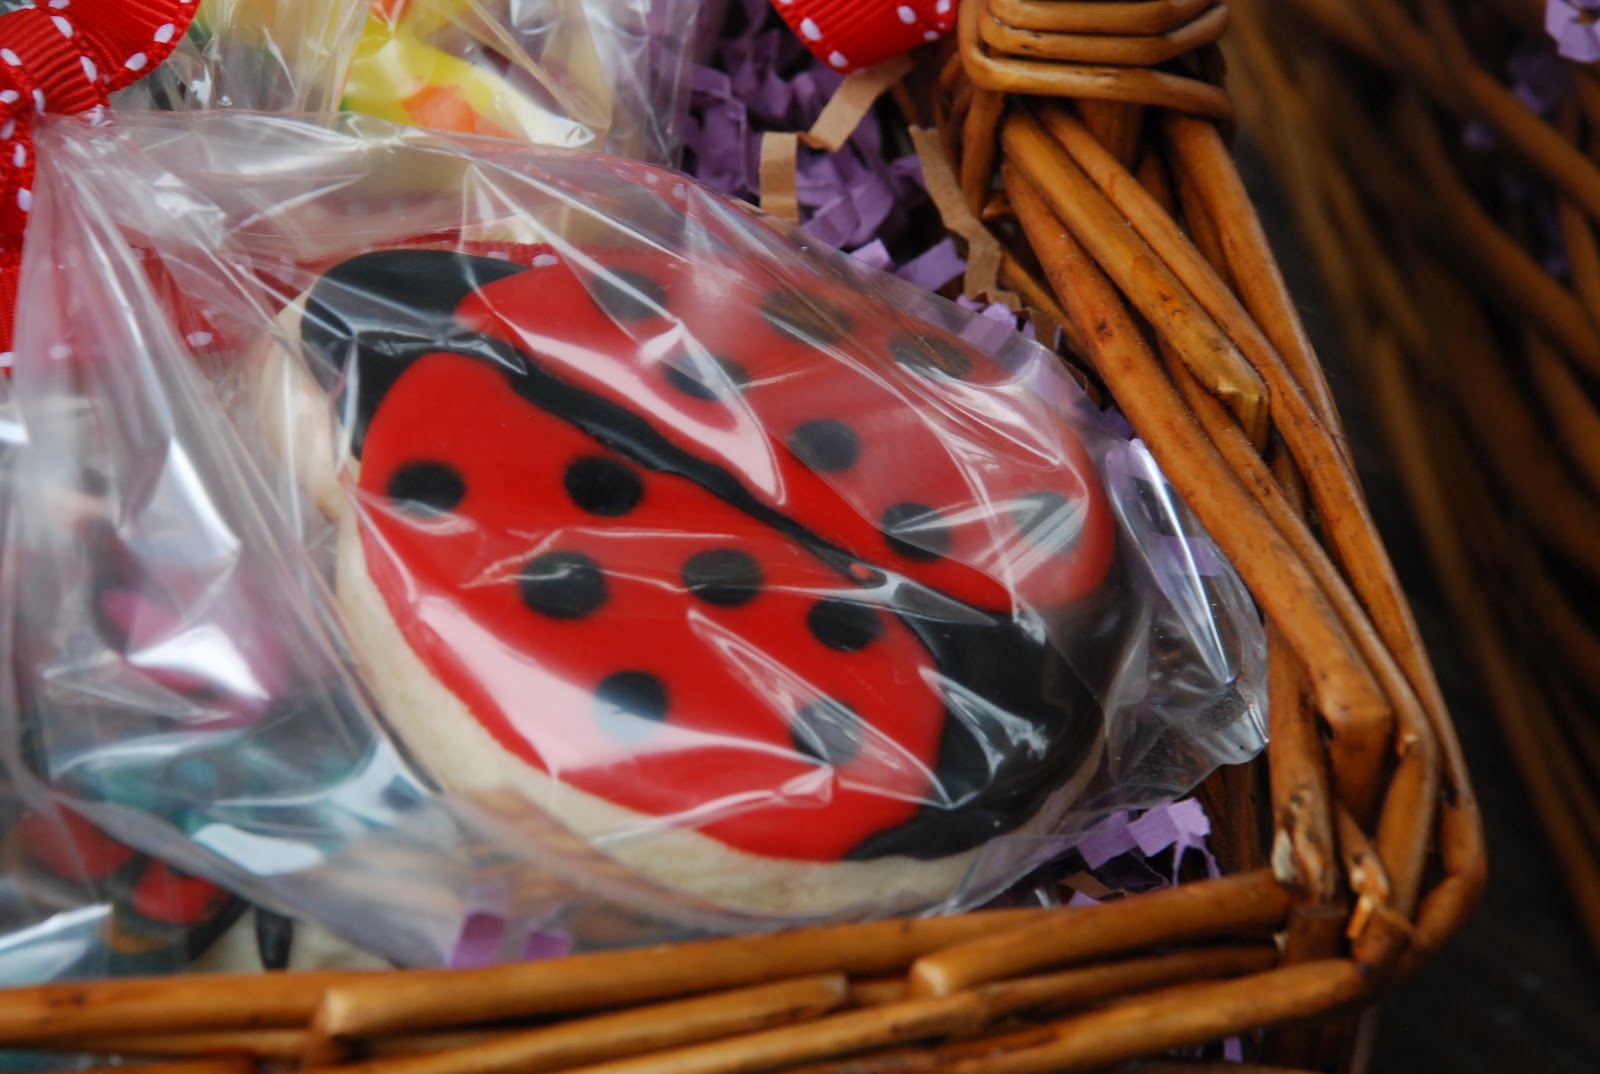
The ladybugs were stuffed into every corner of the basket and each one had a different number of spots.
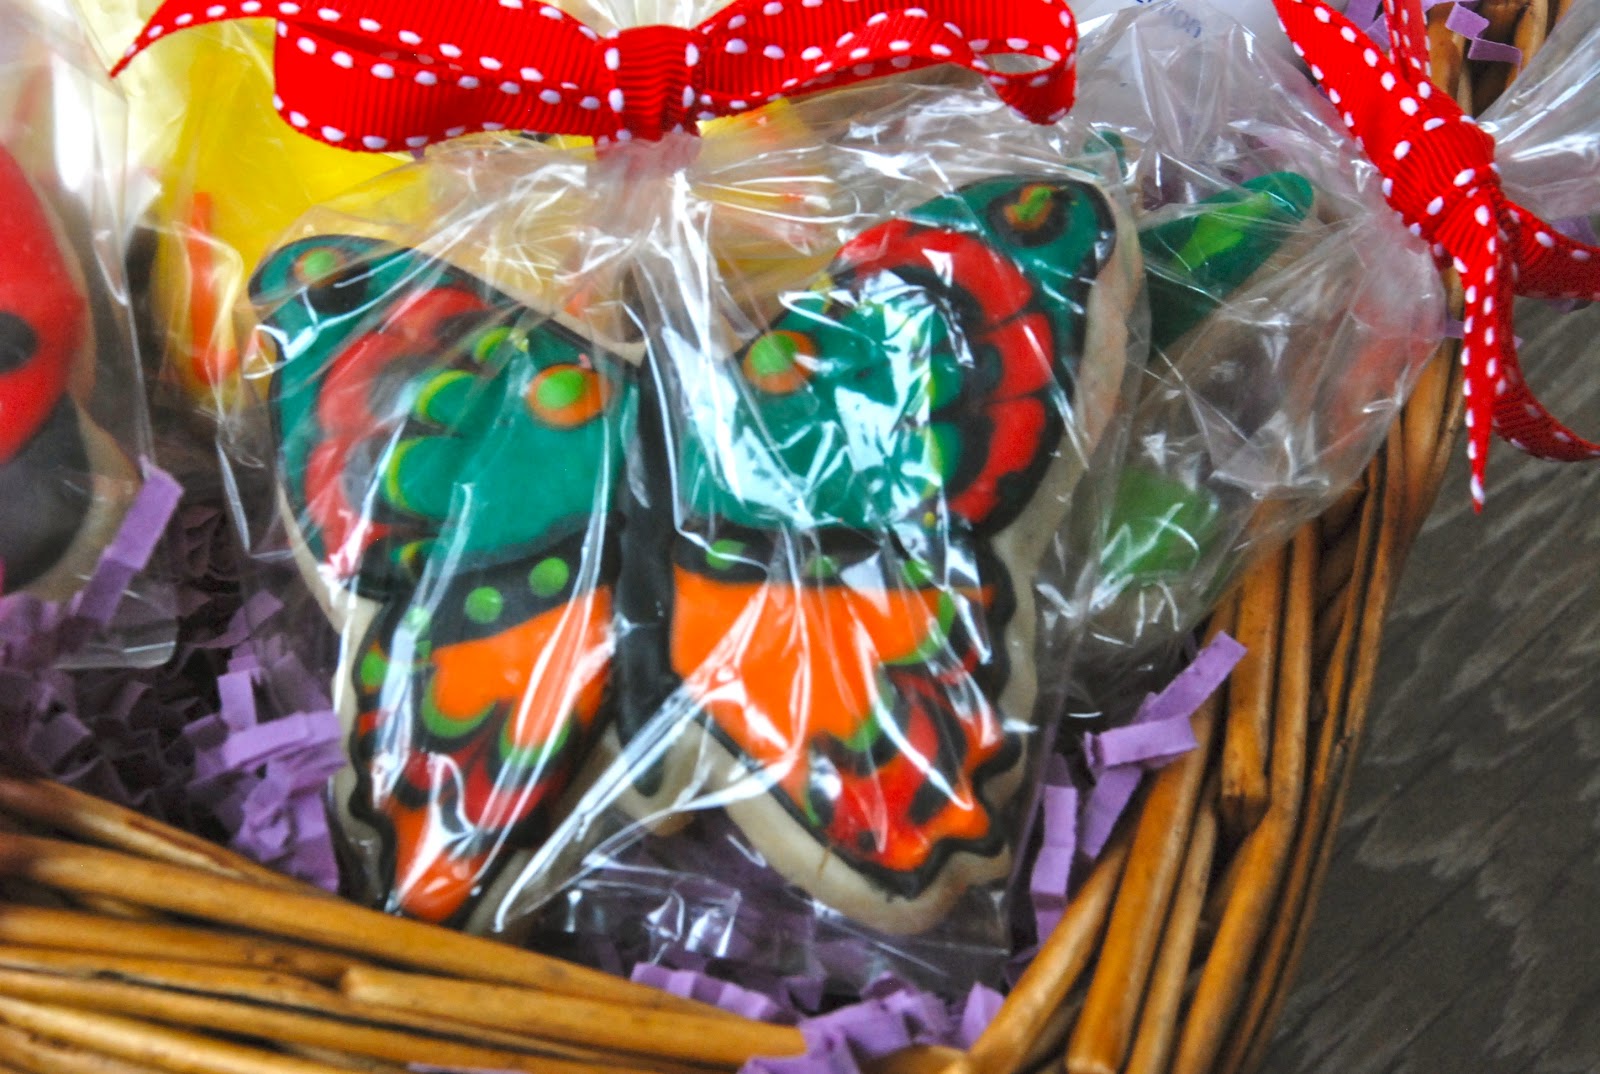
I tried to get a closeup of the royal icing marbling technique here. Basically, you pipe out lines of different colored icing next to each other and run a toothpick through them before they set. It’s a very fun and forgiving technique.

I insisted on making the watermelon slices have bites taken out of them, and I’m glad I did!
The baskets were arranged with tissue paper and a few other picnic items (sunglasses and sunscreen) were tossed in.

Here they are on the tables with sunflowers!

They were a big hit and I love how perfectly they fit the theme.


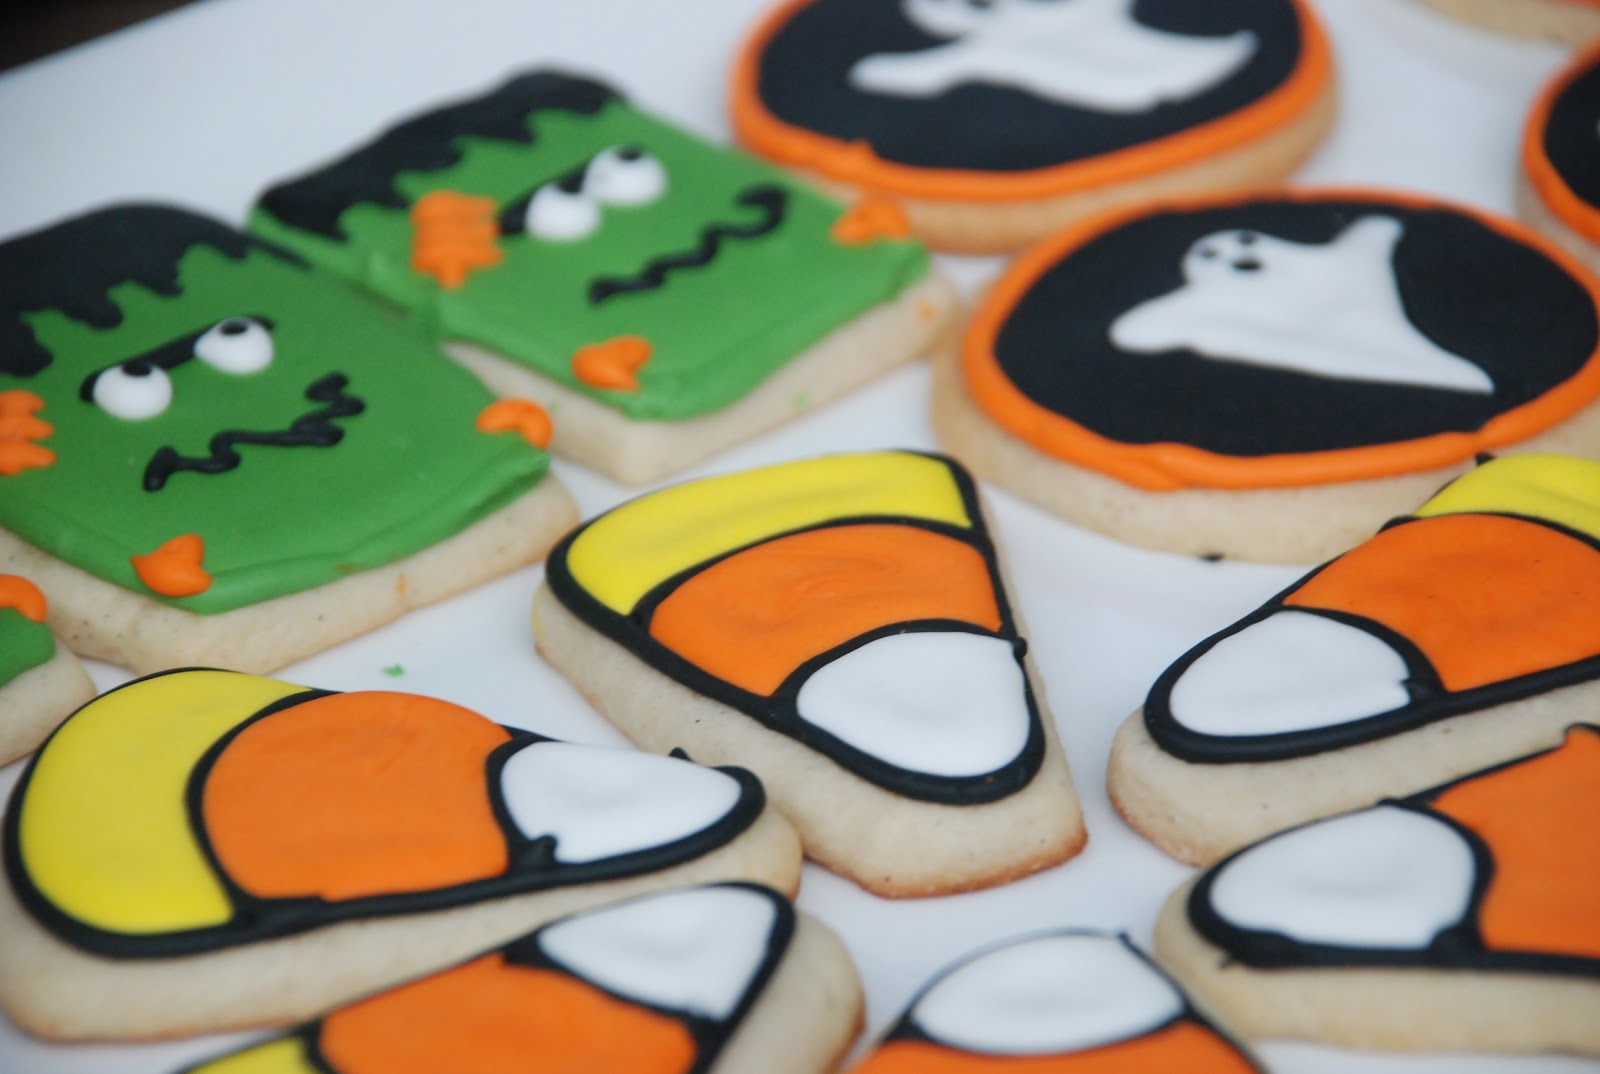
And some Candy Corn triangles. I used a big circle cookie cutter then just sliced it into 6 wedges. The candy corn cookies were the most fun to decorate!

You can see how there’s quite a bit of size variety, but I didn’t really care about perfection for this batch, just cuteness.

I love the cute wiggly smiles on the Frankensteins and the 3D effect of the eyes popping up.

Halloween in Maddieland is never scary.

Happy Halloween!

BOO!

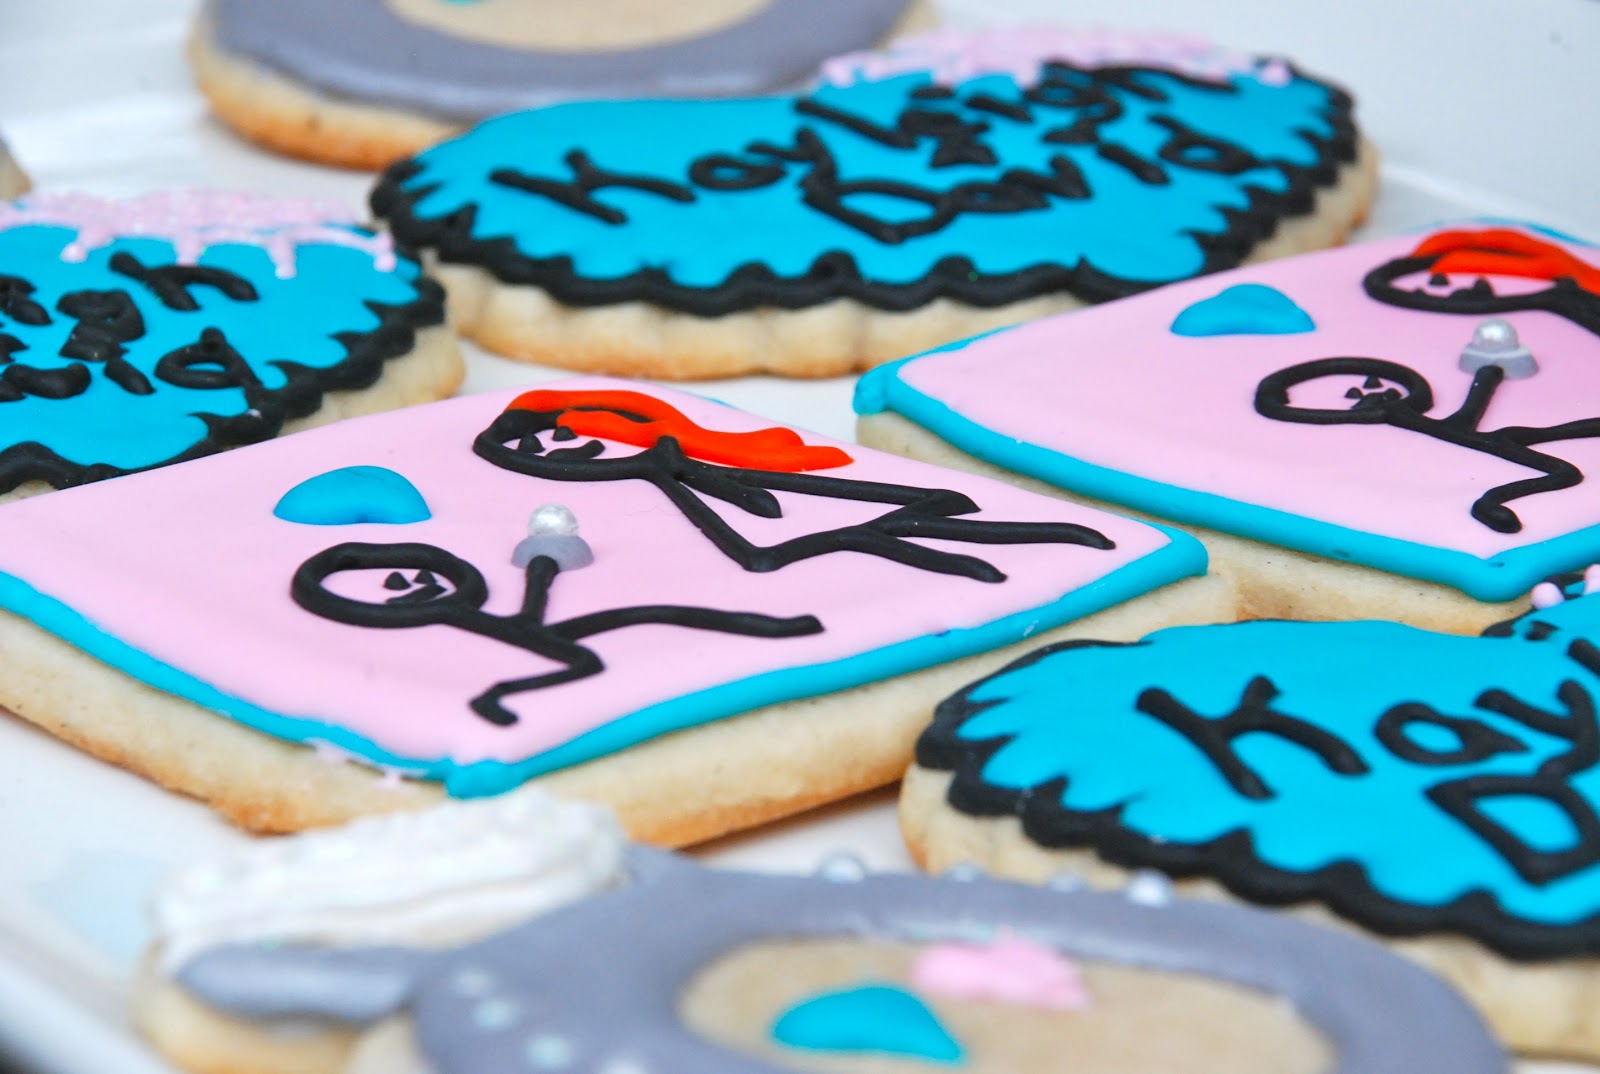
My friend (and suitemate!) got engaged over the summer! Naturally, I made cookies.
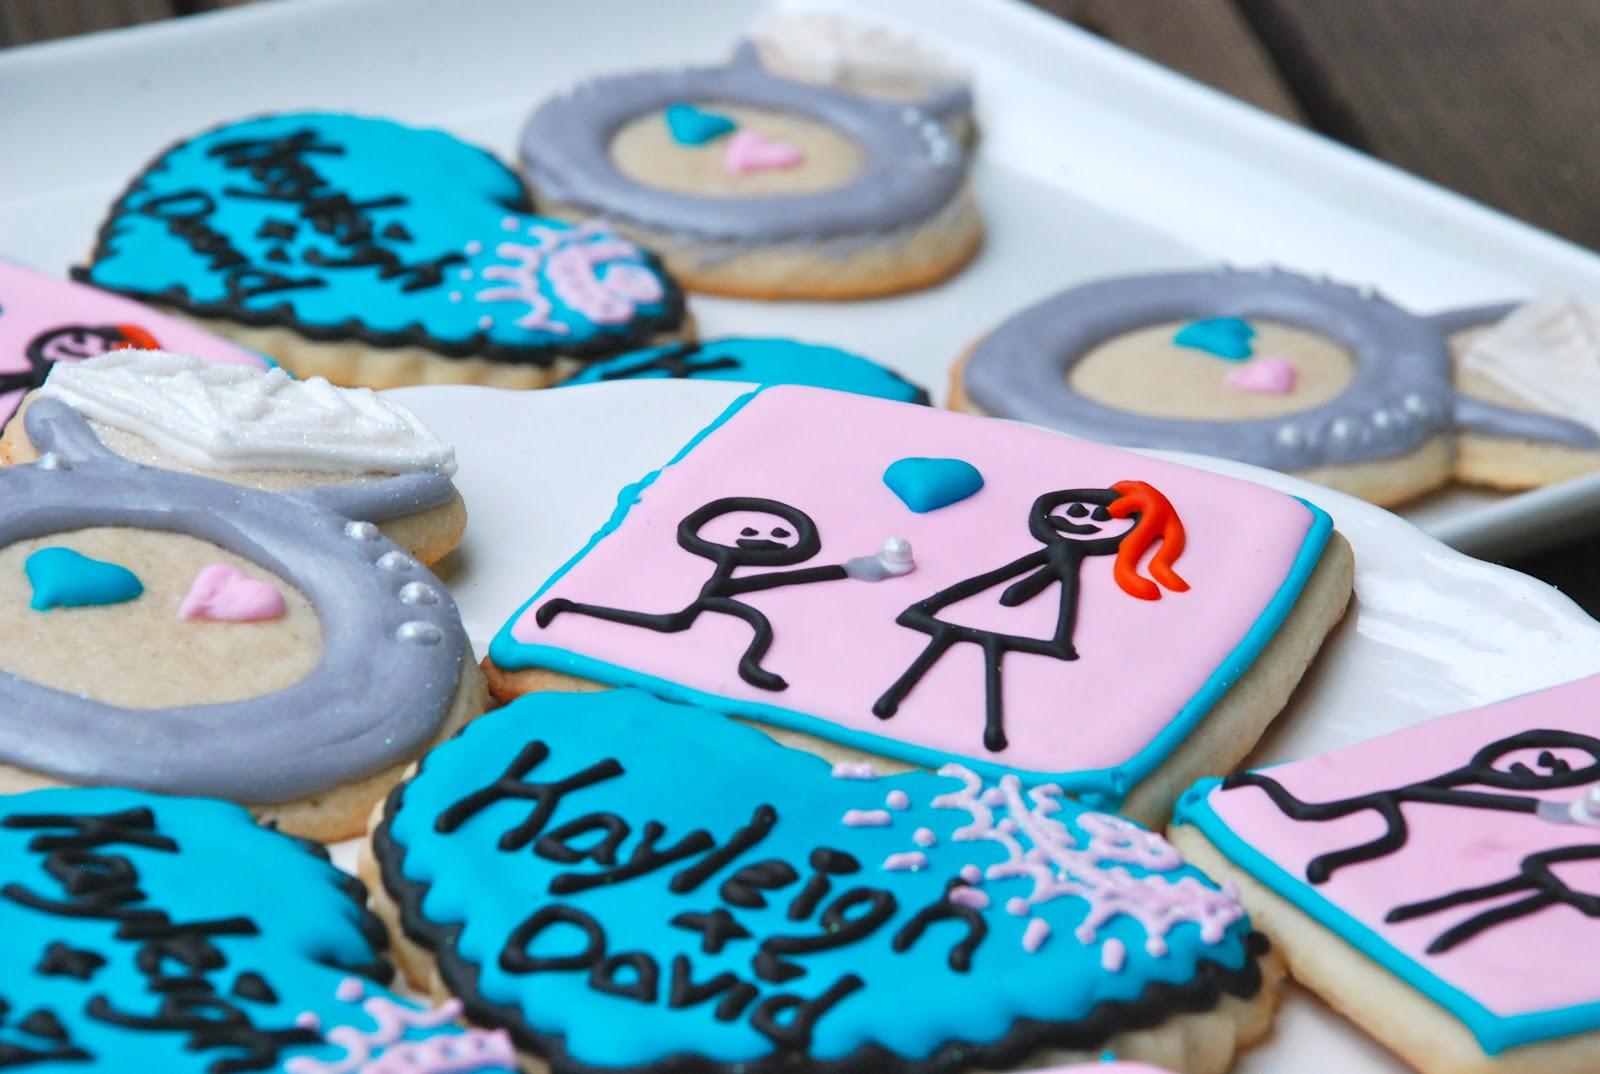
These decorated sugar cookies had to be mailed from Los Angeles to Boston, but they were definitely worth it.

The bride-to-be has the most gorgeous red hair, so of course the cookies with the stick figure proposal had to include that personalization.

These cookies were all pretty big – about 3 inches across, and I cut them nice and thick, too.
I love the disco dust (rainbowy-clear glitter) on the details. It made everything seem that much more special.

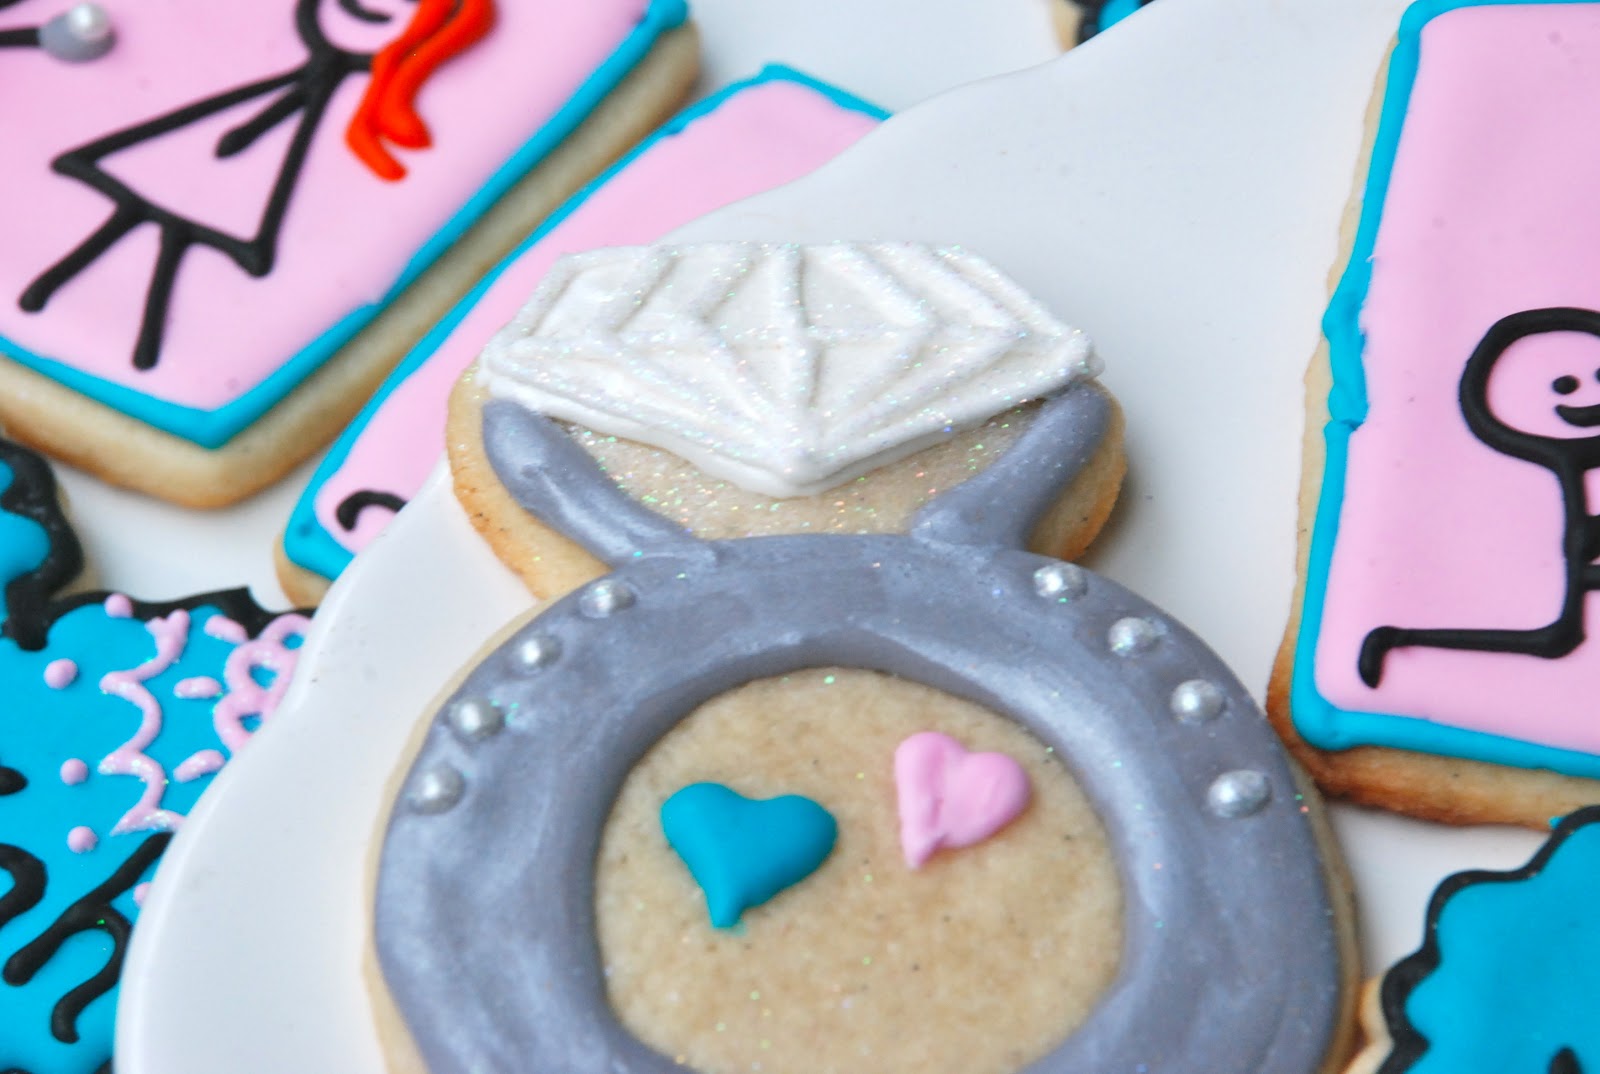
And, of course, the ring. The little diamonds (actually dragees coated in luster dust and disco dust) along the sides were part of the actual engagement ring, so I tried to stay true to that as much as I could.
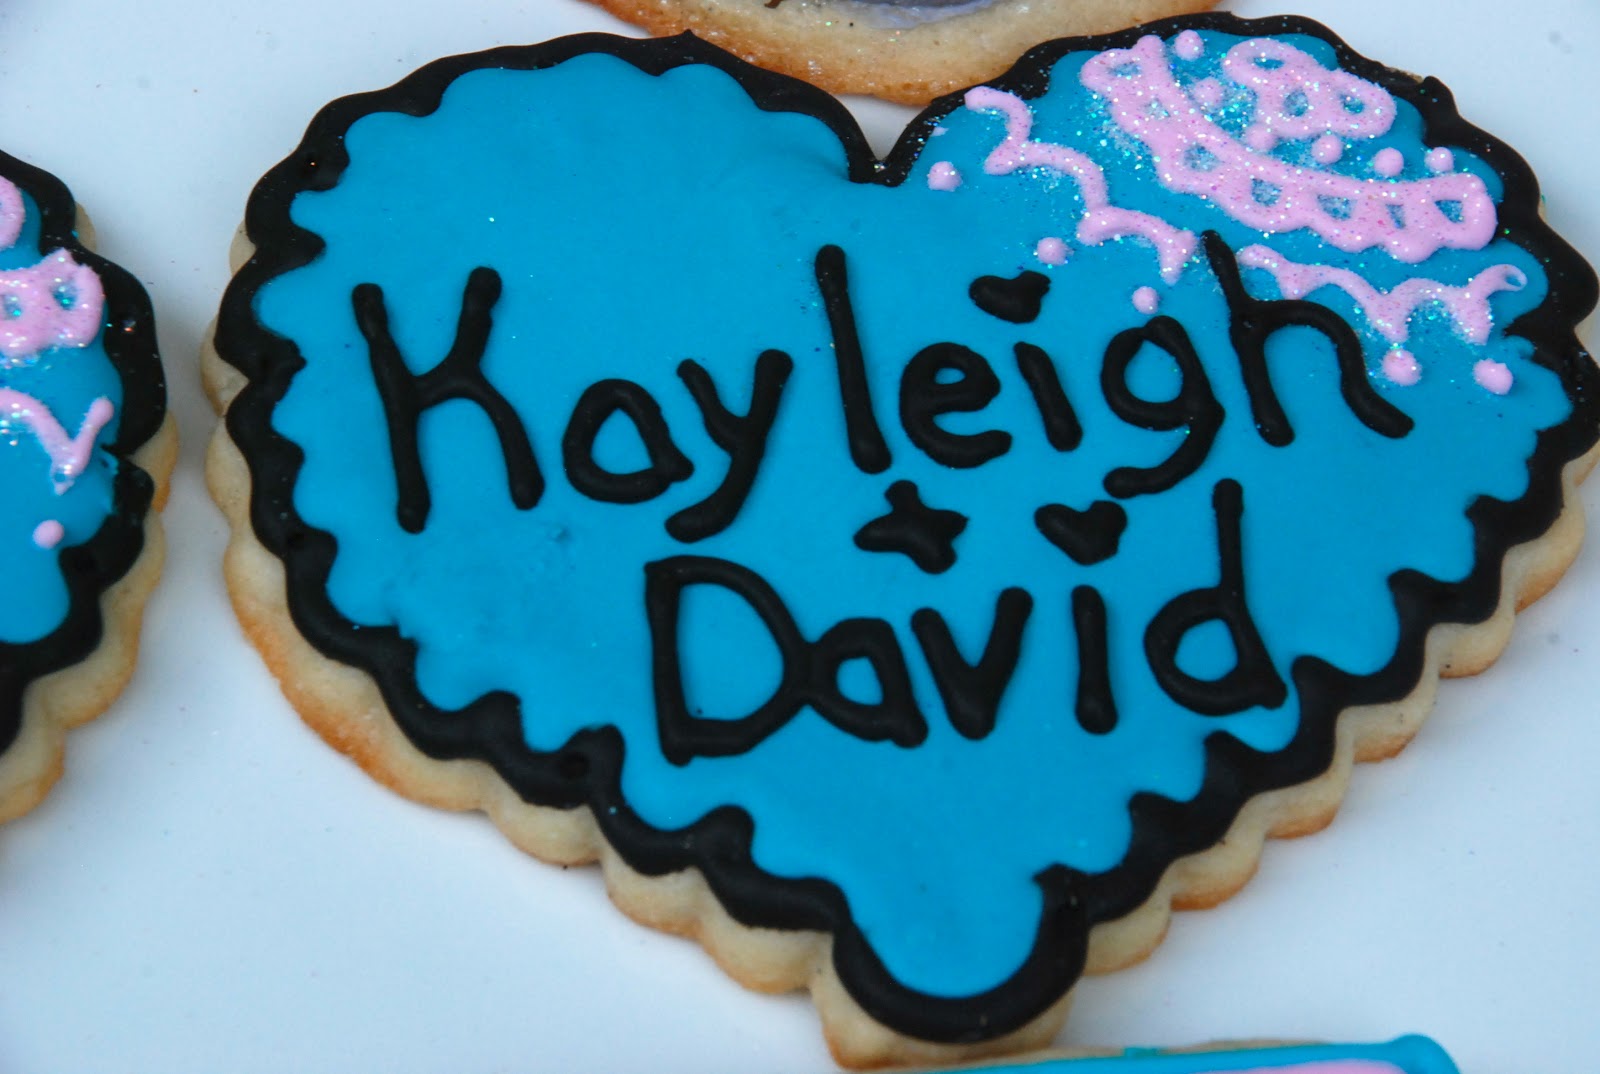
Lots of pretty hearts and details.
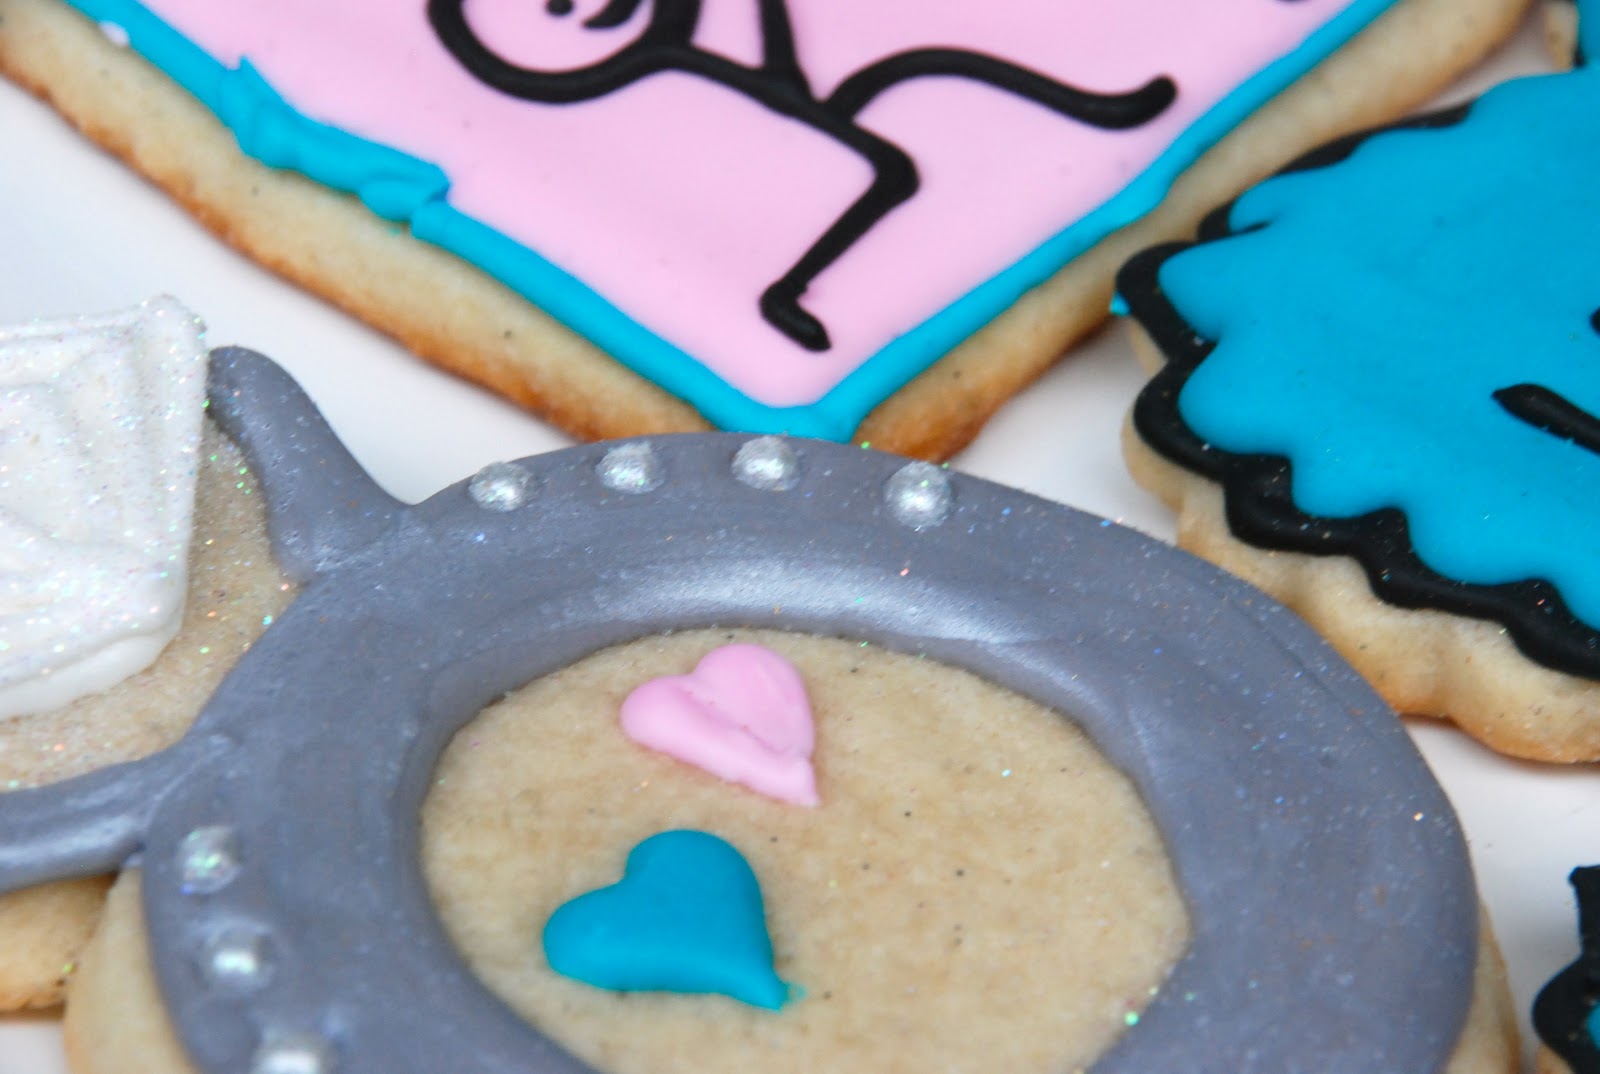
By the way, I started using meringue powder for my royal icing instead of egg whites, and it’s wonderful! The icing dries super strong and I have much less of a problem with bleeding when I use deep colors.


